home / Onlin Courses /Course Creation Tools
We earn a commission from partner links on this site. This doesn’t affect our opinions or evaluations.
Capturing clear, professional audio is a foundational component of producing compelling video content for your online courses. Even if your material is exceptional, subpar sound quality can significantly detract from the overall educational journey for your students.
However, mastering audio production is often one of the more challenging parts of developing an online course, simply because many different factors contribute to the final sound of your recordings.
The good news is that you don’t need a dedicated recording studio or to become a seasoned sound engineer. Nevertheless, you do need to address several key areas, which can feel a little daunting when you’re first beginning your journey.
For this very reason, I have put together this comprehensive guide. My goal is to present some fundamental advice to help you capture great-sounding audio without unnecessary complexity, providing a solid foundation on the key components of the recording workflow.
The majority of the recommendations we will explore throughout this article fall neatly into three primary categories:
With that framework in mind, let’s dive into the eight key tips for recording high-quality audio for your online course videos.
Investing in a high-quality external microphone stands out as the most crucial step you can take toward producing professional-grade videos for your online course.
The leap in audio clarity you’ll experience when using a dedicated external microphone, compared to the standard built-in mic on your computer or phone, is truly remarkable.
Fortunately, achieving this level of sound excellence doesn’t require a substantial financial commitment, as numerous budget-friendly microphones are available that deliver outstanding audio recording capabilities.
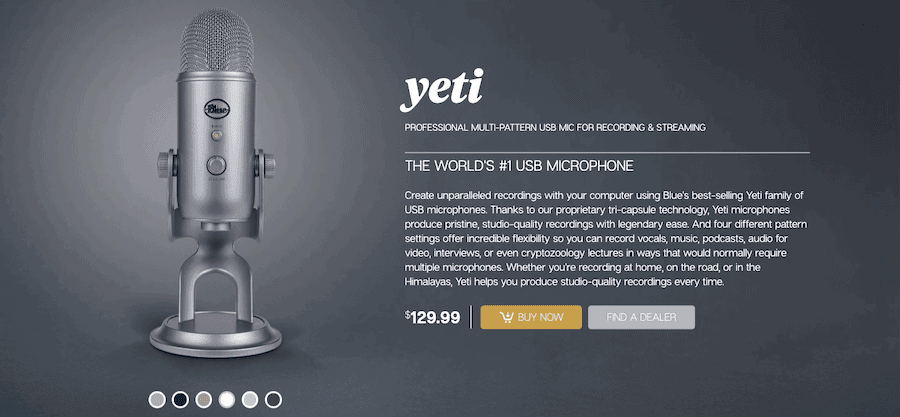
For a well-rounded choice suitable for most course creation needs, the Blue Yeti microphone is an excellent starting point. It is a remarkably user-friendly, plug-and-play device that captures fantastic audio for a USB microphone. This is the exact microphone I rely on for all of my own video production work.

For those managing a more conservative budget, the Samson Go Mic is another outstanding choice. This microphone, priced under $40, is recognized as the best value USB microphone currently available.
Acquiring the ideal microphone is just the initial step; the subsequent challenge involves mastering its proper usage. It is crucial to understand your microphone’s various settings, such as its sound-capturing mode or gain, before you begin your recording.
As an example, when working with a Blue Yeti mic, activating the cardioid sound-capturing mode delivers the finest results, as it exclusively records audio from one direction, thereby minimizing background interference.
Along the same lines, your Blue Yeti mic should be positioned upright when you record, and you should be speaking into the side of the microphone instead of into the top.

There are a couple of additional factors that warrant your attention, such as the specific angle and the precise distance at which you position the microphone while you are recording.
The ideal distance and angle can be quite different from one microphone to the next and are contingent on several variables, so you’ll need to experiment with various setups to determine what ultimately produces the best results for you.
Unwanted background sounds can significantly detract from your recording quality, but fortunately, several straightforward techniques can help you manage ambient noise effectively.
A primary step is to power down any nearby appliances that generate sound, such as air conditioners or ceiling fans. A further helpful tip is to position your microphone as far from your computer as practical to prevent it from capturing the sound of the internal fan.
Furthermore, whenever feasible, select a recording space that is insulated from outdoor disturbances like sidewalks or busy streets. At a bare minimum, ensure all windows in your recording area are securely closed before you begin.
It’s also a highly recommended professional courtesy to notify anyone you live with about your recording times ahead of schedule, helping to ensure household noise is kept to a minimum during these periods.
Additionally, try to schedule your voice recording sessions for times of the day when external environmental noise is naturally at its lowest point.
To further mitigate sound disruptions caused by puffs of air from your speech, consider using a specialized accessory known as a pop filter, which is an effective noise-cancellation tool.
Echoing audio, which bounces off the surfaces in your recording area, can be another common obstacle. Fortunately, a few minor adjustments to your recording space can significantly diminish this effect.
Typically, the primary culprits behind echo are the hard, reflective surfaces within your space, such as tiled floors, unadorned walls, and solid wood furniture, which all tend to reflect sound waves.
Additionally, the larger and more open the empty areas in your room are, the greater the likelihood of noticeable sound reverberation and echo.
Therefore, the optimal solution is to introduce some minor modifications to your room, aiming to reduce open areas and incorporate more soft, sound-absorbing materials like plush furnishings and drapes.
For a quick and effective solution, consider draping curtains or thick blankets over bare walls and placing a carpet or even a small area rug on the floor.
Furthermore, if your home contains upholstered furniture or bookshelves packed with books, temporarily relocating them into your recording space can be highly beneficial.
For dampening the echo from other smooth surfaces, such as wooden tables or glass panes, you can strategically place thick, soft items like pillows, blankets, or even sleeping bags over them.
Thorough preparation before you press record is another essential component for achieving high-quality audio, and it is arguably one of the most straightforward actions you can implement.
To start, it’s crucial to have a written script finalized before you begin the recording session. You could opt to draft a complete, verbatim script in advance or simply outline the key points of your material. Both methods are perfectly acceptable, as the ideal choice ultimately relies on your personal comfort level with a particular approach.
An additional valuable suggestion is to utilize a teleprompter to read your script, which is especially beneficial when working with a precise script. Some recording applications like Screencast-O-Matic offer a Scripted Recording feature that can also be quite useful.
Moreover, you should make it a point to rehearse your script multiple times, ensuring you are completely at ease with the content, particularly with any sections that may present pronunciation challenges.
These habits should enable you to reduce errors and unneeded hesitations in your delivery, which in turn minimizes the probability of needing to re-record your work.
A variety of unforeseen issues can arise during a recording session, so it’s essential to confirm your audio’s quality before you dive into recording your script. Performing a brief audio test is an uncomplicated method for ensuring everything sounds exactly as it should.
These quick audio checks allow you to evaluate all crucial elements, such as your speaking volume, any intrusive background sounds, or echo-related problems. Furthermore, should an issue be present, you can immediately make the necessary adjustments before you begin recording your main material.
After you’ve captured a test recording, it is imperative to use headphones for an accurate evaluation of the sound quality. To put it simply, making these short audio tests a standard practice is a fundamental tip that can spare you significant frustration during editing and potentially save you from having to repeat the entire recording process.
Even when you record in what seems to be a flawless setting, your raw audio will almost invariably contain numerous minor inconsistencies.
This is precisely where the power of audio editing becomes invaluable, allowing you to apply the final polish needed for your sound output to reach a truly impeccable standard.
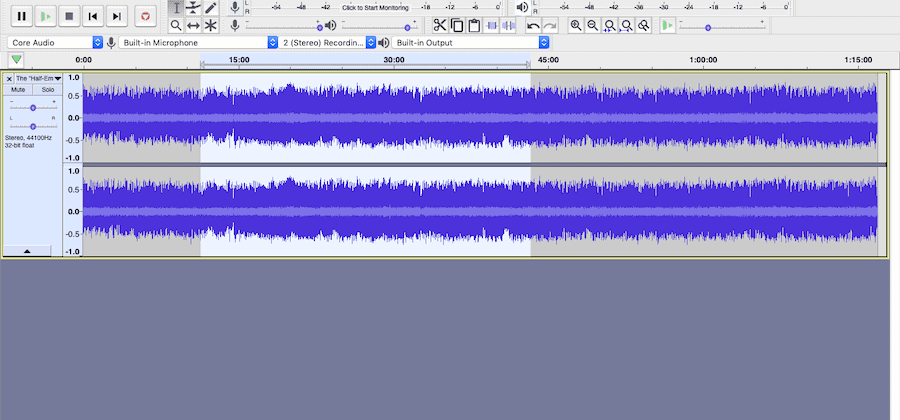
As an illustration, through audio editing, you can accomplish a wide array of enhancements, such as cutting out extended silences, filtering out ambient noise, equalizing the volume levels, and integrating audio effects.
Regarding your choice of editing software, you can begin with a no-cost application like Audacity. Even the top screencasting software choices, such as Camtasia and Screencast-O-Matic, include quite capable audio editing features.

One more important consideration is to refrain from compressing the audio files prior to editing, because only uncompressed formats retain the necessary data for effective editing procedures.
Ultimately, it is essential to recognize that audio editing is not a magic fix for poor recording techniques; instead, you must excel in both areas to achieve a truly professional-quality sound.
Finally, establishing a standardized recording procedure is fundamental to ensuring that your audio quality remains uniform and consistent across all your content.
Moreover, there are a number of specific actions you can adopt to build a reliable recording workflow:
Should you discover any additional recording methods that prove effective for you, it is vital to apply them consistently.
As an example, some creators find it better to capture their audio independently from their screen capture, while others achieve their best results by recording audio simultaneously as the video plays.
It may require a period of experimentation to identify the procedures that are most effective for your workflow, but once you have established them, you should adhere to them.
As this guide has shown, there isn’t one single secret for capturing excellent audio for your online course materials. Instead, achieving professional-grade sound is a result of using the correct equipment, managing your recording environment well, and adhering to a few essential practices.
Regarding your equipment, choosing the right microphone stands out as the most crucial decision, and you must also invest time in learning how to operate it correctly.
The recording space should be optimized to ensure that background interference from appliances or external sources is kept to an absolute minimum. In addition, you should treat the smooth, hard surfaces in your room by covering them with thick materials such as curtains or blankets to absorb sound and minimize echo.
Furthermore, you should leverage the right editing software to clean up your recordings by removing any lingering background noise and correcting other irregularities present in your original audio.
Lastly, concerning your workflow, it is vital to be thoroughly prepared with a finalized script and to rehearse it several times. Additionally, you should always conduct brief audio tests to evaluate sound quality before committing to the full recording.
We hope this guide has been helpful, and please feel free to reach out with any questions. We would also be delighted to hear about any other successful tips you’ve used that we haven’t mentioned here.

Daniel Nic
Founder, SellingOnliceCoursesGuide.com
is an entrepreneur and digital education specialist who founded sellingonlinecoursesguide.com, a platform dedicated to helping creators and educators successfully navigate the online course marketplace. Through his website, he shares insights and strategies for developing, marketing, and monetizing online educational content. His work focuses on empowering course creators to build sustainable online businesses while effectively sharing their knowledge with students worldwide.


Daniel Nic is an entrepreneur and digital education specialist who founded sellingonlinecoursesguide.com, a platform dedicated to helping creators and educators successfully navigate the online course marketplace. Through his website, he shares insights and strategies for developing, marketing, and monetizing online educational content. His work focuses on empowering course creators to build sustainable online businesses while effectively sharing their knowledge with students worldwide.

We respect your privacy and will never spam you.