


Excellent! With your account now active, the next step involves tailoring your community to your specific needs.
To locate your community’s general settings, simply select your community’s title displayed in the upper-left area of your display. A menu will appear, revealing the Settings option.
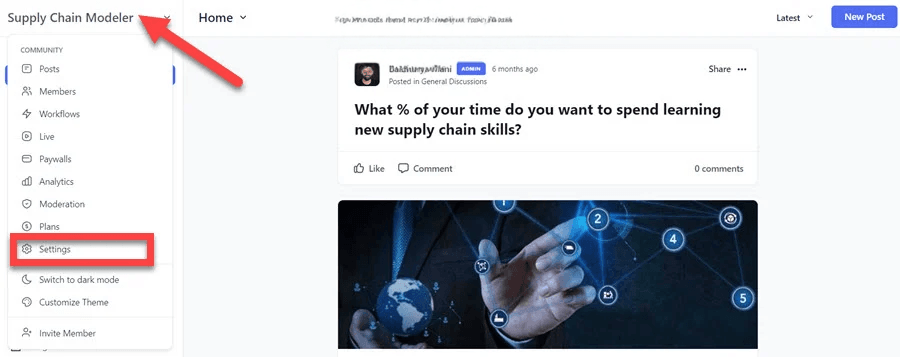
Select Settings, and the primary settings panel will be presented automatically. This section allows you to personalize your community’s title and web address. Furthermore, you can adjust the following crucial configurations:

Furthermore, you possess the capability to manage direct and group messaging permissions, personalize your invitation correspondence, establish a custom web domain for your community, and implement a convenient single sign-on feature.

Next, we will explore the different options available for tailoring the visual identity of your community.
To reach the theme customization settings, select your community’s title located in the upper right section and then choose Customize Theme.

Within this section, you’ll discover various ways to tailor the appearance and atmosphere of your community:

Beyond these standard customization choices, you can also enhance your community’s visual structure by inserting custom CSS and JavaScript codes. To apply these specific adjustments, navigate to Settings → Code Snippets, and place your code snippets into the corresponding boxes provided.
Having personalized the visual elements of your community, our next focus will be on establishing the organizational framework for your content.
Your primary organizational elements are Spaces and Space Groups. Think of a space as a dedicated area for specific content types, whereas a space group functions as a container to categorize related spaces together.
Circle employs Spaces as the fundamental way to arrange content, and all community interactions occur within five distinct space varieties:
The platform offers a robust system designed to assist you in structuring your community effectively. This means that when you generate numerous posts, they won’t appear disorganized throughout your community. Instead, you can leverage spaces to maintain a clear and tidy arrangement.
Now we’ve reached an exciting point: creating our initial space. Simply select Add Space found beneath the Spaces tab to begin this process.

You will be presented with five distinct space options, but our current objective is to establish a Posts space, so please proceed by selecting that type. We will explore the remaining space formats in the sections that follow.

Upon proceeding to the next interface, you will have the capability to perform several actions:
Alternatively, you have the option to establish a completely new space group and subsequently add your spaces to it.
To accomplish this, select the Plus icon situated adjacent to the Get Started group, followed by choosing Add a Space Group. This action prompts a fresh window, enabling you to input a name and specify a unique URL for the group.
This outlines the procedure for generating both spaces and space groups within your Circle community. Feel free to replicate these steps to build additional spaces and groups, structuring your community precisely to your preferences.
Next, we will demonstrate how to adjust the access permissions and privacy controls for your individual spaces and groups.
To modify the settings pertinent to a specific group, click the three vertical dots located beside the group’s name to access its configuration options.

Within these settings, you can determine whether the group is discoverable by individuals who aren’t members, control if members are permitted to establish new spaces within this group, and assign moderator roles.

For adjusting a space’s settings, select the specific space you wish to modify. Its name will appear in the top bar; click on it. This action reveals a dropdown menu where you’ll find the Customize option.

Regarding the customization options available for individual spaces, you can perform the following actions:
To illustrate, if your community includes exclusive content for paying members, maintaining the associated space as private would be the appropriate setting. It will also be essential to integrate this private space with a payment gateway, a process we will cover in a later section.
With the structure in place, let us now begin the process of populating your community with engaging material!
To begin sharing content, navigate to the Posts space you established earlier and select the option labeled Create Your First Post. An alternative method is to initiate a new post by utilizing the New Post button located conveniently in the page header.
Once you have taken either of these actions, proceed by entering a descriptive title and then begin composing the main body of your post.
Beyond incorporating standard text, you have the flexibility to enhance your posts with elements such as bulleted lists and structural headings. You can also enrich your content by uploading video files, images, and PDF documents, or by leveraging embedded links to integrate interactive polls, forms, geographical maps, and data tables.
To explore the full range of available formatting and content options, simply click on the plus (+) icon situated within the menu bar at the base of the post composition window.

Positioned alongside the plus symbol, you will observe five supplementary icons designated for incorporating videos, images, animated GIFs, emoticons, and various file attachments. It’s worth noting that these functionalities can also be reached by selecting the plus icon itself, essentially making these icons helpful shortcuts.
Lastly, Circle’s artificial intelligence feature—the content co-pilot—can be accessed directly from the post editor, providing assistance with composing or revising your written material.

Prior to making your post public, take a moment to adjust its specific settings by clicking the gear icon located in the top-left corner within the post editor. Several configuration options are accessible from this menu:
Once you have configured these settings to your satisfaction, press Publish to introduce your first piece of content to the community. You also have the choice to schedule the post for publication at a predetermined future time or save it as a draft to continue working on later.
Next, let’s walk through the process for establishing an event and initiating a live broadcast.
The initial action required is to establish a specific area intended for this category of material. To do this, select the Plus symbol adjacent to the collection where the event should reside, then choose Events for the space classification.

Similarly, you have the option to designate the area’s availability as either Open, Private, or Secret.
Next, to establish a new event, proceed to the Events section, then find the button labeled New Event situated in the top-right portion of the interface and click it.

Upon reaching the subsequent screen, you’ll have the capability to modify the specifics of your gathering, encompassing the event’s title, scheduled time, and date, plus configure it for recurrence (such as daily, weekly, or monthly intervals). Regarding the venue for the event, your choices include physical gatherings or virtual sessions.
For virtual event arrangements, the platform presents these alternatives:

Given that this represents your inaugural event setup, our advice is to initially store it as a draft. This allows you ample opportunity to revise and meticulously adjust the event’s particulars.
To perform this action, select the ellipsis icon (three dots) located adjacent to the event’s designated name. This interaction prompts a new window to appear, presenting several tabs which empower you to undertake various tasks:

We previously touched upon Circle’s live rooms and live streams, functionalities that provide the flexibility to initiate live broadcasts directly from your account whenever needed. Observe the Go Live button positioned in the lower-left area of your interface. Clicking this button presents the options to begin either a live room meeting or a live stream event.

Irrespective of the alternative you select, the available features are broadly comparable, encompassing the ability to adjust the visibility settings for the room or stream, activate sharing for your webcam and computer screen, and facilitate interactive discussions among members.
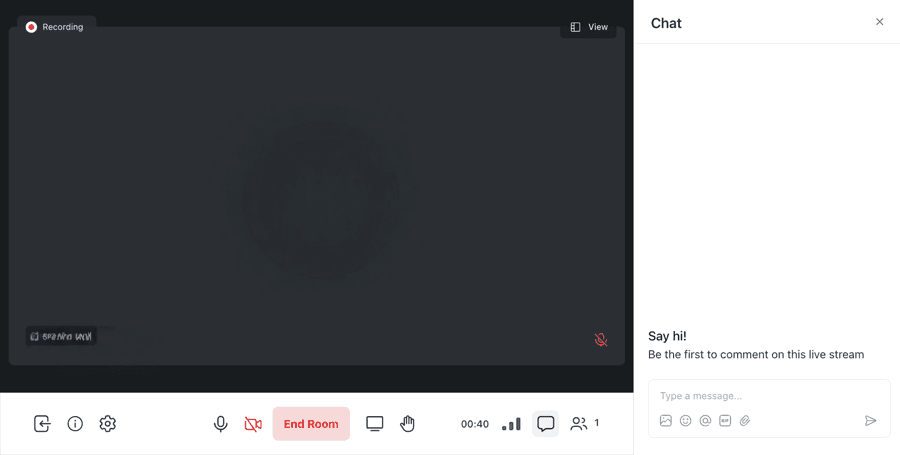
Following the conclusion of your live broadcast, you will receive an email notification. This message includes the session recording and a direct link to its corresponding page, empowering you to download the file, erase it, or share it within a chosen space.
Circle additionally provides support for group chats, enabling your members to participate in vibrant discussions.
To commence a group chat session, your primary action is to establish a designated Chat space. The method involved is identical to that employed when creating spaces for Posts and Events.

Group Discussions within Circle
These group chat functionalities accommodate discussions for up to fifty participants. You have the option to manage membership, assign administrators, and enable the chat history.


Begin by navigating to Settings → Paywalls, where you’ll discover the integration option connecting your community platform with Stripe.

Select Connect with Stripe and proceed through the guided setup process to finalize the integration. You have the flexibility to utilize your pre-existing Stripe account or establish a new one during this configuration procedure.
Once you’ve successfully configured the Stripe integration, you’re ready to implement your initial payment barrier. Return to the Paywalls section and locate the New Paywall button in the upper right corner of your screen.

Within the Paywall configuration panel, you’ll find options to select your preferred revenue model for your community: recurring memberships or single purchase options.
When establishing subscription offerings, you can define your membership fee, determine the appropriate payment frequency (weekly, monthly, or annual), select your preferred currency, and optionally incorporate a complimentary trial period.
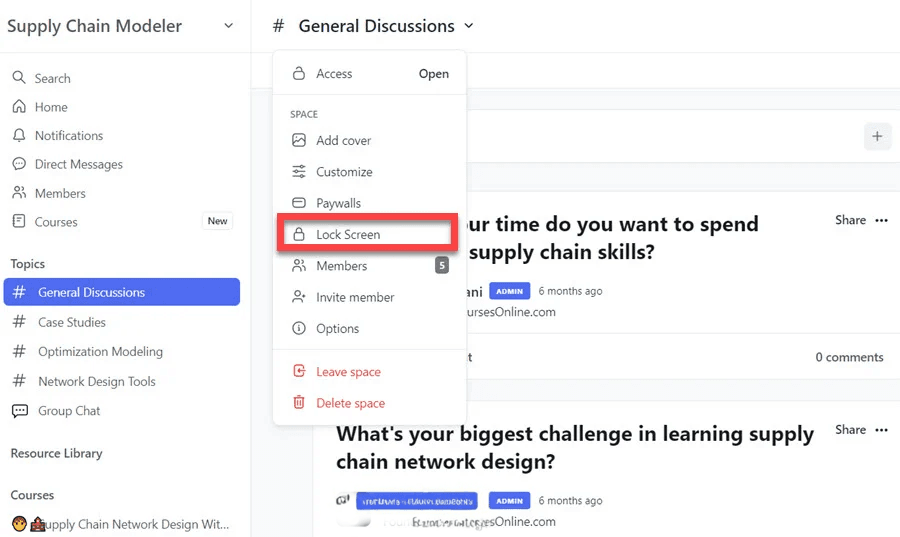
Circle offers a valuable tool called Lock Screen, essentially functioning as a gateway page for any content you wish to restrict from public viewing.
These Access Restrictions allow you to guide community visitors toward completing registration forms or finalizing purchases through the checkout interface.
To customize your access restriction settings, navigate to any space, select its title at the top of your display, and choose Lock Screen from the available dropdown options.
Upon accessing this area, you’ll discover various content elements available for incorporation into your entry page.
You can incorporate promotional headers, informative descriptions, compelling action buttons, and when designing an Access Restriction for educational content, you have the option to showcase your course outline directly on the entry page.
Adjacent to each content element, you’ll notice a Pencil symbol and an Eye symbol. Selecting the Pencil allows for personalization of text content and color schemes within each element, while the Eye functionality enables you to toggle visibility settings for any section.

To complete the setup, you can integrate your payment processing link directly into the action button, enabling participants to complete their transaction and gain immediate access to all resources included within your membership package.
Circle provides several powerful connection options, which you’ll want to implement based on your specific needs.
Furthermore, Circle delivers multiple methods for connecting with your primary website.
The first option includes Circle’s embed widgets, which allow you to incorporate your complete community, a specific space, or even individual posts directly into another website.
When exploring further, you’ll notice the Links section positioned at the bottom of the sidebar and directly beneath the header within your spaces.
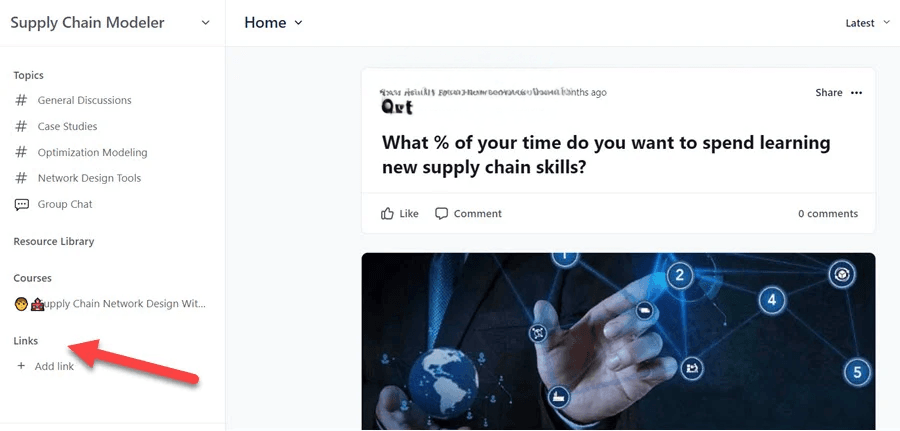
This feature allows you to incorporate connections to your primary website, your YouTube content library, and any additional valuable resources you wish to make accessible to your community members.

As we approach the conclusion of this Circle walkthrough, let’s briefly discuss community administration techniques.
To supervise your community participants, navigate to the Members section located on the screen’s left panel and then select the Manage option in the navigation header.
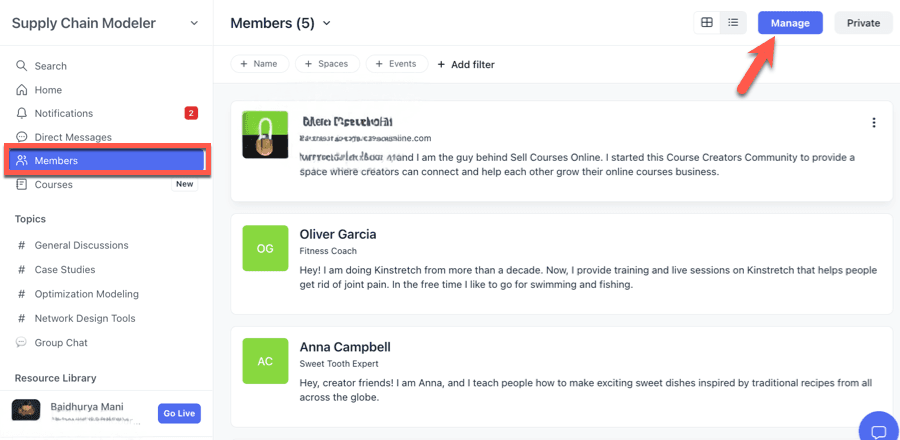
The subsequent interface displays a comprehensive roster of all participants in your community, and you can utilize Circle’s filtering capabilities to organize members according to their space memberships as well as personal identifiers such as email addresses, names, and other criteria.
You can access individual member management options by selecting the three-dot menu icon positioned on the right side of each entry.

Select Edit, and you’ll be presented with these management capabilities for your chosen participant:
Beyond these participant administration tools, you can also leverage Circle Workflows to streamline repetitive administrative functions within your community.
These operate on an event-response framework, meaning that when a community member performs a specific action (such as purchasing a membership plan), you can designate an automatic response to follow that trigger (such as delivering a personalized appreciation message).
The system also accommodates one-time group operations, like sending communications to multiple members simultaneously or transferring members collectively from one space to another.
We offer a comprehensive tutorial on implementing Circle Workflows, where you can discover more about this powerful feature and its practical applications.

Congratulations! Your community platform is now fully established, and it’s the perfect moment to focus on attracting new participants and fostering meaningful connections among them.


