We earn a commission from partner links on this site. This doesn’t affect our opinions or evaluations.
Screencasting represents one of the most straightforward yet remarkably powerful methods for video creation across numerous applications, including online courses, instructional tutorials, YouTube content, video presentations, and much more.
Though screencasting doesn’t require advanced technical expertise, producing a high-quality screencast involves numerous essential elements, and navigating these components can feel quite daunting for beginners.
Throughout this comprehensive guide, I’ll provide detailed, step-by-step instructions on mastering the art of screencasting to produce professional-quality videos. We’ll thoroughly explore every crucial phase, from thoughtful planning and efficient recording to precise editing techniques.
As a bonus, I’ll conclude with several expert recommendations that will significantly enhance your capabilities and elevate your screencast productions to professional standards.
Let’s begin our screencasting journey together.
Screencasting involves capturing video footage of your computer display, typically accompanied by narrated voice instructions. This versatile recording method often incorporates webcam footage and system audio to create comprehensive instructional content.
Creative professionals frequently enhance their screencast productions with supplementary media elements, thoughtful annotations, and engaging visual effects to maximize viewer engagement and knowledge retention.
These screen recordings prove invaluable in any scenario requiring detailed procedural explanations or concept clarification. The most common applications include:
What makes screencasting particularly attractive is its accessibility and cost-effectiveness compared to alternative video production methods.
For instance, creating professional talking-head videos necessitates establishing a proper recording environment and involves substantially more technical complexity than producing quality screencast content.
Additionally, screencast videos demonstrably enhance educational outcomes and participation levels in digital learning environments.
Research indicates that educational screencasts improved student performance by more than 60% among university participants.
While creating fundamental screencast videos requires minimal expertise, producing professional-grade content demands attention to numerous critical details.
To simplify this process, I’ve organized the screencasting workflow into four essential phases throughout this guide:
Regardless of your experience level—whether complete novice or seasoned content creator—you’ll quickly develop proficiency in screencasting by following these straightforward guidelines.
Now, let’s examine each component of the process in comprehensive detail.
Thoughtful preparation forms the essential foundation of any successful screencast project. Establishing a comprehensive plan significantly enhances your ability to produce exceptional content while substantially reducing the need for time-consuming revisions.
Begin your planning process with fundamental considerations—clearly identifying your intended viewers and pinpointing exactly which challenges your screencast will address for them.
Let me illustrate effective planning through a practical example. Consider creating an instructional screencast for a particular software application.
In this scenario, you would benefit from addressing these critical questions:
After gathering insights to these questions, leverage this knowledge to structure your content effectively.
Initially, determine which specific software capabilities require demonstration and establish the appropriate depth of explanation for each feature.
This decision process should weigh both the relative importance of various functions and their inherent complexity levels.
Subsequently, establish your screencast’s optimal duration based on your content scope, industry standards, and your audience’s concentration thresholds.
Next, develop a timeline allocating specific durations for covering individual features or software components.
When certain elements demand enhanced clarity, consider incorporating visual annotations and editing enhancements to facilitate understanding. Including these elements in your initial plan represents sound production strategy.
Finally, determine whether incorporating webcam footage would benefit your presentation and whether capturing system audio alongside your narration would enhance viewer comprehension.
After establishing your strategic framework, developing a structured content outline represents an essential next step in your production process.
Consider organizing your content into distinct thematic segments, then capture key discussion points for each section within this organizational structure.
Following your outline development, proceed to craft your comprehensive script, and if you’re seeking additional guidance, you might find this scriptwriting resource from TechSmith particularly valuable.
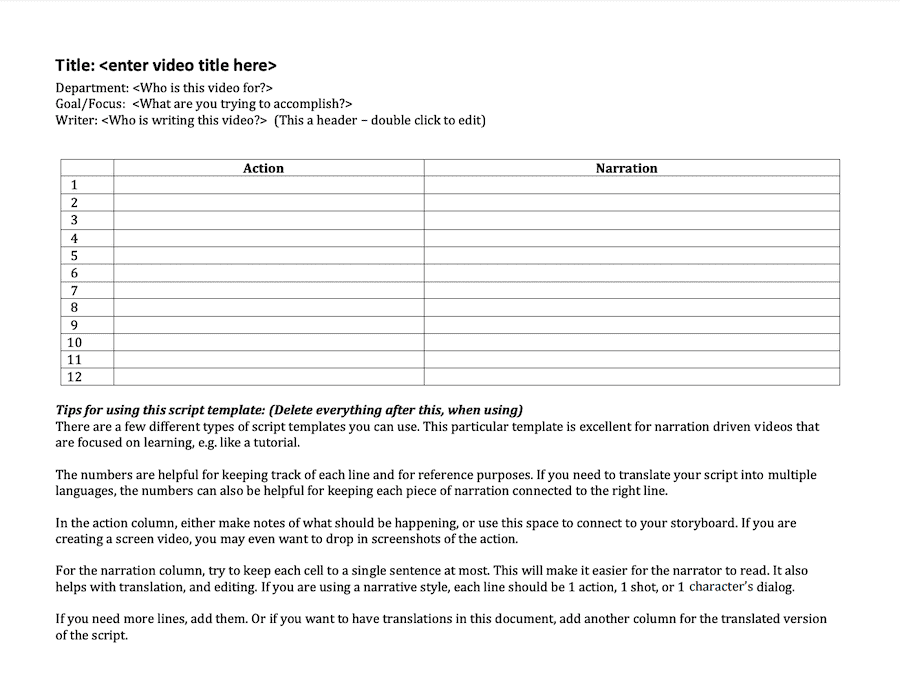
Developing a comprehensive script beforehand significantly enhances content precision and focus. This preparation eliminates unnecessary verbal pauses and promotes fluid delivery, ultimately reducing post-production time while elevating your screencast’s professional quality.
When crafting your script, consider structuring it into three distinct components — *introduction*, *main content*, and *conclusion*.
Your introduction should clearly communicate what viewers will gain from watching and outline the logical progression of information they’ll encounter.
Additionally, consider describing your instructional approach and how it will enhance viewer comprehension.
For example, mention that your tutorial incorporates practical examples drawn from your firsthand product experience and identify which features will receive more comprehensive coverage.
This strategic introduction effectively captures viewer attention early, substantially increasing the likelihood they’ll remain engaged throughout your entire presentation.
The main content section forms the core
After completing your initial script draft, conduct several practice readings to evaluate flow and timing. This rehearsal phase provides valuable opportunities to refine your writing, eliminate redundancies, and transform your content into its most streamlined and effective form.
Establishing an optimal recording environment dramatically enhances your final production quality.
A well-designed recording space helps you achieve superior audio clarity in your recordings. Additionally, if your screencast incorporates webcam footage, a properly configured environment significantly improves visual quality.
When creating your recording setup, focus on two primary considerations—selecting appropriate equipment and implementing fundamental recording practices.
Regarding equipment selection, investing in a professional-grade microphone represents the single most impactful decision for enhancing your audio quality.
Compared to integrated laptop microphones or standard headset options, dedicated external microphones capture significantly less ambient noise while delivering exceptionally clear sound reproduction.
Acquiring a quality microphone doesn’t necessarily require substantial financial investment, as numerous affordable options deliver impressive performance.
My personal recommendation is the Blue Yeti microphone. This user-friendly device offers excellent performance, with entry-level models available for under $100.
The Blue Yeti serves as my primary recording microphone for all video projects, consistently delivering excellent results that meet professional standards.

For further audio quality enhancement, I suggest incorporating a pop filter to effectively eliminate breath-related disturbances during narration, with quality options available starting around $10.
After securing appropriate equipment, implement these practical strategies to minimize background noise in your recordings:
Additionally, addressing echo-related audio issues plays a crucial role in achieving professional recording quality, and several straightforward approaches can deliver significant improvements.
Begin by covering hard, sound-reflective surfaces throughout your recording space—including tile flooring, unadorned walls, and wooden furniture—with soft, sound-absorbing materials such as blankets, curtains, or specialized acoustic fabrics wherever feasible.
Consider installing professional acoustic panels on surrounding walls, as these specialized sound-management solutions effectively reduce audio reflections and substantially minimize room echo for noticeably cleaner recordings.
If persistent audio challenges remain despite implementing these measures, consider investing in comprehensive room soundproofing solutions or purchasing a dedicated voice recording booth for optimal sound isolation.
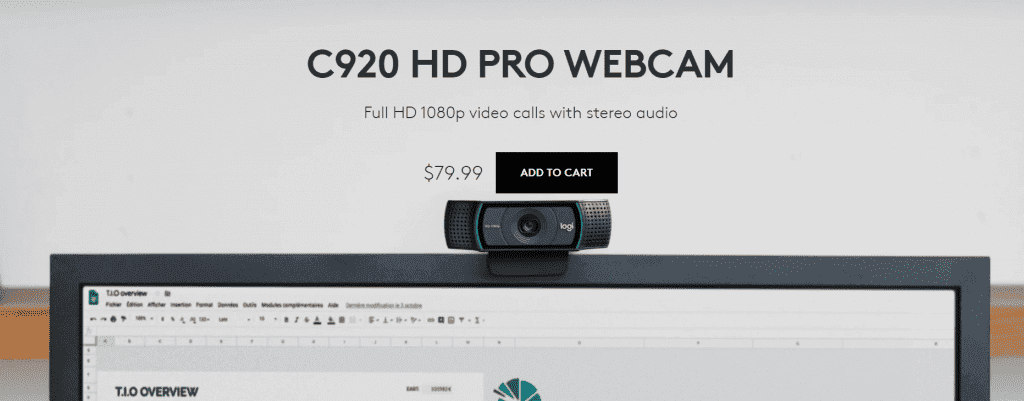
Many professional screencasts incorporate webcam footage, and if this visual element features in your production plans, acquiring a quality webcam becomes essential.
For webcam requirements, I highly recommend the Logitech C920 — this plug-and-play USB device offers excellent video quality with minimal setup complexity at approximately $80.
The Logitech C920 includes companion software offering frame adjustment capabilities, allowing precise framing customization. Position the device atop your monitor with a slight downward angle for optimal framing.
To maximize your webcam’s performance, carefully consider additional production elements including lighting configuration and background selection.
Regarding illumination, natural light streaming through windows or glass doorways provides excellent results in most recording situations.
For environments lacking adequate natural illumination or when pursuing professional-grade results, consider implementing supplementary lighting solutions.
I recommend affordable clamp-style lighting fixtures, available in pairs for approximately $35 through online retailers.
Ideally, select lighting equipment featuring adjustable brightness controls, enabling soft illumination that minimizes shadow formation. Another effective technique involves applying diffusion material over light sources, a widely adopted professional practice.
For optimal lighting arrangement, position one light source directed toward you from a 45-degree angle, with a second light illuminating your background area.
Regarding background selection, any large textile material in neutral tones works effectively. Alternatively, consider investing in a chromakey green screen—complete setups including support stands are available for under $50 through major online retailers.
Remember that your physical recording background need not represent your final visible backdrop, as most screencasting software includes built-in editing capabilities allowing background replacement during post-production.
Finally, once your complete recording environment is established, conduct several test recordings to verify all components function properly together before beginning your actual production.
When preparing to capture your screen activity, your initial task should be selecting appropriate screen recording software that meets your specific needs.
The marketplace offers numerous solutions for this purpose, and I’ve created an in-depth resource to assist you in selecting the ideal screen recording application.
Throughout my extensive guide and in my consultations with clients, I primarily endorse two powerful tools: Camtasia and Screencast-O-Matic.
Camtasia stands out as the most comprehensive screen capture program available today, bundled with sophisticated video editing capabilities.
This premium tool delivers all essential recording functions including options to capture your entire display or just a selected portion, incorporate webcam footage, and simultaneously record both system sounds and microphone input.
As a professional-caliber solution, Camtasia performs exceptionally well in virtually all scenarios, offering seamless functionality for both Windows and Mac environments.
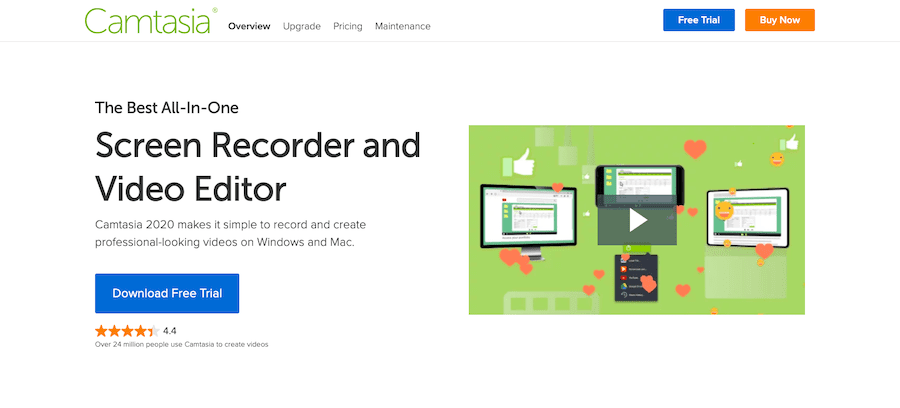
The application requires a single payment of $249, which might seem substantial initially. However, for serious content creators aiming to produce high-quality instructional videos, this investment delivers exceptional value.
Operating Camtasia for screen recording involves a remarkably intuitive process. Begin by downloading their desktop application and validating your purchased license.
After clicking the Record function, you’ll have access to customize various recording parameters:
Once you’ve configured these settings to your satisfaction, simply press the Start Recording button to begin capturing.
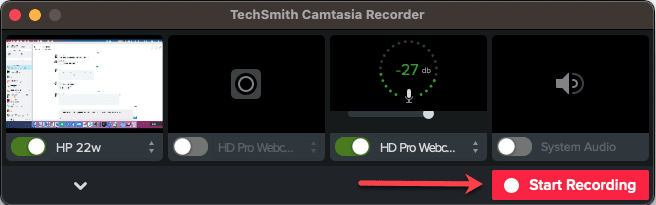
To conclude your recording session, simply press the Stop Recording button.
Afterward, you can refine and enhance your footage using the Camtasia editing suite, which we’ll explore in greater detail shortly.
Screencast-O-Matic represents another widely-adopted screen capture solution. This versatile application functions across numerous devices, including Windows, Mac, iPhone, iPad, Android, and even Chromebook systems.
Similar to Camtasia, it provides all fundamental screen recording capabilities. Additionally, it offers several distinctive features not found elsewhere:
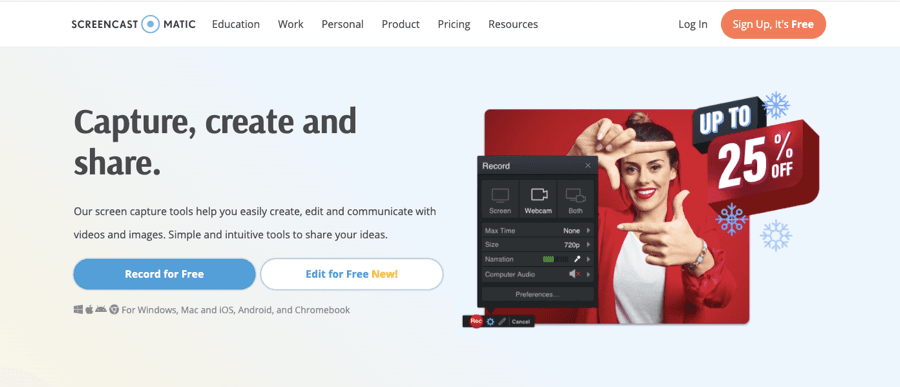
Furthermore, this application provides substantial video editing and enhancement tools, though they admittedly don’t reach the comprehensive capabilities that Camtasia offers in this domain.
As a notable distinction, Screencast-O-Matic lacks support for multi-track editing which Camtasia expertly delivers, significantly limiting your flexibility when refining your video projects.
Despite this limitation, Screencast-O-Matic adequately fulfills the requirements of most content creators regardless of whether you’re developing educational courses or producing content for your YouTube audience.
Additionally, the Deluxe subscription tier for Screencast-O-Matic costs just under $20 for a yearly license, making it exceptionally affordable for a high-quality screen recording solution.
While more sophisticated alternatives exist in the marketplace, Screencast-O-Matic delivers unparalleled value relative to its cost. (Read Screencast-O-Matic Review →)
The recording workflow with Screencast-O-Matic follows a straightforward process, which we’ll examine briefly.
After subscribing to the service, the website guides you through installing the application. Once launched, locate and click the prominent red record button in the top navigation area.
Upon activation, three distinct elements appear on your display:
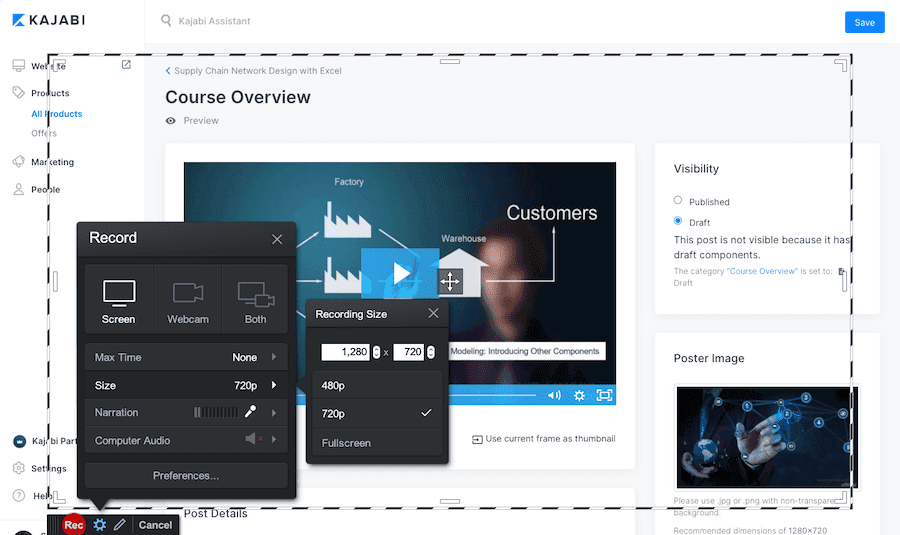
Within the vertical configuration panel, you have options to incorporate webcam footage and capture both microphone input and system sounds simultaneously.
This section also allows you to determine your preferred capture dimensions. Additionally, you benefit from the flexibility to manually adjust and resize the recording frame according to your specific needs—a particularly useful feature.
When fully prepared to commence recording, simply click the record button located on the horizontal control panel. From this same interface, you can conveniently pause, preview, and continue your recording session as necessary.
After completing your initial screen capture, the enhancement phase begins—a critical step that can dramatically influence your final video’s quality.
In general terms, video enhancement can elevate your screen recording in four key areas:
Regarding enhancement tools, most popular editing applications share a standard set of core functionalities. You’ll discover commonly utilized features such as trimming, silence removal, audio enhancement, transition effects, and similar tools across virtually all video editing platforms.
For this section, we’ll examine in detail the video enhancement capabilities provided by Camtasia.
While Camtasia primarily serves as a screen recording solution, its editing functionality rivals that of dedicated video editing software.
By exploring these enhancement features, you’ll develop a comprehensive understanding of effective video editing approaches.
Before delving into specific functionalities, it’s essential to strategically evaluate which editing techniques deserve your attention based on their practical value and accessibility.
Camtasia offers numerous editing options, but remember that applying the vital 20% of editing techniques will generate 80% of your quality improvements—these foundational elements deserve your initial focus.
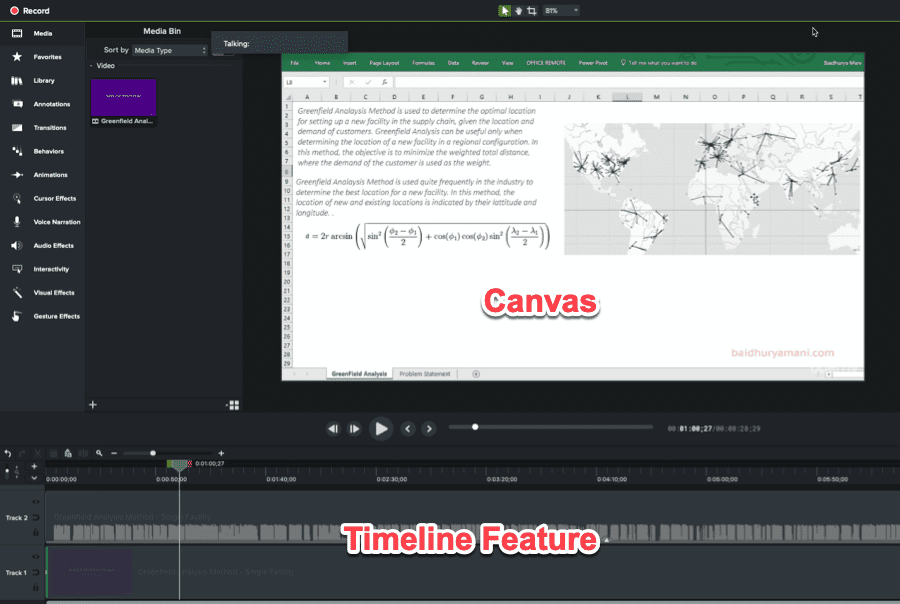
Camtasia features a powerful timeline editing system, enabling you to precisely select and manipulate specific video segments with exceptional control.
Furthermore, the timeline incorporates multiple tracks where various media elements stack upon one another in layers.
As you might expect, this timeline editing capability forms the cornerstone of the enhancement process, and you’ll utilize it extensively to accomplish various editing objectives.
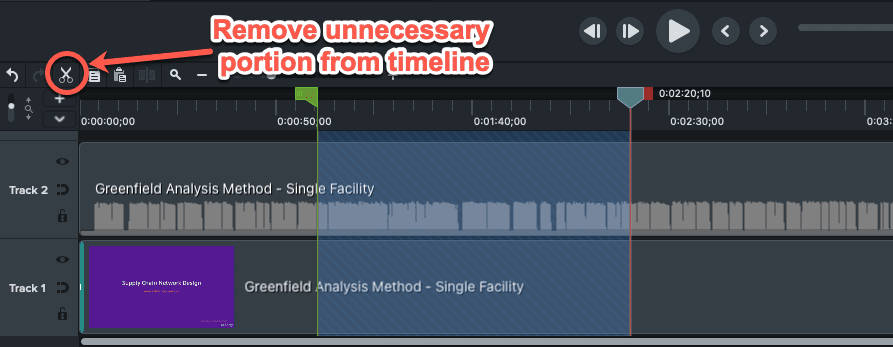
The primary and most crucial enhancement to apply to your recording involves removing any redundant segments or portions containing mistakes.
You can easily accomplish this task by highlighting the specific section on the timeline and selecting the Cut function within the Camtasia editing interface.
In certain instances, you might need to substitute a portion of your footage with alternative content or replace just a particular frame.
This can be easily accomplished by highlighting the relevant section on the timeline and clicking the Delete option. You can subsequently insert your new footage or frame into the created space on the timeline.
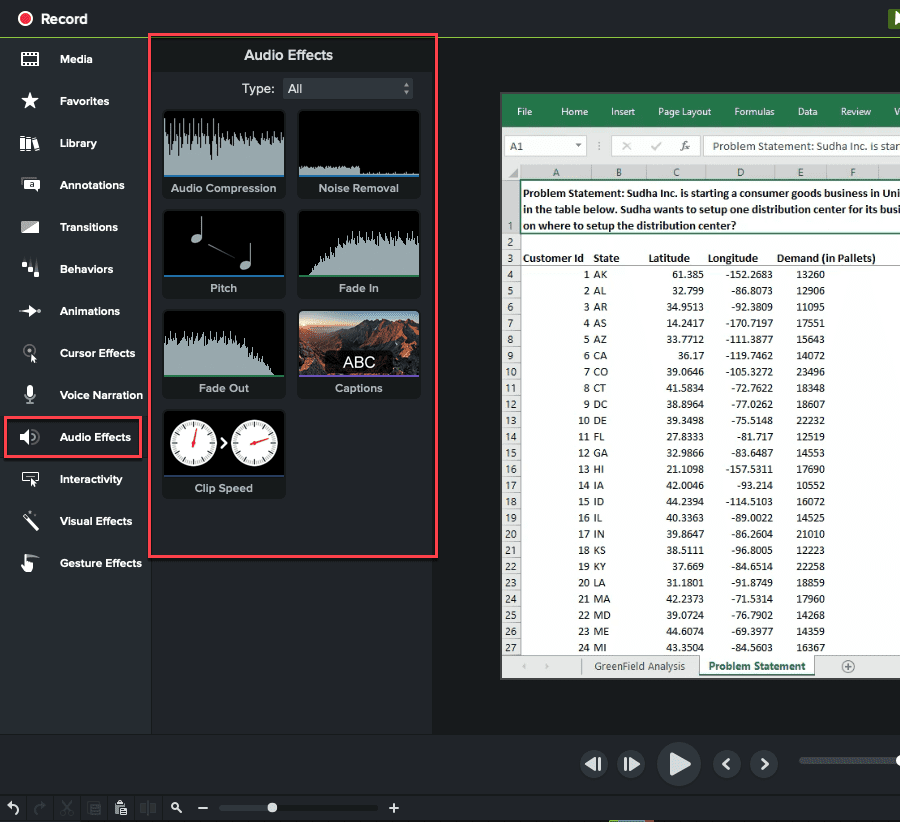
A second set of immediate improvements while enhancing your recording stems from optimizing audio quality, an area where Camtasia excels with numerous options.
It features a powerful noise reduction capability that enables you to eliminate background interference with a single click. This should always be the first audio enhancement applied to any recording.
Additionally, the Audio Compression tool maintains consistent volume levels throughout your entire audio track.
Therefore, if you notice that certain segments of your recording have excessively low or high volume, you can readily adjust these inconsistencies using this functionality.
Furthermore, Camtasia provides several additional audio enhancements such as Clip Speed adjustment, Fade In, and Fade Out effects, which you might find beneficial in various situations.
An additional crucial editing function worth implementing is Cursor Smoothing, which refines mouse pointer movements throughout your recording.
While cursor navigation and page scrolling are necessary elements in screen recordings, they frequently become distracting elements for viewers, making this enhancement particularly valuable.
After completing these fundamental editing tasks, it’s time to focus on visual enhancements—a critical component for creating truly engaging instructional content or product demonstrations.
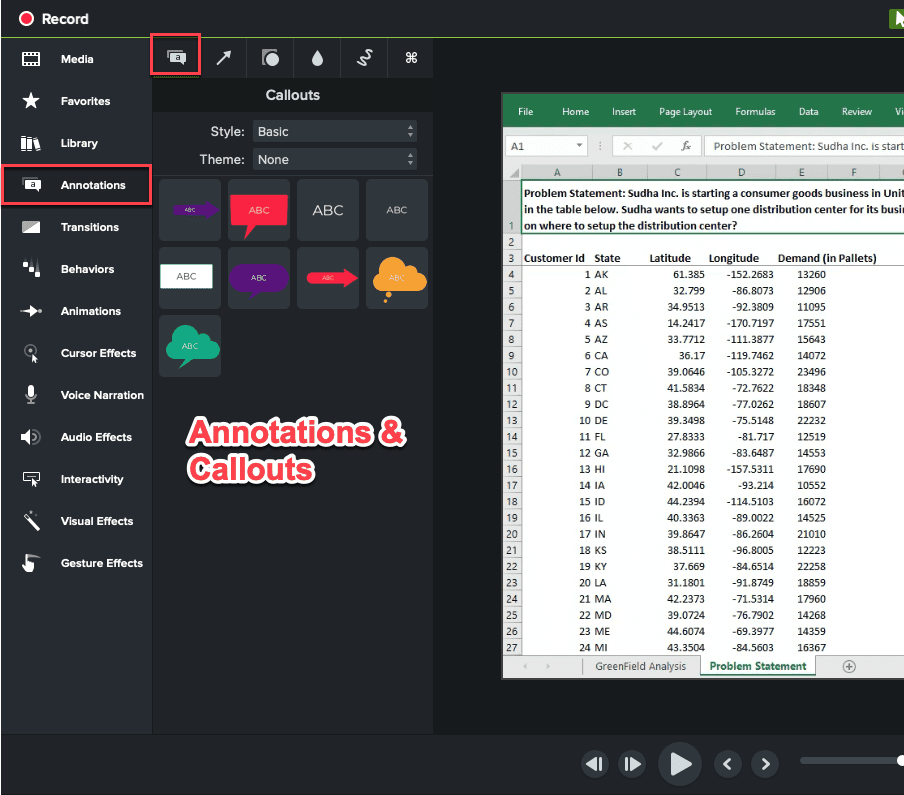
Begin with Annotations. Camtasia provides straightforward tools for adding callouts that highlight important details within your screen recording. The platform even offers sketch motion callouts that take this concept further by actively drawing on your video content.
Moreover, you have options to incorporate shapes and apply blur effects to specific areas of your recording when necessary.
Subsequently, consider incorporating Transition Effects into your recording as they significantly enhance viewing continuity for your audience.
Camtasia provides an extensive collection of transition styles that you can select from and customize according to your specific requirements.
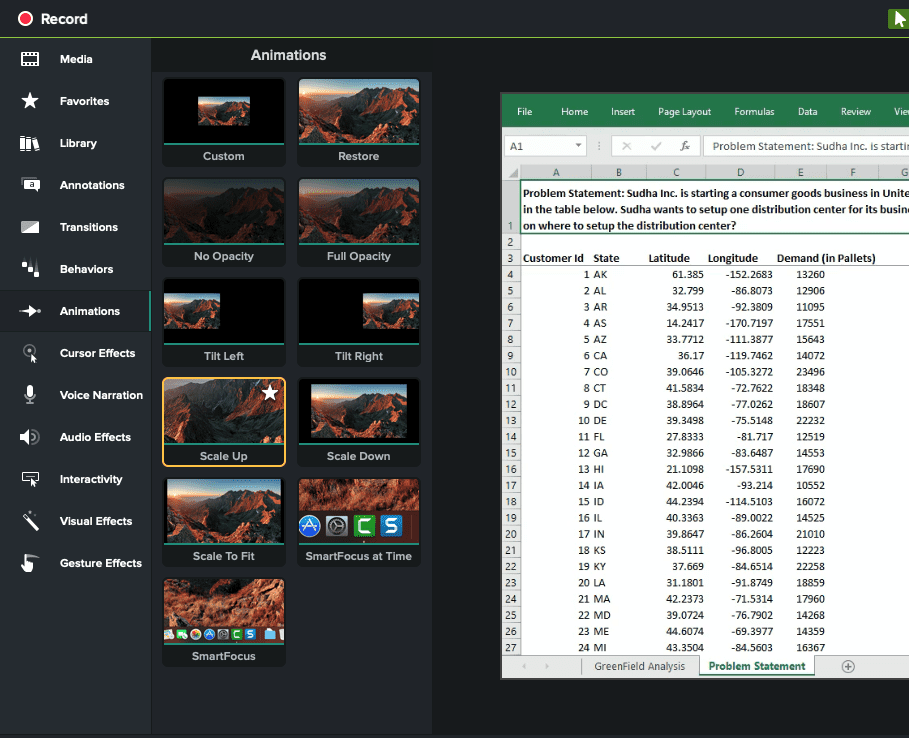
Another valuable enhancement tool for visual improvement is the Animations feature. Camtasia enables you to apply various animation effects to your media elements.
For instance, if you wish to magnify a particular section in your recording, you can implement the Scale Up animation on the timeline and adjust its parameters to create an effective zoom enhancement.
Beyond these core editing capabilities, several additional noteworthy features deserve attention.
The first is the sophisticated chroma key functionality, which enables you to substitute your original background with any alternative image or video element.
Additionally, Camtasia provides an extensive collection of royalty-free assets, including professional icons, introduction and conclusion sequences, background music tracks, and more, which you can incorporate to further elevate your video’s engagement factor.
As evidenced, Camtasia delivers a comprehensive suite of enhancement tools, and despite its extensive feature set, maintains remarkable user-friendliness, making it appropriate for content creators of all experience levels.
Once you’ve completed your enhancements, Camtasia enables you to distribute your finalized video to various video hosting services such as YouTube and Vimeo, or alternatively, save your video file to cloud storage or your local device.
Numerous strategies exist for elevating your screencast videos, though implementing all simultaneously isn’t practical.
I strongly suggest prioritizing elements that deliver maximum impact during your initial recording phase.
As your screencasting skills develop, however, you should definitely explore incorporating more sophisticated techniques to significantly enhance your content quality.
Consider these advanced approaches:
Incorporating webcam footage adds a personal element to your screencast, boosting engagement substantially. You can maximize this effect by strategically switching between your webcam feed, screen capture, and combined displays.
For instance, begin with full-screen webcam footage without any screen elements to establish viewer connection. Similarly, conclude your video with this personal touch.
Throughout your main content, primarily showcase screen recording. However, periodically transition to webcam-only segments to create visual variety and prevent viewer fatigue.
The following Ahrefs tutorial demonstrates masterful integration of screen recording and webcam elements:
While background music and audio effects can significantly enhance viewer engagement, they may potentially divert attention from your core message. Before incorporating audio elements, carefully evaluate several crucial considerations.
For example, including a tasteful music track in product demonstration videos genuinely enhances viewer interest and creates professional atmosphere.
However, when developing comprehensive instructional content, continuous background music might pull viewers’ focus away from essential information. In these scenarios, use music judiciously. Consider brief audio enhancements during transitional moments instead of throughout the entire presentation.
Additionally, ensure your selected music complements your visual content seamlessly while maintaining appropriate volume levels that never overpower your narration.
Incorporating thoughtfully designed supplementary elements as additional layers over your screen recordings represents a powerful enhancement strategy.
Professionally crafted visual components not only dramatically increase viewer engagement but also significantly strengthen credibility with your audience.
When showcasing a product demonstration, consider integrating carefully selected testimonial screenshots and customer reviews directly into your screencast presentation.
Similarly, for instructional content, overlaying custom-designed graphics or informational slides transforms standard tutorials into polished, professional-quality productions that viewers immediately recognize as authoritative resources.
Without extensive video editing experience, the vast array of enhancement options available can quickly become overwhelming and counterproductive.
Therefore, strategically mapping out visual embellishments such as transitions, overlays, highlight effects, and annotative drawings well before production proves tremendously beneficial.
By integrating these planning activities during your initial content development phase, you’ll allocate appropriate time for evaluating which effects genuinely enhance specific segments while identifying areas where simpler approaches may actually deliver superior results.
Throughout this comprehensive resource, we’ve explored the entire screencast creation process in meticulous detail. We’ve navigated every essential phase—from crafting compelling scripts to capturing professional-quality recordings to performing effective post-production enhancements.
The responsibility now shifts to you—implementing these techniques within your own projects while maintaining simplicity during your initial attempts.
Remember that achieving screencast perfection rarely happens on your first attempt. Your skills will naturally evolve through consistent practice and production of additional video content.
Equally important is recognizing that this guide serves merely as your foundation. You’ll need to adapt and refine techniques based on real-world performance and audience feedback.
No single, universal approach to screencast creation exists. Ultimately, you’ll develop a personalized methodology that aligns with your unique style and objectives.
I trust this comprehensive guide has provided substantial value and equipped you with practical knowledge for creating impressive screencast presentations. Should you have questions or wish to share insights, please contribute to the discussion section below.

Daniel NicFounder, SellingOnliceCoursesGuide.comis an entrepreneur and digital education specialist who founded sellingonlinecoursesguide.com, a platform dedicated to helping creators and educators successfully navigate the online course marketplace. Through his website, he shares insights and strategies for developing, marketing, and monetizing online educational content. His work focuses on empowering course creators to build sustainable online businesses while effectively sharing their knowledge with students worldwide.
Daniel Nic is an entrepreneur and digital education specialist who founded sellingonlinecoursesguide.com, a platform dedicated to helping creators and educators successfully navigate the online course marketplace. Through his website, he shares insights and strategies for developing, marketing, and monetizing online educational content. His work focuses on empowering course creators to build sustainable online businesses while effectively sharing their knowledge with students worldwide.

We respect your privacy and will never spam you.


