home / Best Course Platforms /Kajabi Review
We earn a commission from partner links on this site. This doesn’t affect our opinions or evaluations.
Looking to launch your own online course website? Creating and selling courses directly from your personal site stands out as one of the most effective methods for generating online revenue.
As a course developer, you’ll discover numerous software options available for online course creation. WordPress represents an exceptionally versatile and robust platform that enables you to construct a feature-packed educational website.
Nevertheless, establishing a WordPress course site isn’t quite as straightforward as using hosted platforms, which is precisely why I’ve developed this comprehensive guide walking you through each stage of creating an online course with WordPress.
Eager to begin your journey? Let’s dive straight into the process!
To develop an online course, you’ll need a WordPress LMS plugin that simplifies course structuring and content addition. Your chosen plugin should also safeguard your content while facilitating payment processing and course sales.
The WordPress ecosystem offers several excellent online course plugins. However, three particularly stand out as industry favorites: LifterLMS, LearnDash, and WP Courseware.
Each of these three plugins delivers comprehensive functionality, user-friendly interfaces, and reasonable pricing structures.
They all provide intuitive course builders alongside essential features including content dripping, progress tracking, quiz creation, certificate generation, prerequisite management, and more.
Among these three outstanding options, my personal recommendation for WordPress course creation is LifterLMS.
My endorsement of LifterLMS stems from its all-inclusive nature, functioning as a complete course solution with powerful built-in shopping cart capabilities.
While LearnDash and WP Courseware do offer payment acceptance capabilities, they’re missing crucial shopping cart functionalities such as promotional discounts, multi-course packages, and similar features. Consequently, you’ll likely need to implement an external shopping cart solution like WooCommerce to fill these gaps.
Additionally, LifterLMS features a built-in membership site functionality that enables you to establish a complete membership platform without requiring any third-party plugin integration.
The core LifterLMS plugin is available at no cost, but you’ll need to invest in their premium extensions to unlock e-commerce capabilities and connect with various marketing platforms.
Their flagship package, known as the Universe Bundle, is priced at $299/year and provides complete access to all their essential add-ons. They offer an introductory 30-day trial that includes all extensions for just $1.
Before diving into course creation, you must first establish your WordPress platform, which requires both a domain name and hosting service.
Regarding your domain selection, your educational website can operate on either a primary domain (e.g. sellingonlinecoursesguide.com) or function through a subdomain (e.g. learn.sellingonlinecoursesguide.com).
Regardless of which domain option you select, I strongly advise maintaining a separate environment for your course website away from your primary WordPress installation or blog. This separation significantly reduces potential plugin conflicts and technical complications.
You’ll also need a reliable hosting provider to support your WordPress installation and associated files. While numerous shared hosting solutions exist in today’s market, my personal recommendation is SiteGround.
SiteGround delivers premium shared hosting services featuring exceptional loading speeds, complimentary SSL certificates, automatic daily backups, and outstanding customer support. Browse their hosting packages here.

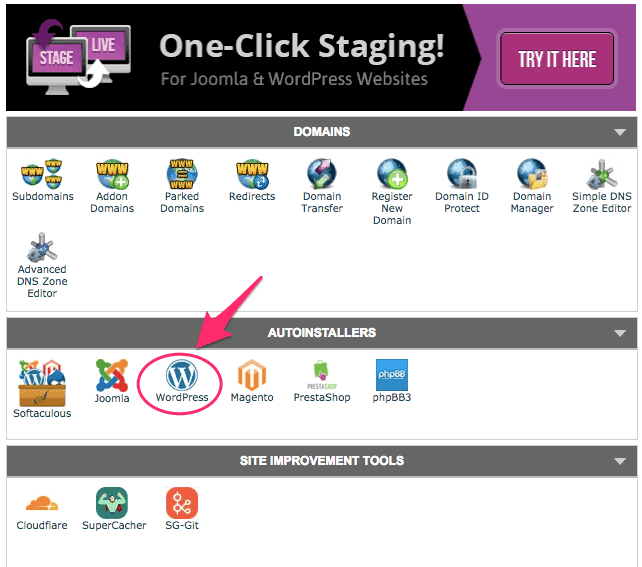
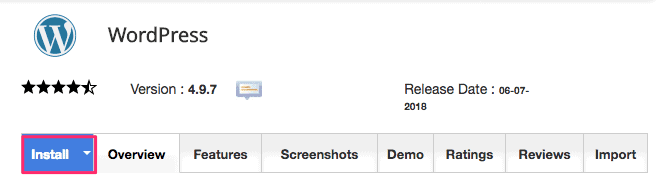
After securing your hosting subscription, you can access your account dashboard and deploy WordPress on your domain through a streamlined one-click installation process directly from your cPanel interface. Within your cPanel dashboard, navigate to the AutoInstallers section and locate the WordPress option, then select it to begin the installation wizard.
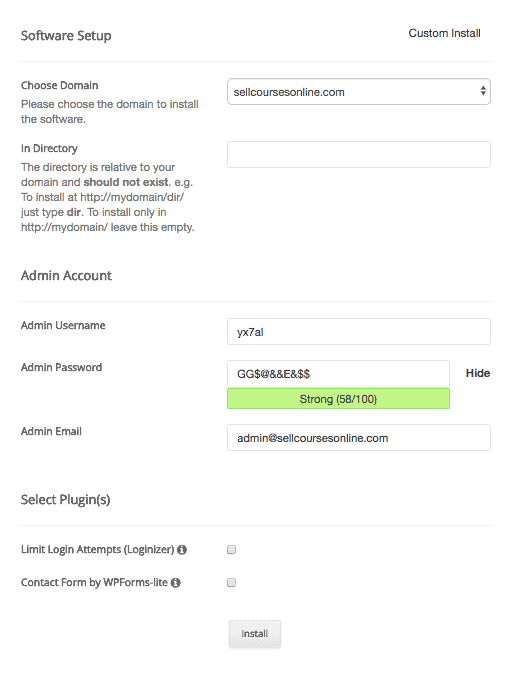
Congratulations! WordPress should now be successfully deployed on your domain.
Your website’s visual presentation largely depends on your theme selection, so let’s briefly discuss themes before proceeding to the next phase.
While LifterLMS functions effectively with virtually any WordPress theme, several themes offer direct LifterLMS integration, providing enhanced customization possibilities.
Among these specialized options is LaunchPad, developed by LifterLMS themselves and included with the Universe Bundle. Another highly compatible theme is Astra, which enjoys widespread popularity. Personally, I find Astra more appealing and versatile than the LaunchPad offering.
Now that your WordPress platform is established, let’s proceed with LifterLMS installation and configuration.
Initially, you’ll need to download the core plugin and integrate it with your WordPress installation. If you’ve made any purchases through their website, simply access your account dashboard where you’ll find options to download both the core plugin and any additional extensions.
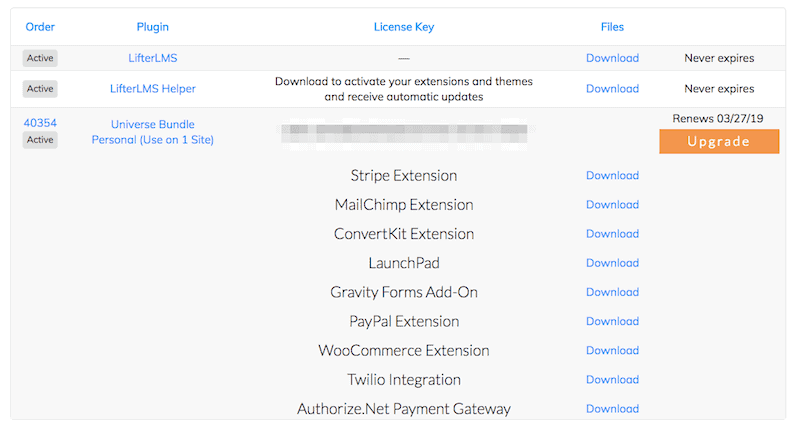
Should you prefer to utilize just the basic version with its foundational features, you can obtain it through this link.
After downloading the LifterLMS plugin package, navigate to your WordPress dashboard and select Plugins -> Add new, then upload the plugin file to your WordPress environment.
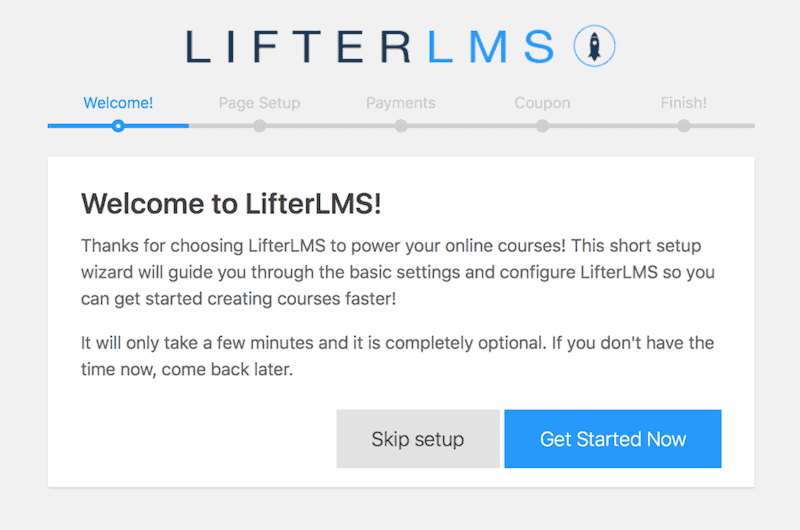
Following this, you’ll need to activate the newly installed LifterLMS plugin. Upon first activation, the system will automatically guide you through their configuration wizard. Simply follow the on-screen prompts, and you’ll have your LifterLMS plugin fully configured within minutes.
After completing the initial LifterLMS setup process, you can enhance your platform by incorporating premium extensions using a similar installation method.
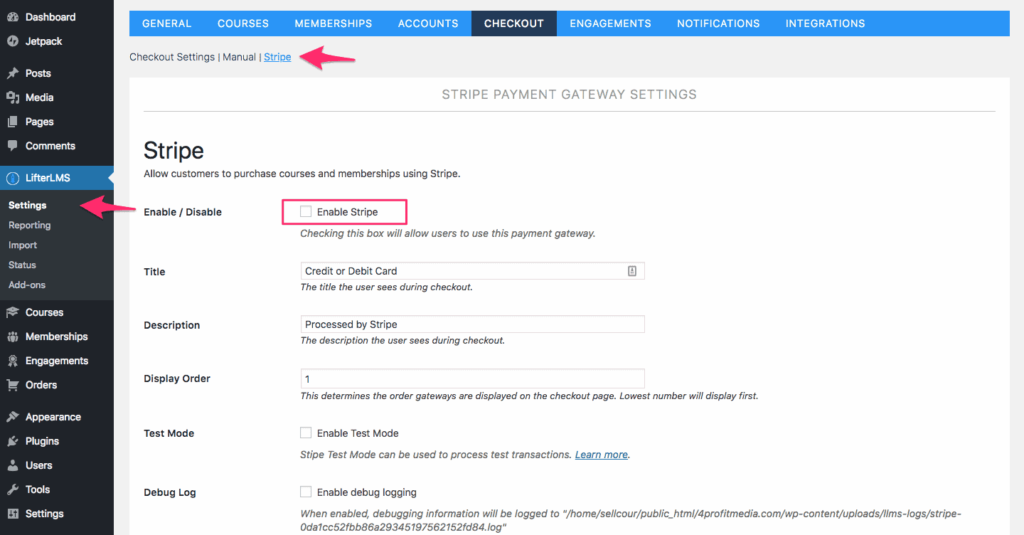
Allow me to demonstrate how to implement and activate the Stripe payment extension. Begin by downloading the extension’s .zip archive from your member dashboard, then upload this file to your WordPress installation by navigating to Plugins -> Add New.
Proceed to activate the newly installed Stripe extension and navigate to LifterLMS -> Settings -> Checkout -> Stripe. This configuration panel allows you to seamlessly connect your Stripe payment account with the LifterLMS platform and enable this payment processing option.
You can implement and activate additional extensions following the same procedure.
Congratulations! You’ve now successfully configured your LifterLMS platform. In the following section, I’ll walk you through the process of developing your inaugural course.
Developing a course within LifterLMS involves a remarkably intuitive process. The initial phase requires establishing your course framework, after which you can populate it with educational materials.
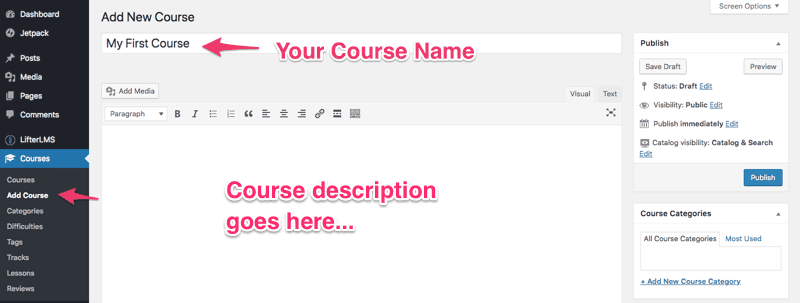
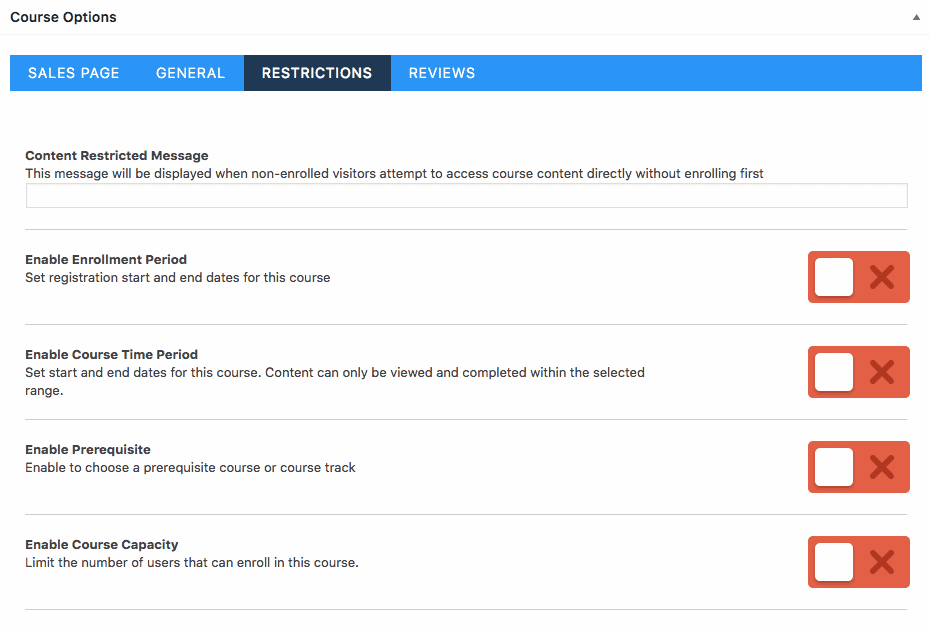
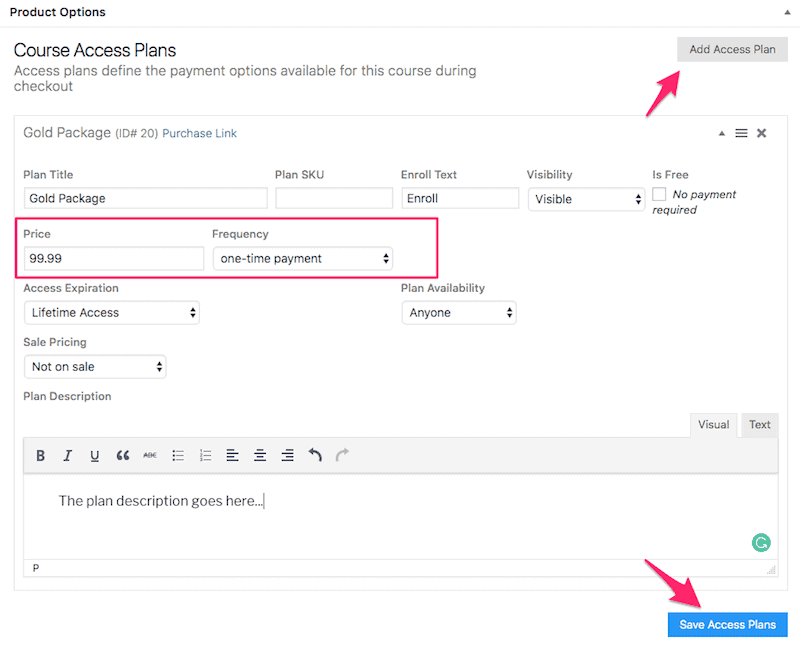
To begin this process, navigate to Courses -> Add Course from the navigation menu on the left side of your dashboard. This interface provides comprehensive course management options, allowing you to designate your course title, design your marketing page, establish pricing structures, and administer enrollment parameters.
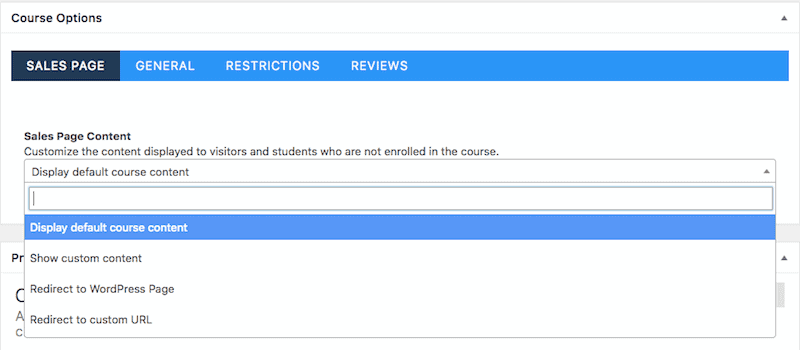
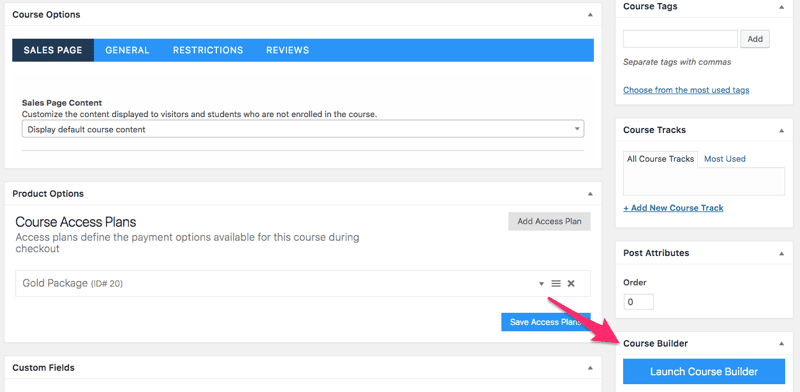
As you continue scrolling down the page, you’ll discover the Course Options section, where you can develop content for your marketing page. LifterLMS automatically generates a standard sales page utilizing the material you’ve entered in the WordPress editor above.
For those seeking a more sophisticated, custom-designed sales page for their educational offering, consider developing one using a specialized page builder such as Thrive Architect and then designating this custom page as your official course sales page within these settings.
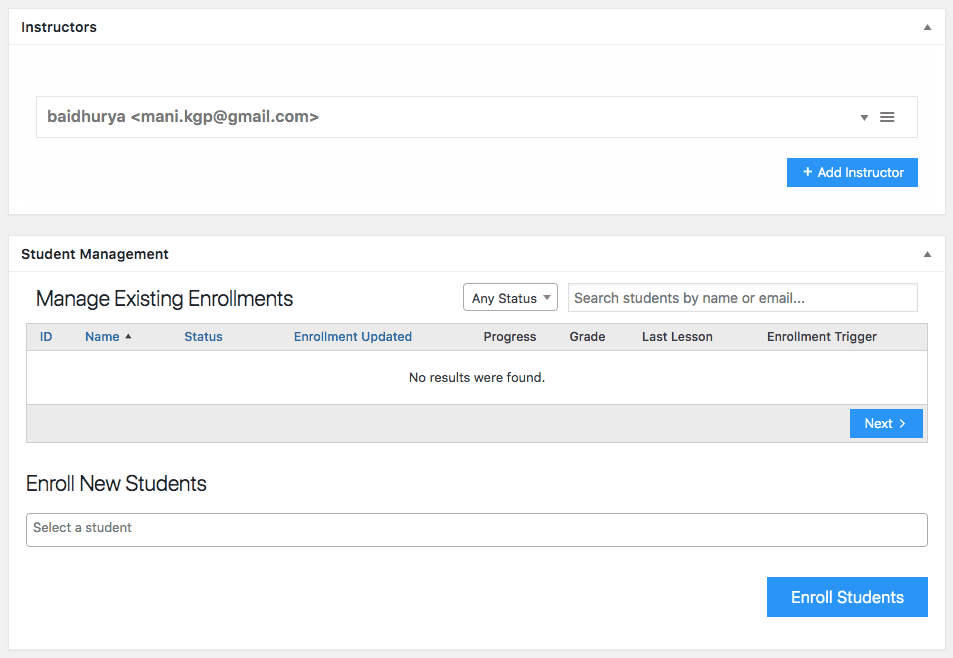
Continuing further down the configuration page, you’ll encounter the Instructors section, which provides functionality to associate additional teaching personnel with your educational offering.
Below this, you’ll discover the comprehensive Student Management interface, offering tools to administer existing course participants, monitor their progress, and even manually register new students directly into your course through the administrative backend.
This completes the initial course setup process in LifterLMS. In the following section, I’ll demonstrate how to organize your educational content and populate your course using the intuitive Course Builder interface.
LifterLMS features an intuitive drag-and-drop course builder interface that enables you to effortlessly organize lessons and thematic sections within your course. You can access this powerful builder through several convenient methods:
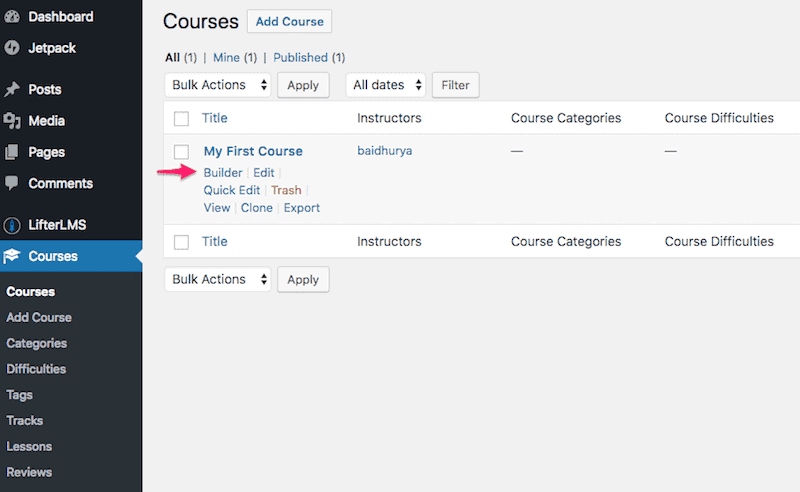
1. Navigate to Courses -> Courses in your dashboard, then select the Builder option displayed directly beneath your course title.

Within this interface, you can incorporate organizational sections into your educational structure by either selecting the Section button or employing a drag-and-drop approach to position it within the primary course construction area.
Following a similar workflow, you can integrate instructional lessons into your course framework by either clicking the New Lesson button or utilizing the intuitive drag-and-drop functionality to place them within your desired location in the builder workspace. The platform also offers the flexibility to repurpose previously developed lessons should you wish to reuse existing educational content.
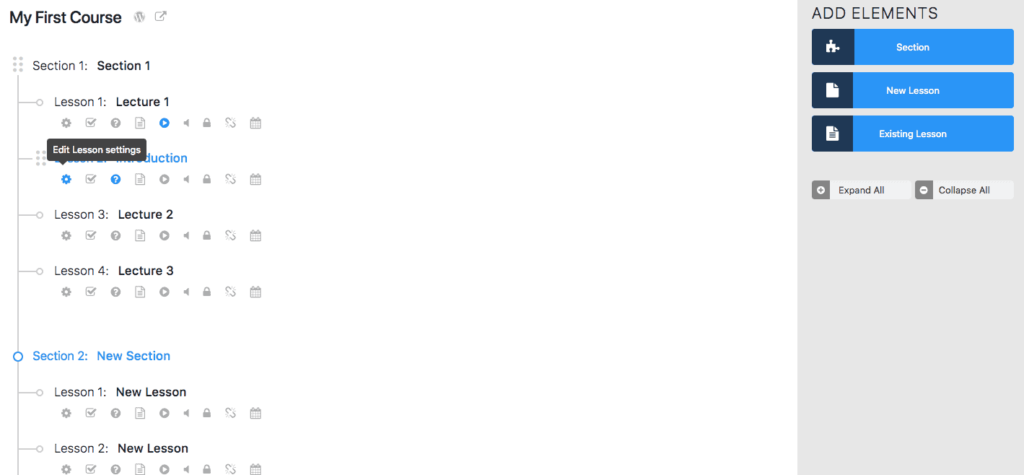
Should you wish to modify the sequential arrangement of instructional materials or relocate lessons between different thematic sections, the platform supports intuitive content reorganization through its seamless drag-and-drop functionality.

Now, allow me to guide you through the process of populating your lessons with educational materials. To initiate this process, select the gear icon located directly beneath each lesson title.
This action will reveal a contextual panel on the right side of your screen, presenting options to incorporate various content formats including video presentations, audio recordings, interactive quizzes, or structured assignments within your lesson structure.
For straightforward video integration, simply acquire the URL of your preferred video hosted on platforms such as Youtube, Vimeo, or Wistia, and insert it into the designated field.
For incorporating textual materials or alternative content formats into your lesson, select the WordPress icon to access the comprehensive WordPress editing environment, which provides extensive formatting options and content integration capabilities.

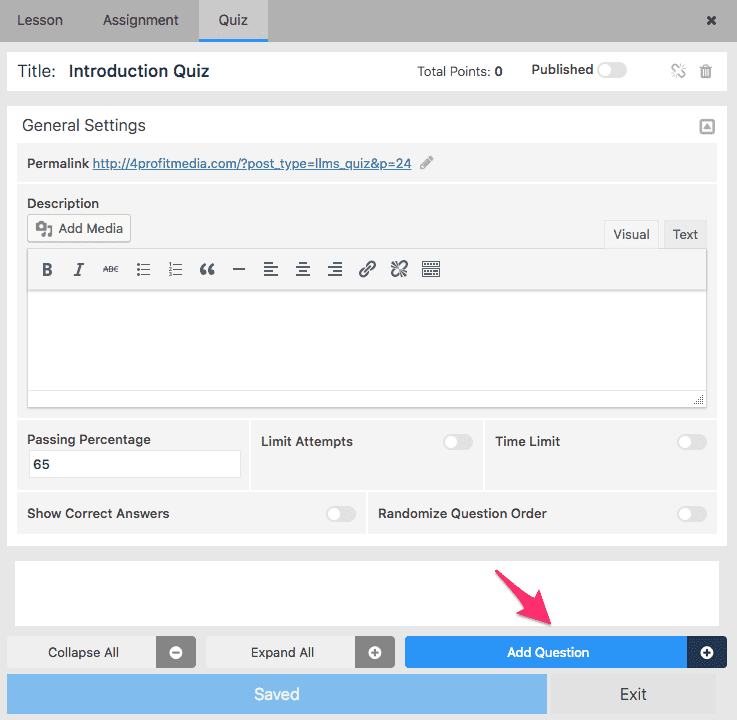
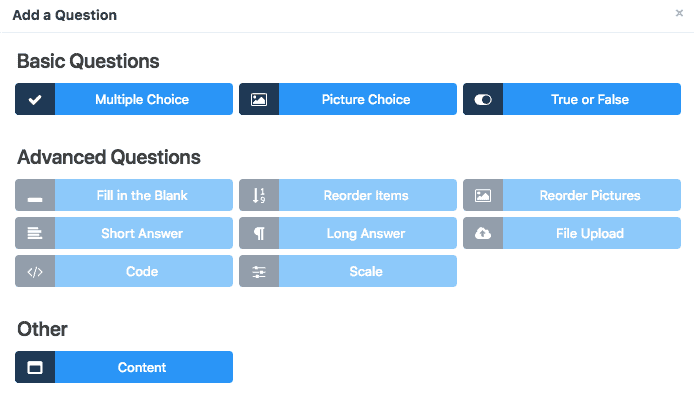
This action will trigger a modal dialog where you can select from various assessment formats. To access the enhanced functionality of Advanced Question formats, you’ll need to first install and activate the Advanced Quiz extension on your LifterLMS platform.
Following a comparable workflow, you can incorporate practical Assignments into your educational modules; however, this functionality requires first obtaining and implementing the dedicated Assignment extension.
After populating your lesson(s) with instructional content, it’s essential to verify the presentation and functionality. Accomplish this by selecting the View Lesson icon positioned adjacent to each lecture title. Additionally, ensure that each lesson’s publication status is appropriately configured for student access.
LifterLMS incorporates several built-in engagement mechanisms to enhance student motivation and participation: Certificates, Achievements and Emails.
To provide formal recognition to students upon course completion, you’ll first need to establish a certificate template. This process begins by navigating to Engagements -> Certificates and selecting the Add Certificate button from the interface.

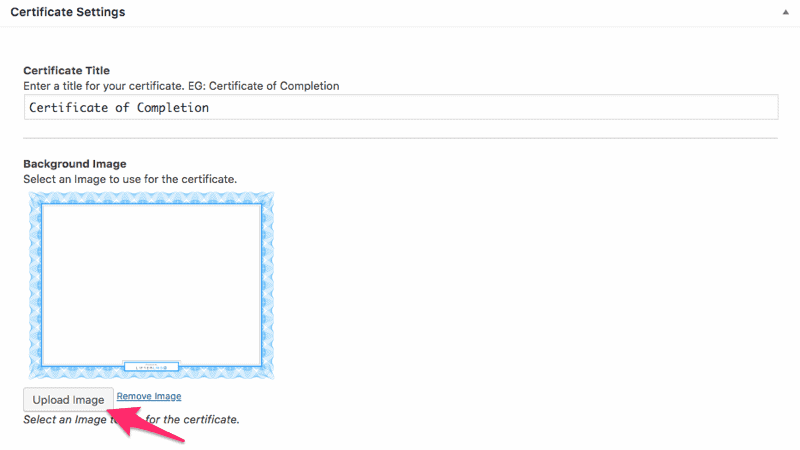
This selection will launch the WordPress editing environment where you can craft and finalize your certificate design.
As you navigate downward through the interface, you’ll encounter the Upload Image functionality, which enables you to incorporate a customized background visual for your certificate template.
Subscribers to any of the LifterLMS premium bundles gain access to an extensive graphics collection through the LifterLMS Pro extension. This comprehensive visual library contains numerous professionally designed certificate backgrounds as well as diverse iconography for achievement badges and notification elements.
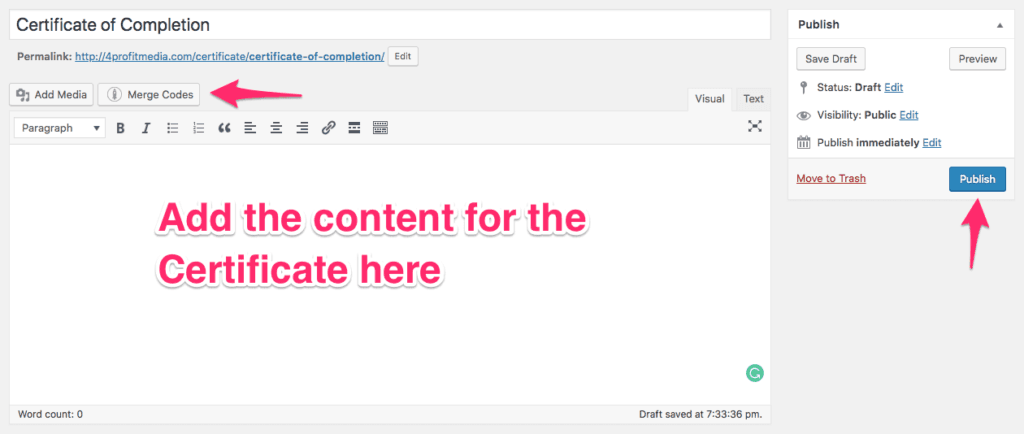
After incorporating your background visual, proceed to develop the overlaid certificate content. The WordPress editor provides comprehensive tools to integrate both textual elements and graphical components to create a professional credential document.
Upon completing your certificate design process, ensure you finalize it by activating the publish function to make it available for distribution to qualifying students.
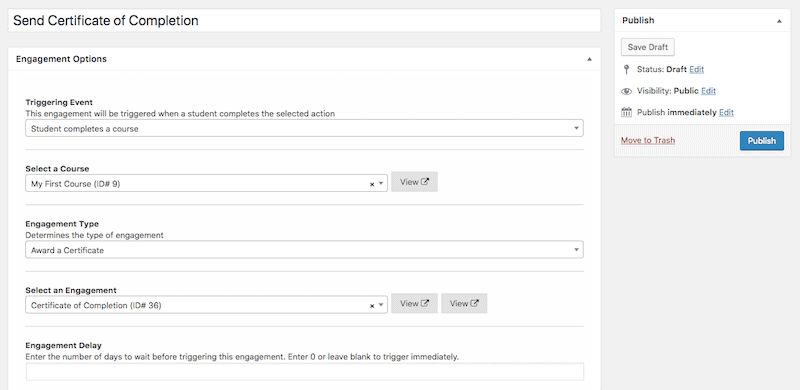
To establish automatic credential distribution to qualifying participants, you must configure an engagement trigger mechanism. Navigate to Engagements -> Add Engagement to access this functionality.
Within this interface, you can precisely define the completion criteria that will initiate certificate distribution. After establishing these parameters, select the Publish button positioned in the right panel to implement your certificate distribution protocol.
The platform additionally offers functionality to design recognition badges that reward learners for achieving specific milestones such as course enrollment, section completion, successful assessment performance, and other noteworthy accomplishments.
Beyond standard email communication capabilities, LifterLMS provides an extension for Twilio integration, enabling SMS notification delivery triggered by specific student activities. This represents an exceptional opportunity to significantly enhance your engagement strategy with direct mobile communication.
Throughout this comprehensive guide, we’ve explored the complete process for establishing an online educational platform using WordPress. We’ve navigated through each essential phase involved in developing a fully operational website designed for marketing your educational content through the WordPress ecosystem.
If you’ve diligently followed these instructions and, most critically, implemented the recommended actions, your educational platform should now be prepared for public launch. Rather than delaying while expanding your course catalog or pursuing perfection, prioritize launching your platform at the earliest opportunity.
I recommend reviewing my comprehensive resource on generating revenue through digital education which provides extensive practical strategies for successfully launching and marketing your online educational content.
I trust this guide has provided valuable insights for your educational platform development. Should you have inquiries or wish to share your experience, please contribute your thoughts in the comment section below.

Daniel NicFounder, SellingOnliceCoursesGuide.comis an entrepreneur and digital education specialist who founded sellingonlinecoursesguide.com, a platform dedicated to helping creators and educators successfully navigate the online course marketplace. Through his website, he shares insights and strategies for developing, marketing, and monetizing online educational content. His work focuses on empowering course creators to build sustainable online businesses while effectively sharing their knowledge with students worldwide.
Daniel Nic is an entrepreneur and digital education specialist who founded sellingonlinecoursesguide.com, a platform dedicated to helping creators and educators successfully navigate the online course marketplace. Through his website, he shares insights and strategies for developing, marketing, and monetizing online educational content. His work focuses on empowering course creators to build sustainable online businesses while effectively sharing their knowledge with students worldwide.

We respect your privacy and will never spam you.


