home / Best Course Platforms  /Kajabi Review

5 Must-Have Zapier Automations for Teachable Instructors

We earn a commission from partner links on this site. This doesn’t affect our opinions or evaluations.

Published – Jan 03, 2023

Teachable’s ability to directly connect with third-party tools has natural boundaries. Realistically, it wouldn’t be practical for Teachable or any platform to develop individual integrations with hundreds of available tools (particularly when new solutions emerge in the marketplace daily).

This is precisely where Zapier becomes invaluable. Zapier functions as an automation platform that enables various applications to connect and communicate effectively.

You can leverage Zapier to connect Teachable with numerous external applications including MailChimp, ConvertKit, Aweber, Infusionsoft, Google Docs and many others.

While Zapier offers countless automation possibilities for your educational platform, several fundamental automations deserve attention from every Teachable instructor.

Before diving into these essential Zapier automations, let’s examine how Zapier actually operates.


How Does Zapier Work?

Here are several key aspects about Zapier’s functionality:

  • Zapier refers to each automation rule as a “Zap,” and every Zap requires at minimum both a trigger and an action.
  • A Zapier trigger represents the initial event that initiates an action—this must be defined first, such as when someone enrolls in your Teachable school.
  • An action constitutes the subsequent event following the trigger, for example, assigning the student to a specific tag within ConvertKit.
  • You can implement conditional parameters for Zap triggers by incorporating filters, ensuring the automation only executes when particular criteria are fulfilled.
  • You also have the option to develop multi-step Zaps where multiple actions can be performed within a single automation.

1. Segment your students based on what course they enroll in

If you offer multiple courses through your Teachable platform, segmenting students according to their course enrollment is absolutely essential.

Without proper segmentation, all students get directed to an identical list or receive the same tag—preventing you from targeting them based on their specific preferences, previous purchases, or other relevant factors.

Regarding the direct integration options for segmenting Teachable students in your email service provider, only ConvertKit currently offers this specialized integration with Teachable.

I strongly recommend ConvertKit for online course creators, and if you’d like to explore its capabilities, you can access a complimentary 1-month trial of ConvertKit by clicking here.

For those using alternative service providers, Zapier becomes necessary to effectively segment your Teachable student base.

Within Zapier, you’ll need to configure individual Zaps for each Teachable course. Let me demonstrate how you can accomplish this seamlessly with Mailchimp.

1. Create or access your Zapier account. After logging in, locate and click the ‘Make a Zap’ button at the top of the page

2. Configure the Trigger App for your automation You’ll need to provide a name for your Zap and select Teachable as your Trigger App for this particular automation.

Select ‘New Sale’  as your Teachable Trigger and click on the ‘Continue’ button.

The following screen will prompt you to link your Teachable account if you haven’t established this connection previously. Simply enter your Teachable School login credentials, and your account will be successfully connected.

If you’ve already established a connection with your Teachable account, simply proceed by clicking the continue button.

You’ll then have the opportunity to verify your trigger app on the subsequent screen. Upon successful testing, your trigger app will be properly configured, allowing you to advance by selecting the ‘Continue’ button.

3. Implement a Filter App A Filter App serves as a crucial component for identifying which specific course the student has enrolled in. Consider this step as establishing a conditional parameter ensuring this automation only triggers when someone registers for a particular course. Select ‘Filter by Zapier’ as your Action App for this stage.

You’ll notice ‘Only continue if’ already selected on the following screen. Simply proceed by clicking the continue button.

Next, you’ll need to establish the specific filtering condition. Choose ‘Course ID’ as your primary condition parameter, select ‘(Text) Contains’ from the dropdown menu, and enter the unique course ID for the specific course this Zap will monitor. Then click the ‘Continue’ button to proceed.

You can easily locate the Course ID for your particular course within your Teachable administrative dashboard.

On the subsequent screen, you can verify your filter app’s functionality through a quick test. Following successful verification, select the ‘Finish’ button to complete this stage. Your filter app is now properly configured.

4. Establish an Action App The Action App serves as the mechanism that will assign your student to the appropriate list within Mailchimp.

You have two options for adding an Action App: either select the ‘+’ icon located in the bottom left corner or click the designated link on the main interface.

You’ll then be prompted to choose an Action App—in this particular scenario, you’ll select Mailchimp from the available options.

When the following screen appears, locate and select the ‘Add/Update Subscriber’ option, then proceed by clicking on the ‘Continue’ button

If you haven’t previously linked your Mailchimp account, you’ll receive a prompt to establish this connection with Zapier. Enter your login information and then select the ‘Continue’ button to move forward.

Now choose the specific Mailchimp list where you want your new students to be added. For optimal results, you should map ‘User – Email’ as the subscriber email field and ‘User – Name’ as the subscriber name field. You’ll notice numerous additional mapping options available for selection based on your specific requirements.

Now you can review the comprehensive overview of your Zap and proceed by selecting the ‘Create & Continue’ button.

Once you receive the Test Successful confirmation message, click the Finish button and your automation is fully configured and ready for implementation.

After confirming the successful test, select the Finish button and activate your Zap by turning it on!

From this point forward, every student who registers for this specific course will automatically be added to your designated Mailchimp list.

This represents a complete 3-step Zap workflow – consisting of a Trigger App, a Filter App, and an Action App. You’ll need to replicate this process by creating a similar Zap configuration for each course in your Teachable catalog.

Implementing proper student segmentation based on course enrollment enables you to deliver highly targeted offers to your audience, significantly enhancing your sales conversion metrics.

2. Tag those students who sign up to your school but don’t make a purchase

Teachable’s checkout system operates with a specific flow that requires students to first create an account on your school before proceeding to payment.

From my experience working with clients, I’ve observed that 25-30% of students register for the school but never complete a purchase. This typically occurs for two primary reasons: 1) you’ve placed a signup button within your navigation menu, or 2) students initiated registration but abandoned the payment process.

These individuals have likely already explored your course offerings and represent qualified potential customers. If you’re not actively following up with this segment, you’re missing substantial revenue opportunities.

Let me demonstrate how to leverage Zapier to identify these prospects within your email service provider. For this demonstration, I’ll be using ConvertKit as the example platform.

1. Establish a Trigger App Start by creating another Zap with your preferred name. Once again, select Teachable as your designated Trigger App.

On the following screen, choose the appropriate Teachable Trigger, which in this scenario would be ‘New User,’ then click the ‘Save + Continue’ button.

If you’ve previously connected your Teachable account, you can simply proceed to the next step—otherwise, you’ll be prompted to add your Teachable credentials first.

Your Trigger App configuration is now complete and ready for testing. Upon successful verification, move forward to establishing your Action App.

2. Implement an Action App Choose ConvertKit as your designated Action App. Next, you’ll need to select ‘Add a Subscriber to a Tag’ from the available ConvertKit Actions, then proceed by clicking the ‘Continue’ button.

The following screen will prompt you to establish a connection with your ConvertKit account if you haven’t already integrated it with Zapier.

After completing this connection process, select the ‘Continue’ button to proceed.

Now you’ll need to choose the specific ConvertKit tag to which you want to assign new subscribers (note that this tag must already exist within your ConvertKit account), and then select which user information from Teachable you wish to transfer to ConvertKit.

On the subsequent screen, you’ll see a comprehensive summary of your application configuration. If everything appears correctly set up, you can proceed to the next step.

Your Zap is now fully configured and ready for testing. Following a successful test, select the Finish button to complete the setup.

You can now activate your Zap by turning it on. With this automation, everyone who registers for your school will be assigned to your specified tag.

But hold on—don’t we specifically want to identify only those who register without enrolling in any courses?

Indeed, and here’s the strategic approach to accomplish this.

You’ll need to create a specialized automation rule within ConvertKit that automatically removes this signup tag from any user who proceeds to make a purchase.

This same approach can be implemented with virtually any email service provider, including MailChimp.

This system enables you to easily identify prospects who registered for your school but didn’t continue to enroll in any courses. This presents an excellent opportunity to follow up with targeted educational emails that ultimately lead to a compelling offer for one of your courses.

Just ensure you schedule these follow-up communications at least one hour after their initial registration. This timing strategy prevents sending unnecessary emails to those who have already completed a purchase.

3. Tag those students who complete a course and present them special offers

One of the most strategic moments to promote additional courses to your existing students occurs immediately after they’ve completed their current course.

This provides the perfect opportunity to congratulate them via email while introducing them to your other course offerings. You might even consider providing special promotional discounts exclusively for these successful students.

Let me demonstrate how to effectively tag students who complete a specific course within ConvertKit.

1. Establish a Trigger App Begin by creating another Zap with your preferred name. Once again, select Teachable as your designated Trigger App.

On the following screen, select the appropriate Teachable Trigger, which in this scenario would be ‘Course Completed’ (you’ll find this option listed under the ‘show less common actions’ section).

If you’ve previously connected your Teachable account, you can proceed directly to the next step—otherwise, you’ll receive a prompt to add your Teachable credentials.

Your Trigger App is now properly configured and ready for testing. After successful verification, continue to establishing your Action App.

2. Implement a Filter App Choose ‘Filter by Zapier’ App as your Action App for this automation.

You’ll notice ‘Only continue if’ is already selected on the subsequent screen. Simply proceed by clicking the continue button.

Now you’ll need to define the specific filtering condition. Select ‘Course ID’ as your primary condition parameter, choose ‘(Text) Contains’ from the dropdown options, and enter the unique course ID for the specific course this Zap will monitor. Then click the ‘Continue’ button to proceed.

You can easily locate the Course ID for your particular course within your Teachable administrative dashboard.

On the following screen, you can verify your filter app’s functionality through a quick test. Upon successful verification, select the ‘Finish’ button. Your filter app configuration is now complete.

3. Establish an Action App (for ConvertKit Integration) You’ll need to add one additional action app to finalize the process of transmitting user information to ConvertKit.

You have two options for adding this Action App: either select the ‘+’ icon positioned in the bottom left corner or click the designated link on the main interface.

Choose ConvertKit as your Action App. Next, select ‘Add a Subscriber to a Tag’ from the available ConvertKit Actions, then proceed by clicking the ‘Continue’ button.

The subsequent screen will prompt you to establish a connection with your ConvertKit account if you haven’t previously integrated it with Zapier.

Once again, click the ‘Continue’ button to proceed.

Now you’ll need to select the specific ConvertKit tag to which you want to assign course completers (note that this tag must already exist within your ConvertKit account), and specify which user information from Teachable you wish to transfer to ConvertKit.

The following screen will display a comprehensive summary of your application configuration. If everything appears correctly configured, you can proceed to the next step.

Your Zap is now fully configured and ready for testing. Upon successful verification, select the Finish button to complete the setup.

You can now activate your Zap by turning it on. From this point forward, anyone who completes this specific course will be automatically tagged appropriately within ConvertKit.

This creates the perfect opportunity to send your successful student a congratulatory message, present them with a special promotional offer, or even provide a certificate of completion (which you would need to create manually before sending via email).

4. Send a Certificate of Completion to anyone who completes a course (completely automated)

Many Teachable instructors need to provide Certificates of Completion to their students. If you’re comfortable handling certain aspects manually, you can leverage Zapier to tag students in ConvertKit and then distribute personalized certificates through a manual process.

Alternatively, you can integrate Webmerge with Teachable and Zapier to fully automate this entire workflow. Teachable provides a comprehensive guide that details exactly how to implement this solution.

With Accredible, your first step involves designing and configuring a certificate template. You’ll find detailed tutorials within your dashboard that will guide you through this entire process.

After successfully setting up Accredible, follow these instructions to integrate it with Teachable through Zapier.

1. Establish a Trigger App Begin by creating another Zap with your preferred name. Once again, select Teachable as your designated Trigger App.

On the subsequent screen, choose the appropriate Teachable Trigger, which in this scenario would be ‘Course Completed’ (you’ll find this option listed under the ‘show less common actions’ section).

If you’ve previously established a connection with your Teachable account, you can proceed directly to the next step—otherwise, you’ll be prompted to provide your Teachable login credentials.

Your Trigger App configuration is now complete and ready for testing. Following successful verification, continue to establishing your Action App.

2. Implement an Action App (Accredible) You’ll need to add an Action App, which in this particular implementation will be Accredible.

Next, you’ll need to select the appropriate Accredible Action for this automation. For this specific scenario, choose ‘Create Credential’ from the available options and proceed by clicking the continue button.

At this stage, you’ll need to connect your Accredible account to Zapier, and then proceed by selecting the continue button.

You’ll be prompted to choose the ‘Accredible Cohort Name,’ which essentially represents the certificate template you’ve previously designed within your Accredible account.

Additionally, you’ll need to configure the data mapping to transmit the User Name and User Email details along with the relevant course information to Accredible. After completing these mapping configurations, select the ‘Continue’ button to proceed.

Verify the Accredible App functionality through testing and proceed if everything works as expected. Upon successful validation, select the Finish button and activate your Zap by turning it on.
Congratulations! You’ve successfully implemented a fully automated certificate issuance system for your students. From now on, whenever someone completes your designated course, they’ll automatically receive a personalized certificate from Accredible delivered directly to their email inbox.

5. Follow up with students who cancel a subscription

Test the Accredible App integration and proceed to the next step. If the test completes successfully, select the Finish button and then activate your Zap.
1. Establish a Trigger App
Create another Zap with your preferred name. Select Teachable as your designated Trigger App.
On the following screen, choose the appropriate Teachable Trigger, which in this scenario would be ‘Subscription Cancelled’ (you’ll find this option listed under the ‘show less common actions’ section).

If you’ve previously connected your Teachable account, you can proceed directly to the next step—otherwise, you’ll receive a prompt to add your Teachable credentials.
Your Trigger App is now properly configured and ready for testing. Following successful verification, continue to establishing your Action App.
2. Implement a Filter App
Next, you’ll need to create a ‘Filter by Zap’ App to refine your automation.
You’ll notice ‘Only continue if’ is already selected on the subsequent screen. Simply proceed by clicking the continue button.

Now you’ll need to define the specific filtering condition. Select ‘Course ID’ as your primary condition parameter, choose ‘(Text) Contains’ from the dropdown options, and enter the unique course ID for the specific course this Zap will monitor. Then click the ‘Continue’ button to proceed.

You can easily locate the Course ID for your particular course within your Teachable administrative dashboard.

On the subsequent screen, you can verify your filter app’s functionality through a quick test. After successful verification, select the ‘Finish’ button to complete this stage. Your filter app is now properly configured.

3. Establish an Action App You’ll need to add one additional action app to finalize the process of transmitting user information to ConvertKit.

You have two options for adding this Action App: either select the ‘+’ icon positioned in the bottom left corner or click the designated link on the main interface.

Choose ConvertKit as your Action App. Next, select ‘Add a Subscriber to a Tag’ from the available ConvertKit Actions, then proceed by clicking the ‘Continue’ button.

The following screen will prompt you to establish a connection with your ConvertKit account if you haven’t previously integrated it with Zapier.

Next, you’ll need to select the specific ConvertKit tag to which you want to assign subscription-cancelling users (note that this tag must already exist within your ConvertKit account), and specify which user information from Teachable you wish to transfer to ConvertKit.

The subsequent screen will display a comprehensive summary of your application configuration. If everything appears correctly set up, you can proceed to the next step.
 
Your Zap is now fully configured and ready for testing. Following successful verification, select the Finish button and activate your Zap. You’ll need to establish this specific automation for each course where you offer subscription-based access.
 
From this point forward, all subscription cancellations will be automatically tagged, allowing you to proactively engage with these customers—whether through a feedback survey to understand their cancellation reasons or by presenting a special offer designed to encourage them to resubscribe to your course.

What else can I do with Zapier?

Zapier enables countless additional integration possibilities, including connecting Teachable with various other platforms such as Shopify, ClickFunnels and many others.

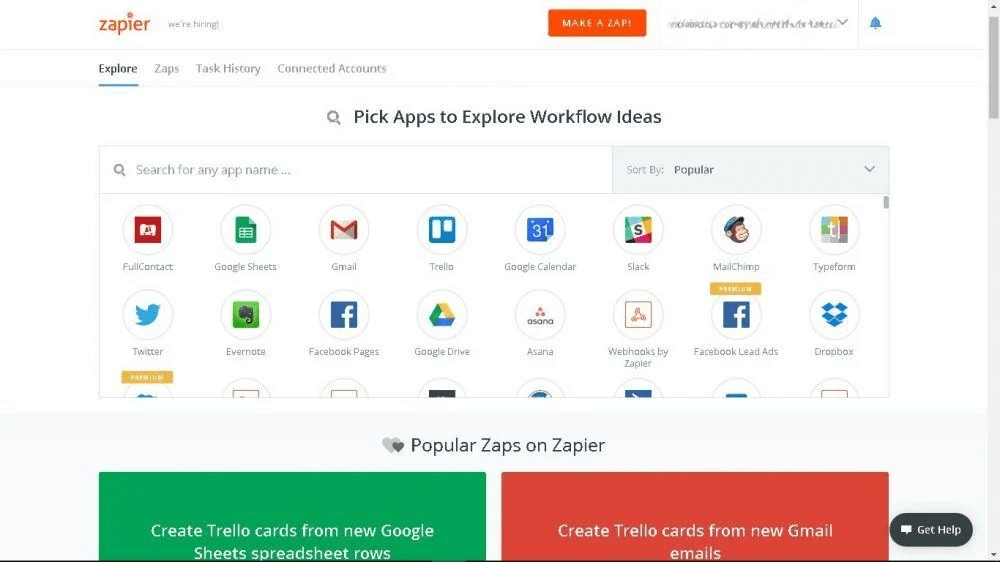
Rather than exhaustively listing all potential applications (which would be virtually endless), I encourage you to begin exploring Zapier yourself.

Through hands-on experience, you’ll not only discover existing automation possibilities but likely develop innovative automation strategies specifically tailored for your Teachable implementation.

It’s worth noting that Teachable continues enhancing its Zapier integration capabilities, which will unlock even more powerful automation opportunities for course creators in the future.

Which of these automations do you plan to implement first? Have you developed any creative Zapier workflows you’d like to share? I’m genuinely interested in hearing your thoughts and experiences, so please share your feedback in the comments section below.

About The Author

Daniel Nic

Daniel NicFounder, SellingOnliceCoursesGuide.comis an entrepreneur and digital education specialist who founded sellingonlinecoursesguide.com, a platform dedicated to helping creators and educators successfully navigate the online course marketplace. Through his website, he shares insights and strategies for developing, marketing, and monetizing online educational content. His work focuses on empowering course creators to build sustainable online businesses while effectively sharing their knowledge with students worldwide.

Related Post

Daniel Nic

Daniel Nic is an entrepreneur and digital education specialist who founded sellingonlinecoursesguide.com, a platform dedicated to helping creators and educators successfully navigate the online course marketplace. Through his website, he shares insights and strategies for developing, marketing, and monetizing online educational content. His work focuses on empowering course creators to build sustainable online businesses while effectively sharing their knowledge with students worldwide.

FREE EBOOK

How to Create and Sell a Profitable Online Course

Learn the essential tips and strategies to build your own online course and maximize your earnings. Get started now!

We respect your privacy and will never spam you.