
Mighty Networks operates as a web-hosted community construction tool, and initiating its use simply involves establishing an account directly on the platform.
Fortunately, the platform extends a 14-day complimentary trial period, affording you the opportunity to explore its array of features prior to committing to a paid subscription.
To activate your free trial, navigate to the official Mighty Networks website and choose the Free Trial selection prominent on their main page.

Upon selecting the Free Trial button, a new display will appear, prompting you to specify your intended audience. This action initiates Mighty Co-Host, the platform’s artificial intelligence-driven community construction tool. Drawing from the information you provide, it will then autonomously formulate a community overview, a suggested name, and a visual design concept.
The subsequent stage involves establishing your account, a process achievable either through your email address or by leveraging your pre-existing social media profiles.
Should you opt for the email method, the system will first request your name, followed by a prompt for your email address and a chosen password in the subsequent step.


Your account has now been successfully prepared, and you are ready to proceed with establishing your community, a topic we will delve into in the subsequent section.
When you register with Mighty Networks, a foundational community structure is automatically generated. Your primary task then involves defining its organizational framework and adjusting a few key settings prior to populating it with content.
Your Mighty Network features an intuitive and straightforward design. The various community segments are itemized in the sidebar on the left, whereas the dynamic activity stream is positioned on the right. Other crucial settings are distinctly situated within the header section, accessible via your profile icon.
To commence the customization of your community, click on your profile icon and then choose Network Settings from the options provided.
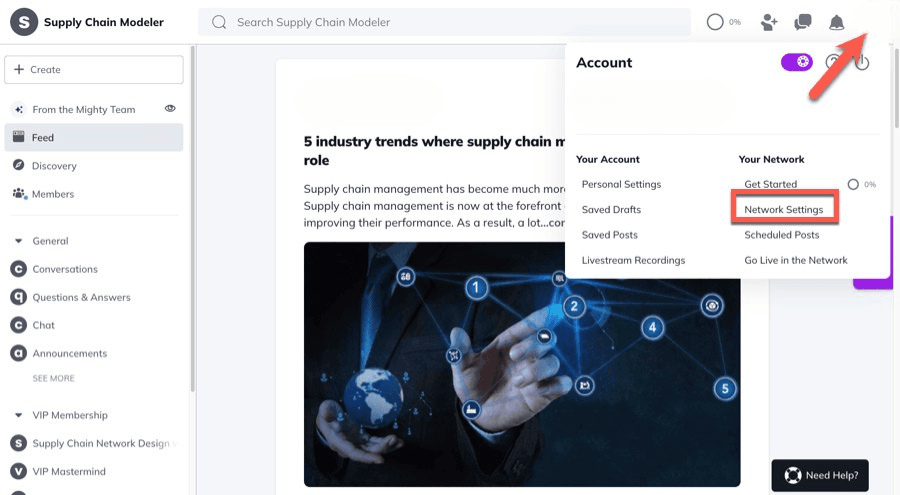
Upon selecting General Settings, you will encounter your designated community name and its accompanying description, both of which were established during the initial account creation process.

Should you find your network’s current description or tagline unsatisfactory, you have the option to revise the text by hand or select the Suggestions feature to allow Mighty Co-Host to produce these elements for you.
Within this same configuration area, you are able to:

In addition to these options, several other configurations will require your attention to fully set up your network.
Return to the Network Settings page and then choose the Premium Features section from the available options.

Within this area, you can activate several of the advanced functionalities that Mighty Networks provides:
These enhanced features are exclusively accessible with the Business plan subscription. For a detailed understanding of the available plans, please consult our Mighty Networks pricing guide.
Subsequent to adjusting the general settings, you can commence the process of structuring your community. Mighty Networks offers a comprehensive suite of tools to assist in organizing your content, with Spaces being a primary example.
Spaces function as distinct zones within your overall Mighty Network, where you can introduce various types of content and engage with particular segments of your membership. Consider them as self-contained sub-communities operating within your larger network, with the ability to control access permissions for each.
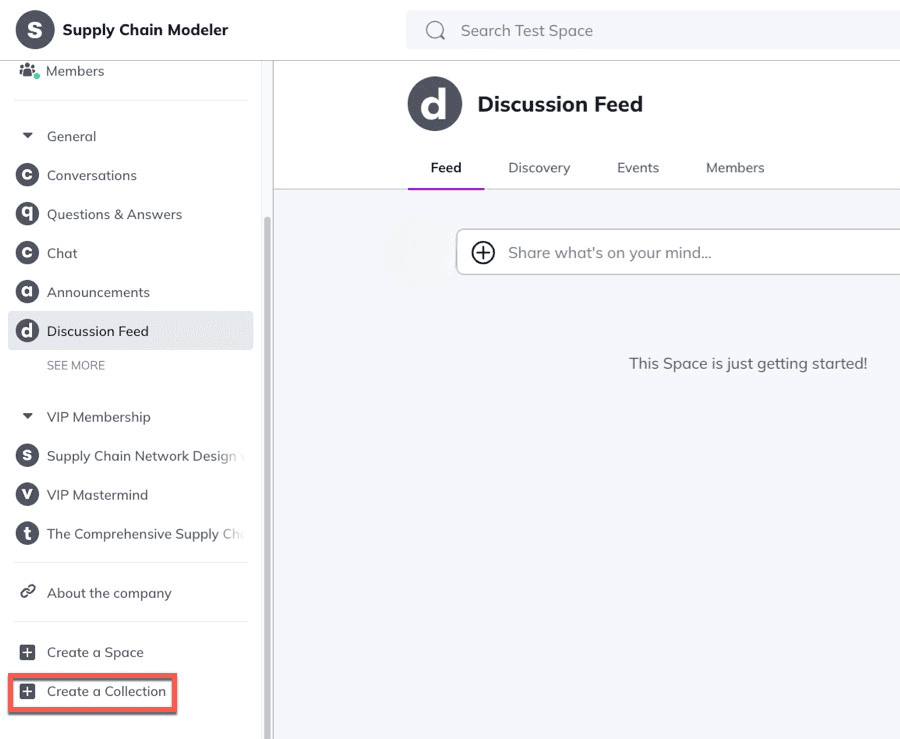
Collections, conversely, serve to aggregate multiple Spaces together. It’s important to note that content cannot be directly added to Collections; their purpose is solely organizational.
To establish a Collection, simply click on the Create a Collection option, typically found at the lower left portion of your screen, and then provide a name and a descriptive tagline. This completes the creation process.
However, to introduce content into your community environment, the creation of a Space is necessary, so let us proceed to establish one.
Navigate to your administrative dashboard, and from the menu located on the left-hand side, choose the Create a Space option.
On the subsequent screen, you will be presented with a selection of pre-designed Space templates; you can pick the one that best aligns with your specific goals.
Nevertheless, it is important to keep in mind that all Spaces within Mighty Networks are fundamentally alike, meaning you can readily activate or deactivate various features according to your requirements.

Should you be establishing a Space intended for discussions, opt for the Feed template. Then, assign a name and a descriptive tagline, designate the appropriate Collection, and configure the desired privacy level.
You will observe that the Feed template inherently incorporates the following functionalities by default:
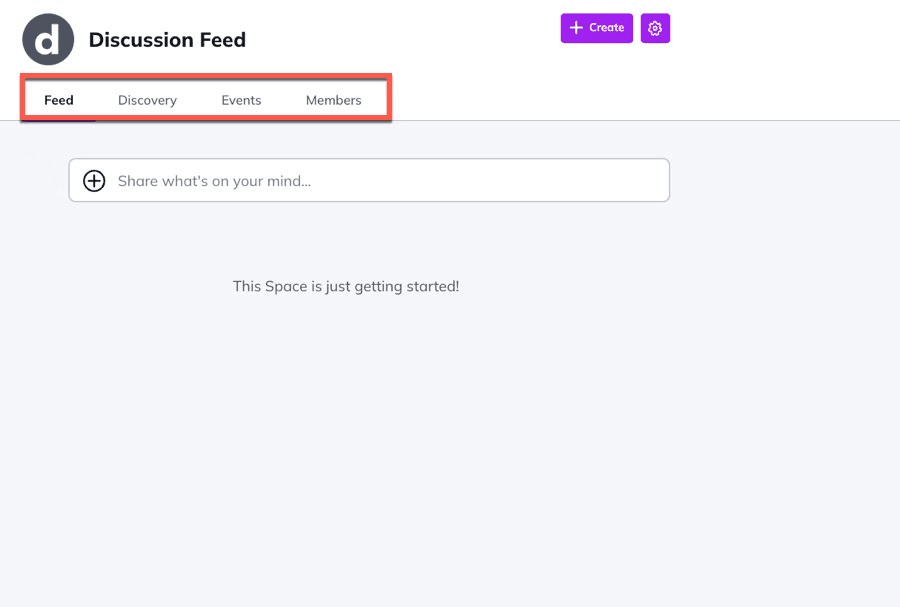
Nonetheless, you possess the flexibility to deactivate these existing features or to activate alternative ones, including options like online courses or interactive group chats.
To accomplish this, your initial step is to click on the gear icon, typically located in the upper-right section of the interface, and then choose Features from the subsequent menu.
This action will navigate you to a different screen, where a comprehensive list of all accessible features will be displayed.

Therefore, Spaces within Mighty Networks offer considerable adaptability, allowing you to employ them in a multitude of ways.
The most apparent application is to structure your community according to specific subjects. In such an instance, you can establish numerous Spaces, each featuring solely a discussion feed.
Conversely, if your objective is to develop a cohort-based course, you might create a dedicated Space that incorporates the course material, a designated discussion forum, an events calendar, and a directory of enrolled members.
The potential configurations are virtually boundless, and this flexibility represents one of the significant advantages of Mighty Networks.
Should you require some creative ideas for structuring your community, we recommend reviewing this compilation of Mighty Networks examples.
Content forms the central pillar of any digital community, and, advantageously, Mighty Networks empowers you to generate a diverse array of content formats, encompassing brief posts, comprehensive articles, interactive polls, scheduled events, live video broadcasts, and more.
Let’s begin by illustrating the process of composing a new post.
To initiate a new post, navigate to any existing Space within your Mighty Network and click the Create button, typically situated near the upper right corner of your screen. You will then be presented with the following content creation choices:

Choose your desired content format, and Mighty Networks will direct you to the corresponding editing interface.
The most frequently utilized option is Quick Posts.
Within the post creation tool, you have the capability to include textual content, visual media such as images and videos, or various other file types. Additionally, you can incorporate relevant hashtags or mention fellow community participants.

Should you decide to compose a comprehensive article, Mighty Networks will navigate you to its dedicated article editor. This environment provides a broader range of formatting tools and is better suited for developing more extensive, long-form content pieces.

Additionally, you have the option to leverage Mighty’s artificial intelligence writing aid to expedite the content creation process.
To access these AI-powered tools, simply highlight any segment of text within the editor. Upon doing so, a star icon will become visible; clicking this icon will reveal the array of available AI-assisted options.

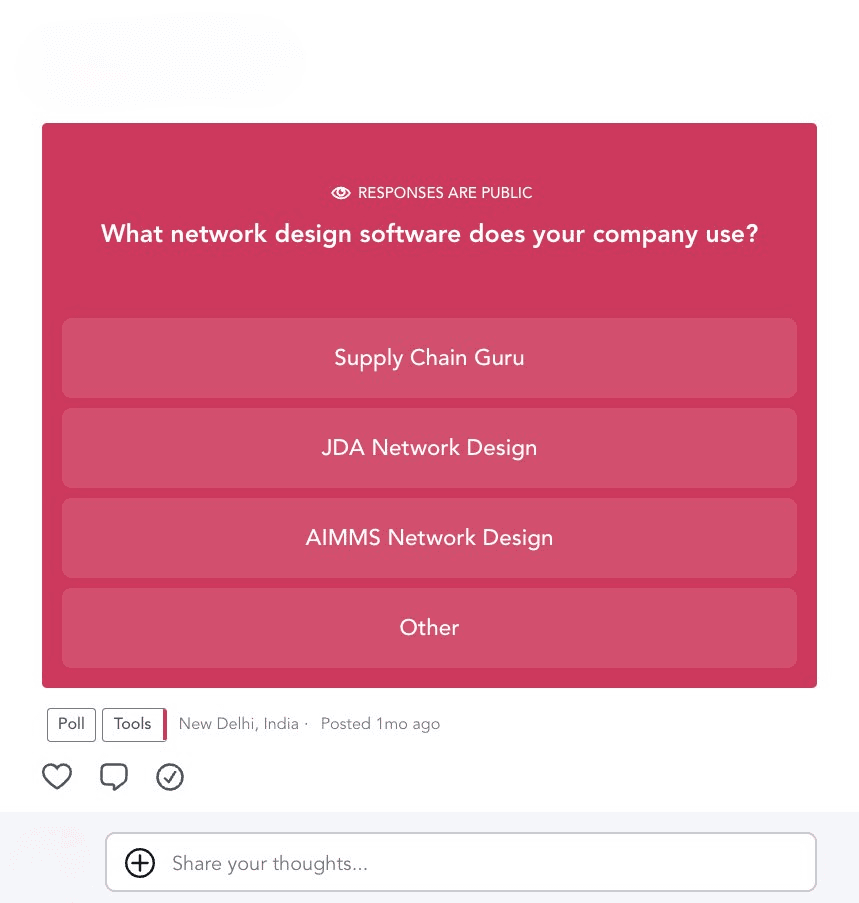
An additional valuable content format available is polls. To initiate the creation of a poll, choose the Question or Poll selection, and subsequently, you will be presented with the opportunity to select from several distinct question formats:

For instance, if you opt to design a Multiple Choice poll, you are able to pose a question and furnish your audience with several distinct answer alternatives.
In a similar fashion, should you decide to implement a Percentage poll, participants can respond to your query by utilizing an interactive percentage-based slider.

This outlines the method for generating various content formats within your community. You can replicate the steps previously described to introduce as much content as you deem necessary. The crucial aspect is to ensure your content is placed within the appropriate Spaces, thereby guaranteeing straightforward accessibility for your members.
In addition to standard posts, Mighty Networks provides the capability to organize events directly within your community and to conduct live video broadcasts.
To initiate an event, the preliminary step involves activating the Events feature within a designated Space.
As previously demonstrated, you can reach the feature settings for a specific Space by selecting the cog icon situated at the top of the interface and then proceeding to the Features area.

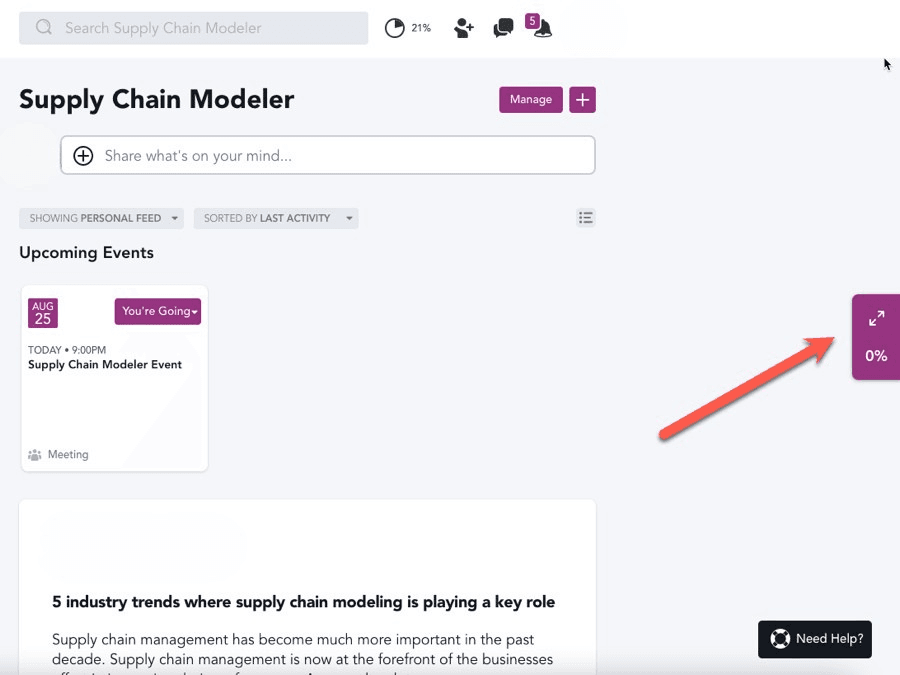
Every event you schedule within this particular Space will be cataloged and displayed under the Events tab for easy reference.
To establish a new event, simply click on the Create button and then choose the Event option from the subsequent menu.
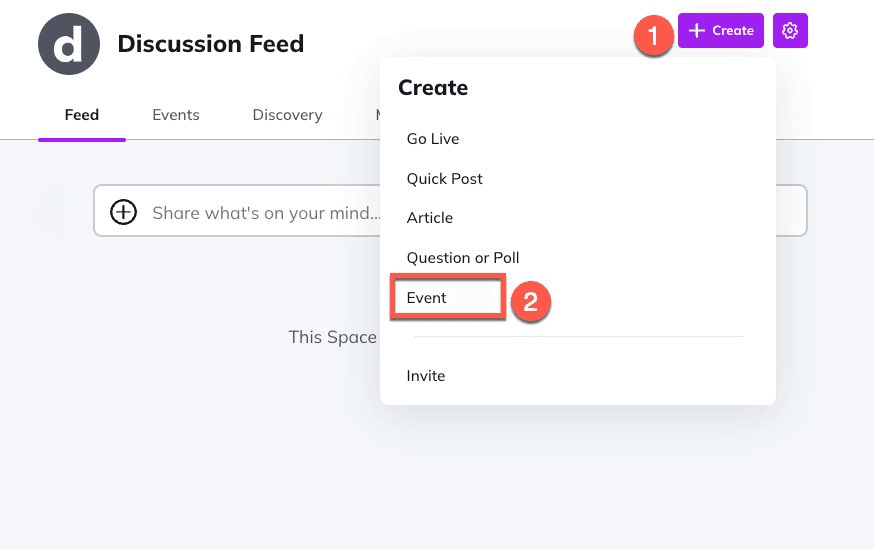
This action will unveil a new interface where you are able to:

Should you choose to host the event virtually, you have the option to employ Mighty Networks’ built-in livestreaming feature or integrate with Zoom for delivery.
Beyond pre-planned events, your network also supports the ability to initiate spontaneous livestreams. This functionality proves particularly beneficial for brief, impromptu interactions and significantly contributes to enhancing community participation.
To commence a live broadcast, once more click the Create button and then choose the Go Live selection.

You simply need to grant permission for access to your camera and microphone. Additionally, you have the option to record the live session and to send notifications to your members regarding the broadcast.
Select Go Live Now when you are prepared, and your live session will commence without delay.
The Welcome Checklist represents a distinctive Mighty Networks capability designed to help you orchestrate the initial onboarding experience for new community members. By means of this checklist, you can systematically direct your members through the various components and features of your community.
You can locate the Welcome Checklist within Network Settings, specifically under the Premium Features category. Select Manage to begin the configuration process.

Within this area, you will find several pre-populated items in your checklist, which you can eliminate at your discretion. Additionally, you are able to introduce custom checklist entries.

Numerous other actionable tasks can be incorporated into your checklist. To view these additional options, simply navigate downwards to the Mighty Suggestions portion of the page.
Below are a few illustrative examples of the action items that are accessible:
After you have completed the personalization of the checklist, it will be visible on the right-hand side of your community interface. This is also the manner in which it will be presented to your members.
You aren’t limited to just community interactions and planned activities; Mighty Networks also enables you to develop and offer online educational programs directly within your existing network framework.
Developing an educational program can be an effective way to captivate your participants or to establish an income stream from your collective.
To initiate the course creation process, select the Create a Space button. A dialog box will then open, presenting you with two distinct course frameworks to choose from – the Cohort Course or the Content Course.
We will opt for the Content Course framework for this walkthrough.

Enter the name for your educational program and its accompanying descriptive phrase, then select the appropriate grouping and define its accessibility level.
Following this, you can organize your educational content by incorporating modules and individual learning units into your program. Mighty Networks provides an intuitive interface for constructing your course using a simple click-and-move system.
Select Create -> Creation Section located at the lower part of your display to establish a new module. Alternatively, press the Add Lesson button to include a new learning unit.

Once you are content with the curriculum’s overall structure, you can proceed to populate your individual lessons with the necessary educational material.
To edit a lesson, simply position your cursor over it and click on the pencil icon displayed alongside. This action will open the lesson composition interface, where you can input your material into the section labeled Start Writing Your Lesson Here.
You will also notice a + button. Clicking this allows you to introduce various other types of content elements into your lesson.
Mighty Networks accommodates diverse content formats, including text, images, videos, and various file uploads. Similarly, you can integrate video links and other types of embedded media directly into your lesson content.

In addition to video-centric instruction, your educational program can also feature interactive quiz modules to assess understanding.
To incorporate a quiz, navigate to the conclusion of your curriculum outline page, then select the Create option, and from the menu that appears, choose the Create Quiz selection.

This action will navigate you to the quiz creation interface, where you have the capability to input questions, establish the required score for successful completion, define conditions for unlocking content, and adjust other settings.
Once you have finalized the structure and content of your course’s educational plan, the subsequent phase involves setting up various supplementary functionalities tailored to your course area.
From the curriculum overview page, select the settings symbol (typically represented as a gear), then choose Features, and proceed to activate the Feed functionality.

Consequently, your dedicated course environment will feature an exclusive forum, accessible solely by enrolled learners.
With your educational program fully prepared, you are now positioned to proceed with establishing its pricing structure.
The initial phase in formulating your pricing strategy involves configuring a method for processing financial transactions.
It’s important to note that Mighty Networks exclusively utilizes Stripe for payment processing; therefore, an active Stripe account is a prerequisite if you do not currently possess one.
To link your Stripe account, navigate through Network Settings, then to Plans and Payments, followed by Stripe Settings, and select Connect Stripe. Subsequently, adhere to the guided instructions to finalize the integration process.

To establish a new subscription option, revisit the Payments section, choose Plans, and then click the Create Plan button.
Following that, you must specify precisely what this particular plan will encompass. You have the flexibility to incorporate access to your central network, various courses, and designated spaces.
It is also essential to provide certain particulars, such as an engaging promotional message, a clear enumeration of advantages, and a thorough outline.

Regarding the financial arrangements for your offerings, Mighty Networks provides you with several distinct choices:
Recurring payment plans can be structured on a monthly or yearly basis, and you have the option to provide a no-cost introductory period for your participants.
Furthermore, you have the ability to select the digital environments where the plan will be accessible, choosing from these configurations:
Finally, you are able to bill customers in various international currencies, contingent upon the capabilities supported by your integrated Stripe account.

Once you input the price, select Finish, and your new plan will be activated and ready for use.
The capacity to generate income from your online community represents a significant benefit of utilizing Mighty Networks compared to alternatives such as Facebook Groups. This feature unlocks fresh avenues for you to create revenue streams through your network.
Before extending invitations to potential members to join your community, it is essential to apply some concluding refinements to its presentation and functionality.
Within Mighty Networks, your central network is automatically provided with its own distinct introductory page.
You can find and modify this page by navigating to Network Settings -> General Settings, and then under the Network Access -> Network Landing Page section, click on Manage.

This action will guide you to the page construction interface, where you have the ability to tailor your primary welcome page.
Be aware, though, that the Mighty Networks page editor offers fundamental capabilities, with a somewhat constrained selection of design adjustments.
The standard welcome page is structured with a main banner, an informational summary, and a section for pricing plans.

You have the ability to adjust the color schemes, visual media, and written content, but beyond these basic modifications, the extent of what you can alter on the welcome page is somewhat limited.
It is not possible to introduce new segments to your page or to change the structural design of the sections that are already provided.
An additional element to contemplate before the official introduction of your community is the linking of your distinct web address with your Mighty Network.
While readily utilizing the standard web address extension that Mighty Networks assigns is an option, configuring a personalized domain will prove more advantageous for your brand identity.
You can link your personalized web address by navigating to General Settings and, within the Domain category, choosing Use Your Own Domain.

Subsequently, within the field designated Paste Your Domain Here, you should enter your web address.
To make the custom domain operational, some CNAME configuration adjustments will be required on your part. Please carefully follow the procedures outlined in the linked support guide.

An excellent method to confirm that no details were overlooked during your community’s configuration is to conduct a simulated purchase yourself. This approach enables you to evaluate the operational sequence of your network from a customer’s perspective and rectify any potential issues.
If your Mighty Network operates on a complimentary basis, you can easily sign out from your administrator account and then register for the network as a new user. Conversely, if your offerings involve a fee, activate the complimentary trial phase and experience your product through that mechanism.
We suggest obtaining the Mighty Networks mobile application and verifying all functionalities within that environment as well.
Once you have diligently executed all the procedures detailed in this guide, you are prepared to extend invitations for individuals to acquire your premium plans, granting them access to your products through distributable links.
To generate such a link, proceed to Network Settings and select Plans, located under the Payments section.
Next, select the Share Plan option corresponding to the specific plan and click on Create a Share Link. This generated link will empower prospective clients to directly purchase the plan, allowing you to begin welcoming new members immediately.

This instructional guide on Mighty Networks has detailed the complete sequence of actions necessary for successfully establishing your digital community through this system.
Our exploration included the methods for establishing distinct areas, enriching your collective with valuable material, developing an educational program, and implementing a system for paid entry to your network.
The Mighty Networks platform provides a comprehensive array of features designed for fostering group development and interaction, rendering it an excellent choice for constructing an online enterprise centered around its community.
Should you not have registered for the service at this point, you are welcome to initiate a complimentary trial period via this link.
It is our sincere wish that this instructional guide has aided your understanding of the utilization of Mighty Networks. Are there any points requiring further clarification? Kindly present them in the discussion area provided below.


