home / Best Course Platforms /Kajabi Review
We earn a commission from partner links on this site. This doesn’t affect our opinions or evaluations.
“Creating genuine urgency within perpetual sales systems for always-available courses presents significant challenges, yet few marketing approaches match its effectiveness in enhancing conversion rates for digital educational products.”
When developing your educational content strategy, you face two primary approaches – maintaining continuously available access to your programs (evergreen courses) or implementing a limited enrollment model where registration opens periodically throughout the year.
Should you choose the latter approach, incorporating urgency elements into your marketing sequence becomes relatively straightforward and uncomplicated.
Conversely, when operating with permanently accessible programs, establishing authentic urgency mechanisms becomes considerably more challenging. This difficulty stems from the asynchronous nature of visitor engagement – since participants discover your funnel at different moments, each potential customer requires an individualized deadline experience.
And manually implementing such a system remains entirely impractical!
This foundational phase represents the crucial cornerstone when establishing a timeless marketing sequence for your digital educational products. You must thoroughly conceptualize your complete pathway structure – determining entry mechanisms, promotional presentations, timeframe durations and more.
Consider this practical scenario. You might develop a limited-time promotional opportunity targeting various audience segments:
Additional scenarios certainly exist depending on your specific business model and comprehensive marketing approach.
Let’s examine the “Recently Joined Audience Members” category specifically. Perhaps you wish to extend a one-time 25% reduction in price exclusively to new community members.
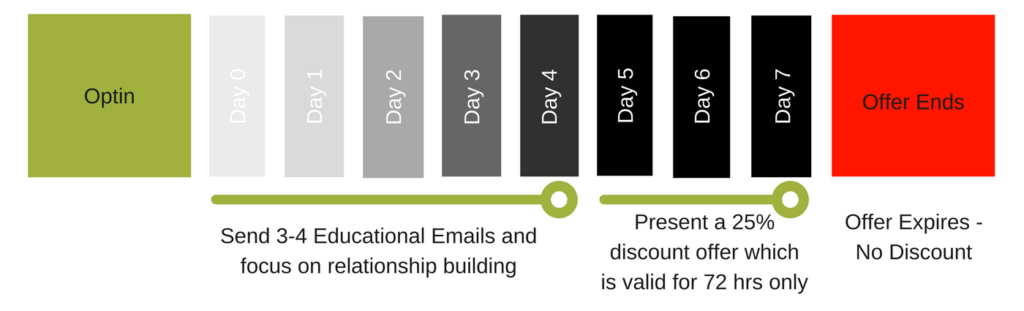
You could potentially showcase this opportunity immediately upon subscription confirmation, or alternatively, deliver several relationship-building communications before revealing the special offer.
Additionally, your promotional window might remain accessible for several days or extend throughout an entire week (commonly referred to as the expiration period).
The following demonstrates a proven perpetual revenue pipeline framework targeting new community members that has generated substantial results for numerous clients I’ve advised.
Naturally, your specific promotional details, timeframe parameters, activation triggers and other elements will vary based on your strategic objectives, business category, target demographic and additional factors.
Now, allow me to walk you through the precise implementation sequence required to develop such a perpetual marketing system tailored specifically for your educational offerings.
As previously highlighted, implementing a Perpetual Revenue Pipeline requires utilizing Deadline Funnel technology.
You can register for a complimentary Deadline Funnel account here.
After completing your registration, you’ll need to establish connectivity between Deadline Funnel and your website infrastructure.
Within your Deadline Funnel dashboard, locate the ‘Tracking Code’ option positioned in the left navigation panel. Selecting this option will direct you to a dedicated page displaying the necessary integration script that requires copying.
With Deadline Funnel now successfully connected to your Teachable or ClickFunnels environment, you’re prepared to develop your initial perpetual marketing campaign.
Should you wish to establish integration with alternative web frameworks such as WordPress, comprehensive instructions are available on the Deadline Funnel website for additional guidance.
To begin, you’ll need to establish an offer page. For instance, if you market your courses at a regular price of $100 and wish to provide your subscribers with an exclusive 25% one-time discount, your offer page would be this special sales page featuring the reduced price.
The redirect page serves as the destination where subscribers will land after the promotional period ends. This typically consists of your standard sales page without any special pricing applied.
When utilizing ClickFunnels, this process requires creating two distinct pages – your regular sales page alongside a discounted version of the same page.
However, platforms like Teachable or Thinkific simplify this process by allowing you to generate a sales page link with an automatically applied coupon.
Creating a coupon in Teachable involves these straightforward steps:
Navigate to your specific course → Access the Coupons section → Select Create a New Coupon → Input your Coupon Details → Review the Coupon Preview → Obtain your Coupon Link
For comprehensive instructions on coupon creation within Teachable, you can reference this support resource provided by the Teachable team.
With these elements prepared, your offer page becomes the sales page URL that includes the attached coupon code, while your redirect page is simply the standard sales page URL without any discount applied. Having established both, you’re now fully equipped to configure everything within Deadline Funnel.
Now it’s time to establish what Deadline Funnel specifically refers to as a countdown. This countdown mechanism will precisely manage which promotional offer your subscribers see, when they can access it, and the exact duration of its availability.
Let’s proceed with creating your campaign in Deadline Funnel:
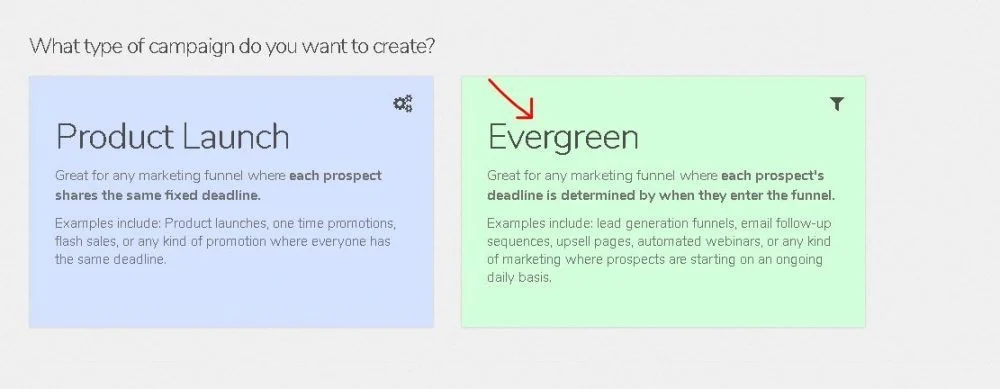
1. Navigate to your admin dashboard, then from the left-side navigation panel, select Countdowns >> Add New and choose the ‘Evergreen’ option under the ‘What type of campaign do you want to create?’ section.
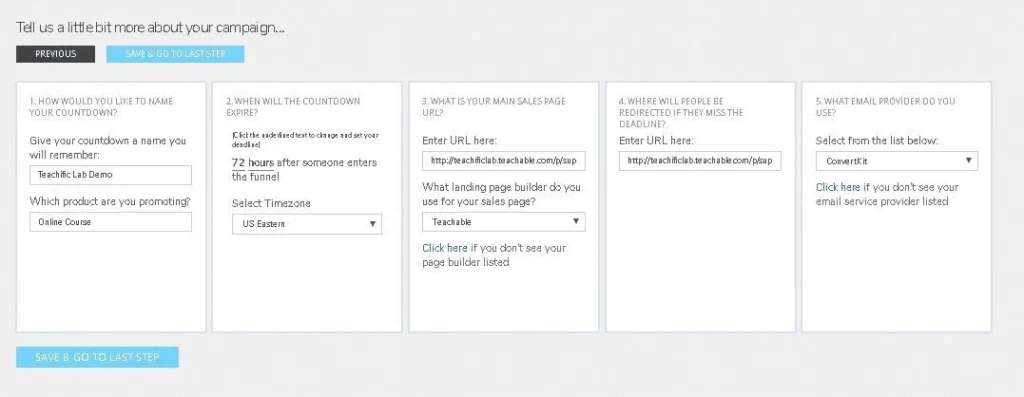
3. Moving forward, you’ll need to provide additional campaign details on the ‘Tell us a little bit more about your campaign…’ screen.
Enter your unique campaign name and specify which product you’re featuring in this promotion.
When configuring ‘When will the countdown expire?’, select hours rather than days. This important distinction prevents your campaign from requiring an end time definition, which would result in inconsistent offer durations depending on when prospects enter your funnel throughout the day.
For our example promotion running 72 hours, simply input 72 in the appropriate field.
Under ‘What is your main sales page URL?’, insert the URL of your previously created offer page, and be sure to select your specific landing page platform such as Teachable.
Then input your redirect URL, which should be your standard sales page address (the version without any special offers). Finally, select your Email Service Provider from the available options (in this example, we’ve chosen ConvertKit).
4. At this point, you’ll see a prompt requesting you to ‘Install Deadline Funnel on your website’. This integration is only required once per website, and since you’ve already implemented this code during step #2 of our process, you can proceed without performing this action again.
Your campaign framework is now established within Deadline Funnel. However, several critical components still need configuration before your campaign becomes fully operational and ready for deployment.
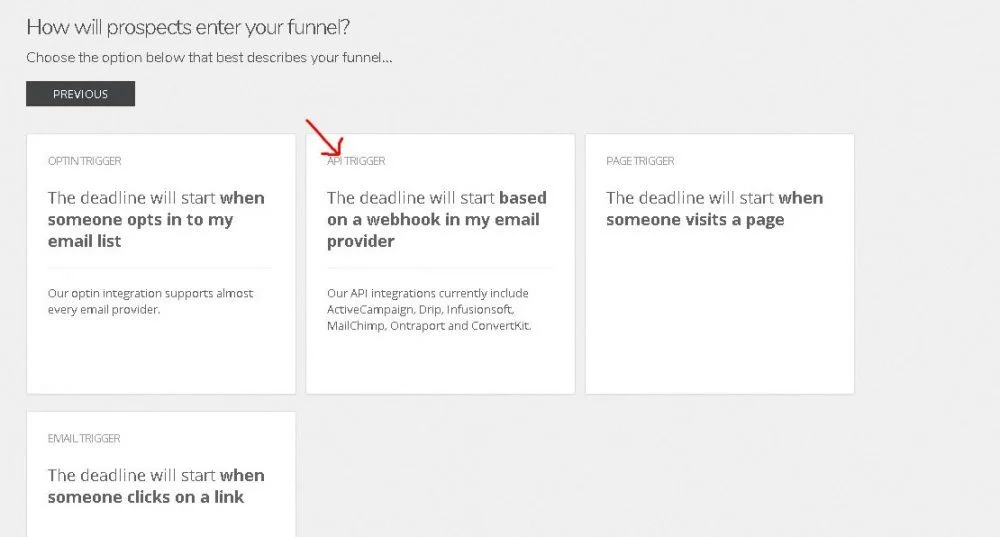
Your next crucial task involves setting up a corresponding trigger within your Email Service Provider and creating a matching API trigger in Deadline Funnel to establish the necessary connection between these platforms.
This represents a pivotal step in your funnel creation process, requiring you to establish a specific trigger action within your email service provider that will communicate directly with Deadline Funnel. This crucial trigger effectively signals to Deadline Funnel that a subscriber should now enter your promotional funnel, activating the countdown timer.
Allow me to demonstrate my recommended configuration approach using ConvertKit. My system utilizes two distinct sequences within ConvertKit – an ‘Educational Sequence’ comprising 3-4 value-driven emails delivered after someone joins my list, followed by a ‘Sales Sequence’ containing 4 targeted promotional emails specifically about the course offering.
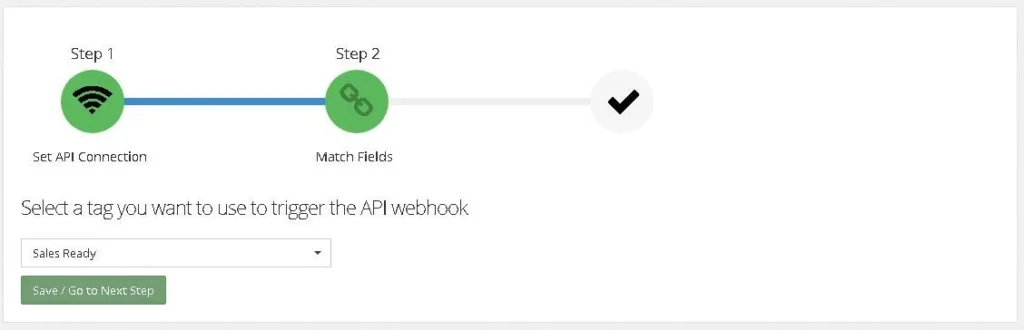
Within ConvertKit, I’ve implemented an Automation Rule that automatically assigns the tag ‘Sales Ready’ to subscribers upon completion of the ‘Educational Sequence’ and simultaneously enrolls them in the subsequent ‘Sales Sequence’.
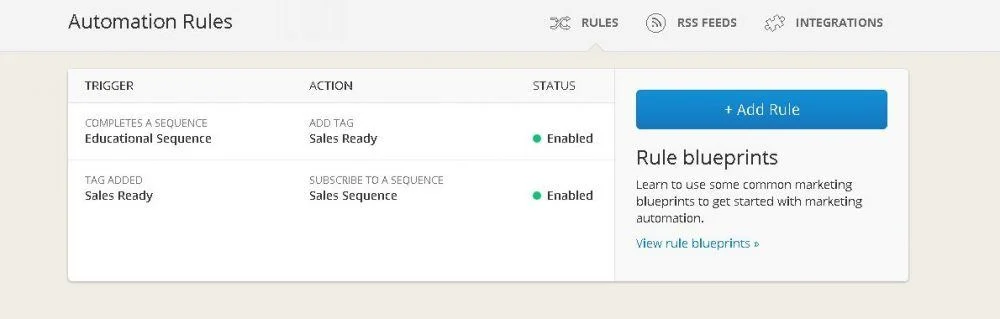
This ‘Sales Ready’ tag serves as the precise moment when the deadline countdown activates for your subscriber, with this critical timing information being transmitted directly to Deadline Funnel.
For those utilizing MailChimp, your trigger mechanism will instead be based on the specific moment when a user joins a designated list.
Now, let me walk you through establishing the API connection between Deadline Funnel and your email marketing platform.
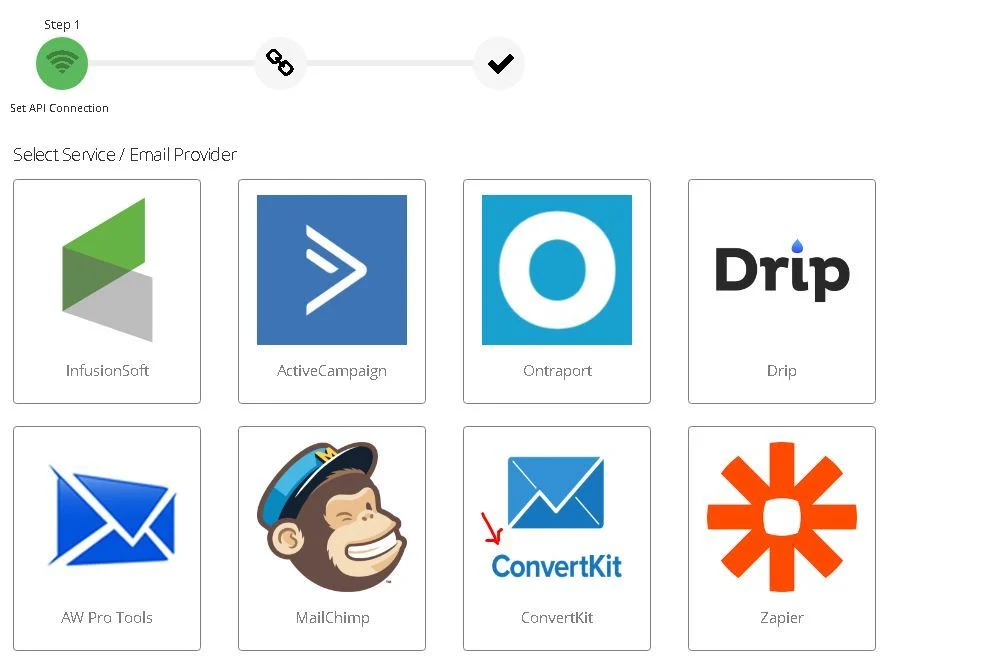
Navigate to your Deadline Funnel dashboard, then proceed to Triggers >> API Integration and select your specific email service provider from the available options. Should your particular email platform not appear in the provided list, you’ll need to implement the connection using Zapier as an intermediary service.
After selecting your email service provider (ESP), you’ll need to retrieve the appropriate API credentials from your ESP account dashboard.
For ConvertKit specifically, navigate to Account >> Account Info within your ConvertKit dashboard. This section contains both your unique API Key and API Secret – you’ll need to capture both these authentication credentials and enter them into the corresponding fields in Deadline Funnel to establish the secure connection.
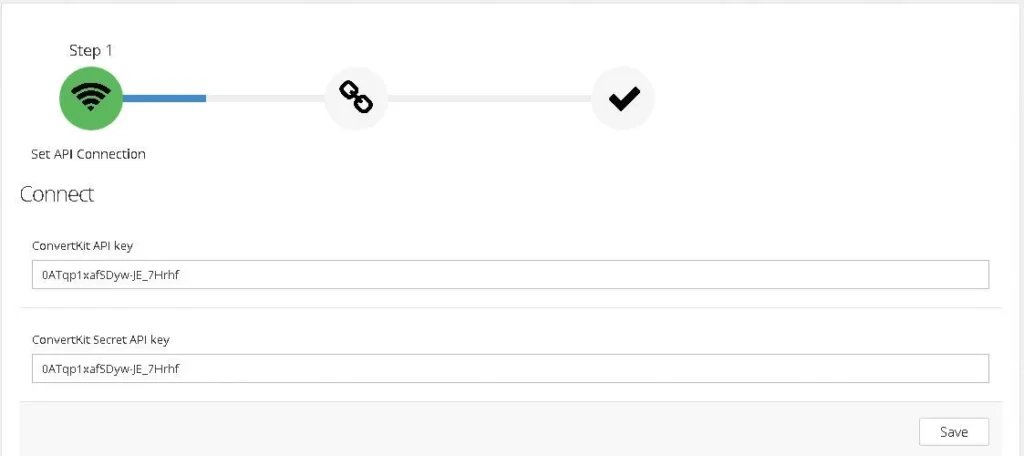
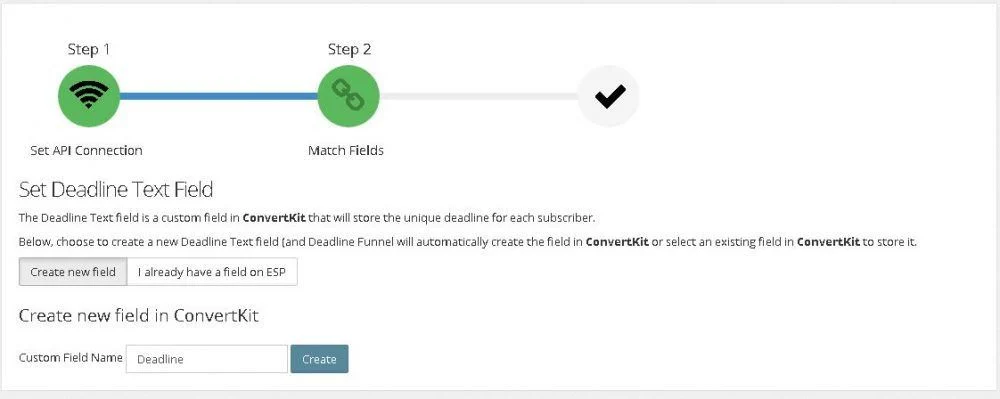
You’ve now successfully established the integration between ConvertKit and Deadline Funnel, and you should see a confirmation message on the following screen. To verify the functionality of your integration, simply click the ‘Test’ button located at the bottom of the page.

If you’re utilizing an alternative email marketing platform, you can access comprehensive integration instructions for connecting it with Deadline Funnel here.
Pro Tip: Ensure your tag is properly configured within ConvertKit and confirm it’s the same tag that initiates your sales sequence (campaign emails).
Additionally, it’s crucial that your campaign emails are delivered to subscribers within their designated deadline window (72 hours in our example). We’ll address this critical timing synchronization in more detail later in this guide.
Navigate to Countdowns >> View All and modify the campaign you previously established. Select the ‘Funnel Steps’ option:
At this point, you’ll notice that a countdown timer display rule has already been automatically generated based on the configuration details we provided during the campaign creation process.
Deadline Funnel offers several distinct timer variations that you can implement across your sales pages:
You also have the flexibility to display countdown timers throughout other sections of your website without implementing the redirection behavior after deadline expiration.
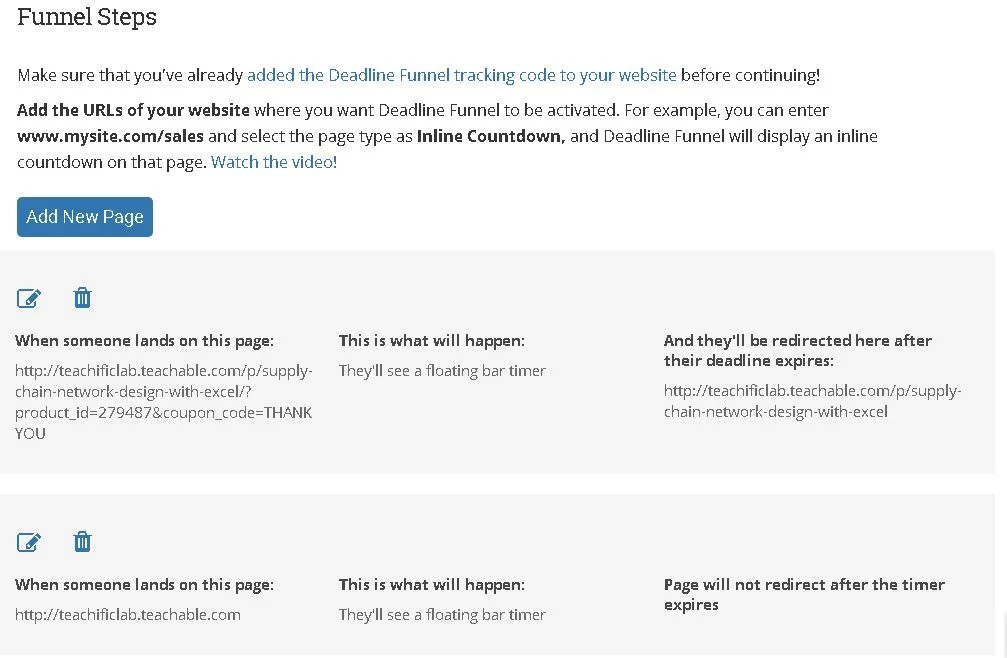
In my implementation, I’ve strategically placed one countdown timer on my offer page that will automatically redirect visitors to my standard sales page once the promotional period concludes.
Additionally, I’ve incorporated another timer on my homepage for enhanced visibility. The homepage timer, however, functions differently—rather than redirecting visitors, this timer simply disappears after the deadline passes.
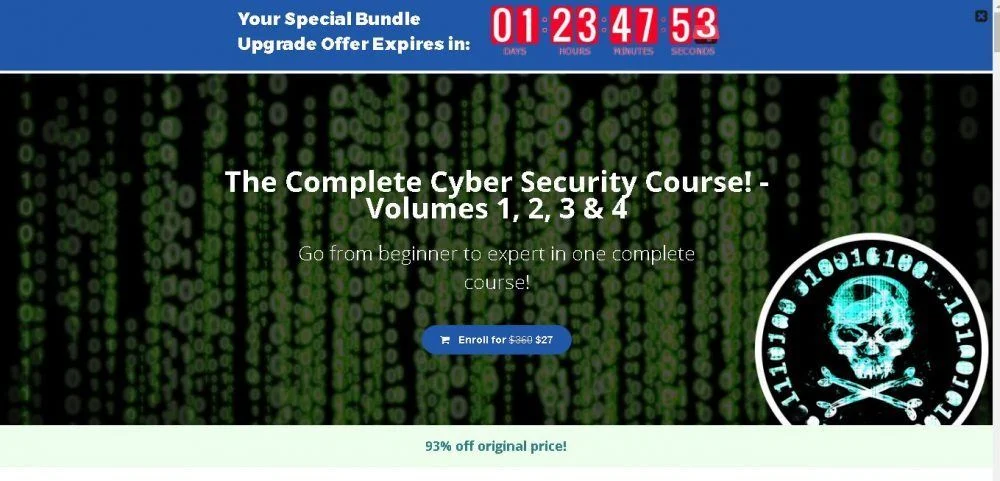
Below is an example of how a floating timer will appear on your sales page:
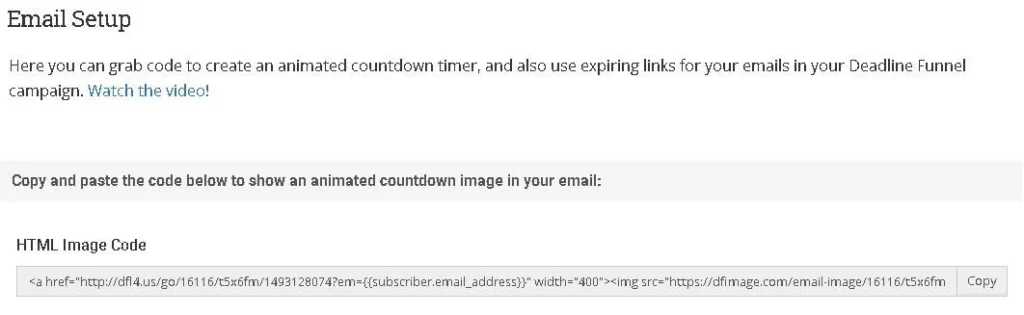
With your sales page countdown timer now successfully implemented, let’s explore how to incorporate a dynamic timer within your email communications.
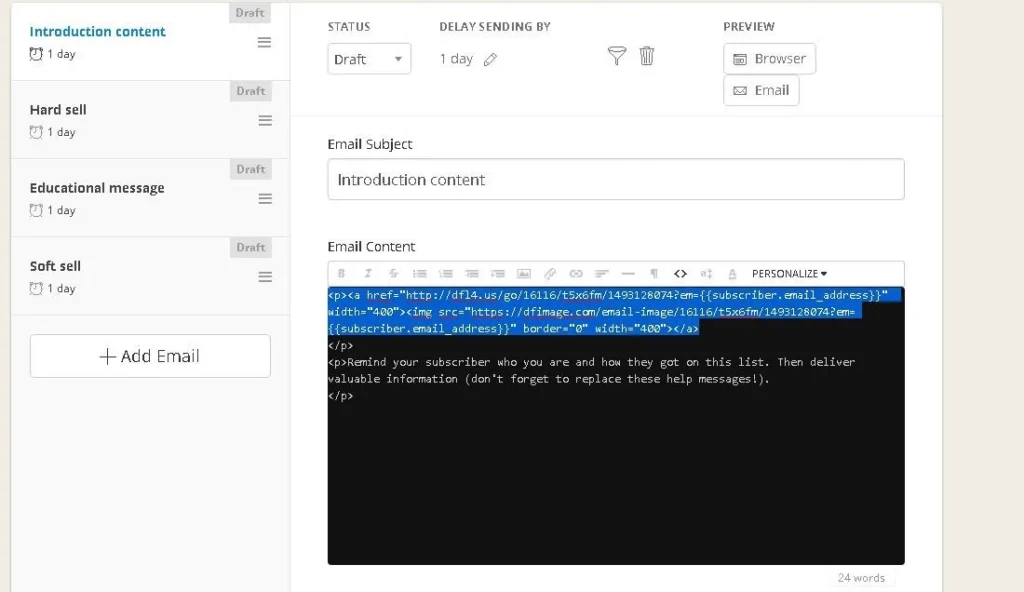
Navigate to the ‘3. Email Setup’ section and locate the HTML image code for copying to your email template.
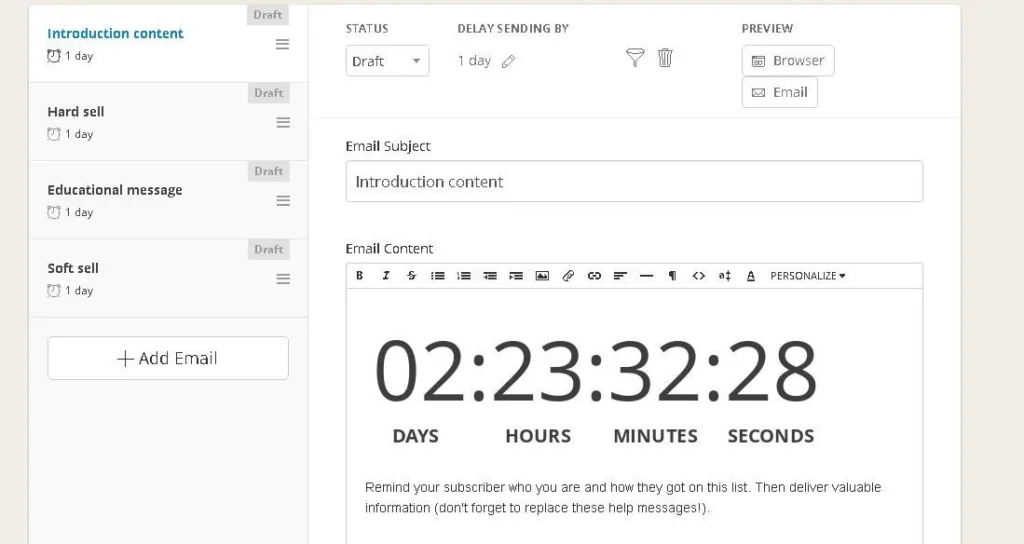
Here’s a preview of how your email will appear with the countdown timer integrated:
For your email campaigns, consider implementing time-sensitive links instead of standard sales page URLs. These time-sensitive links are specialized Deadline Funnel connections that direct visitors to your offer page before the deadline expires, then automatically redirect them to your regular sales page once the promotional period ends.
After navigating to the ‘Email Setup’ section, you’ll find the ‘Time-Sensitive Link’ option at the bottom of the page. Simply incorporate these links into your email communications as you would with any standard hyperlink.
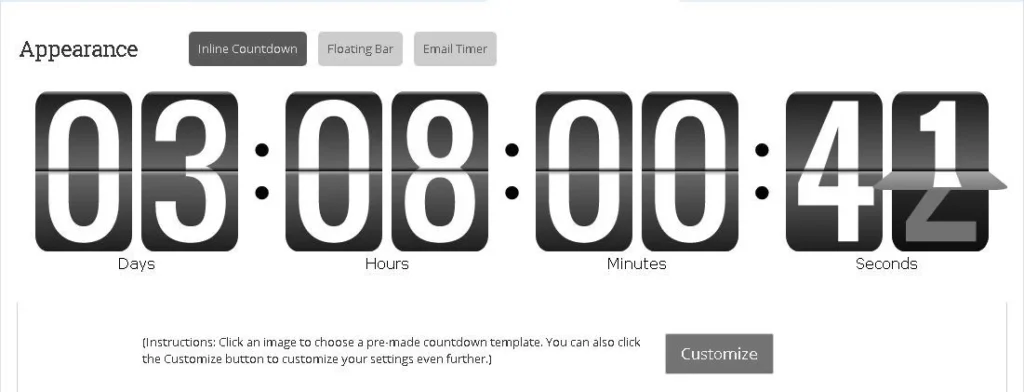
Before launching your funnel, one final customization step remains. You may wish to personalize the visual elements and appearance of your countdown timers across both your sales pages and email communications.
To accomplish this, navigate to the ‘4. Appearance’ section where you’ll have full control over modifying the dimensions, color scheme, and overall design aesthetic for all timer variations.
I’ll entrust this design customization phase to you, and once you’ve finalized the visual elements, proceed with testing your complete funnel implementation.
To thoroughly evaluate your funnel’s functionality, please consult this comprehensive testing guide provided by Deadline Funnel.
For additional verification, Deadline Funnel strongly suggests arranging a consultation with their technical specialists to review your configuration. Schedule your configuration review session with the Deadline Funnel team here.
As a final verification step, navigate back to the ‘1. Quick Start Guide’ section and methodically confirm that you’ve successfully completed each required implementation phase.
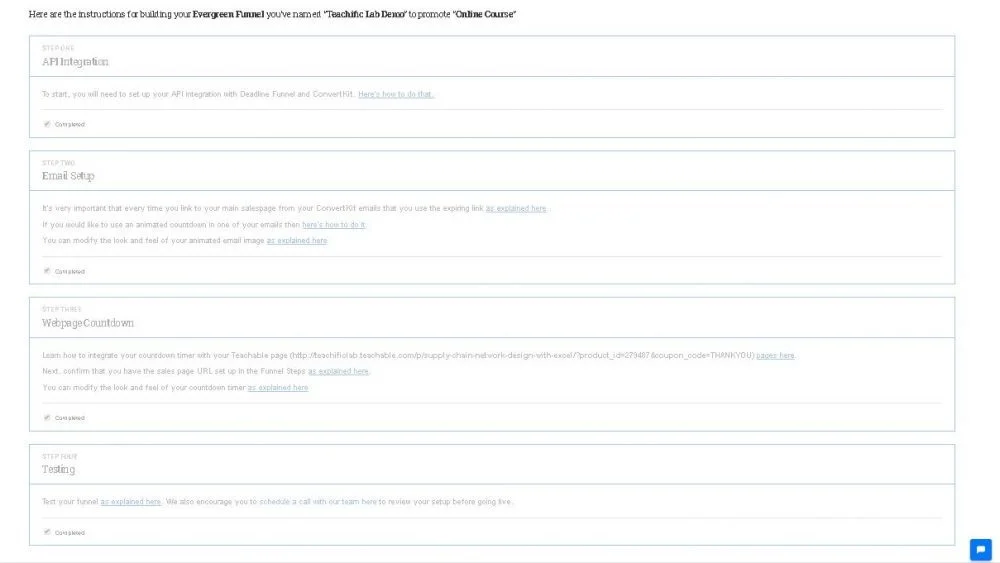
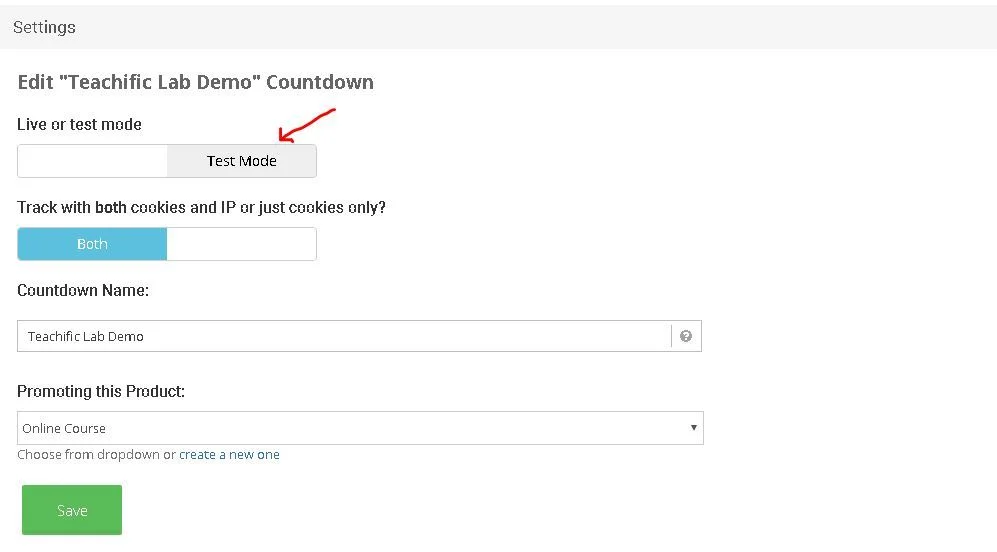
You’re now ready to activate your funnel by accessing the ‘Settings’ section.
I’m thrilled you asked! The possibilities with Deadline Funnel are truly extensive, enabling you to design numerous variations of evergreen sales funnels.
Consider offering an exclusive limited-time discount to purchasers of your entry-level courses, encouraging them to upgrade to your premium educational offerings.
Alternatively, extend a special promotional rate to prospects who initially declined your courses during your first promotional period.
Developing any type of evergreen sales funnel follows the fundamental process outlined in this comprehensive guide. Your primary decisions involve three key elements – determining your specific offer, establishing your activation trigger, and setting an appropriate deadline timeframe.
Once these strategic decisions are finalized, simply configure all necessary elements within Deadline Funnel following the detailed instructions provided throughout this tutorial.
Should you have any inquiries regarding implementing evergreen sales funnels for your digital education products, please share your questions in the comment section below.

Daniel NicFounder, SellingOnliceCoursesGuide.comis an entrepreneur and digital education specialist who founded sellingonlinecoursesguide.com, a platform dedicated to helping creators and educators successfully navigate the online course marketplace. Through his website, he shares insights and strategies for developing, marketing, and monetizing online educational content. His work focuses on empowering course creators to build sustainable online businesses while effectively sharing their knowledge with students worldwide.
Daniel Nic is an entrepreneur and digital education specialist who founded sellingonlinecoursesguide.com, a platform dedicated to helping creators and educators successfully navigate the online course marketplace. Through his website, he shares insights and strategies for developing, marketing, and monetizing online educational content. His work focuses on empowering course creators to build sustainable online businesses while effectively sharing their knowledge with students worldwide.

We respect your privacy and will never spam you.


