We earn a commission from partner links on this site. This doesn’t affect our opinions or evaluations.
Jul 20, 2023
Thinkific stands out as a premier choice for developing and distributing digital educational content, and it incorporates a special function known as Communities, intended to help you establish an engaging collective for your learners.
Nevertheless, is employing Thinkific’s community function the most suitable approach for your needs? Does it furnish the essential instruments you require? What steps are involved in its initial configuration?
Throughout this detailed manual, we will navigate you through the entire spectrum of functionalities offered by Thinkific Communities and instruct you with a clear, progressive method on how to commence using it.
Whether you are already a Thinkific subscriber or you are currently in the process of assessing the platform, we sincerely anticipate that this manual will be of significant value to you.

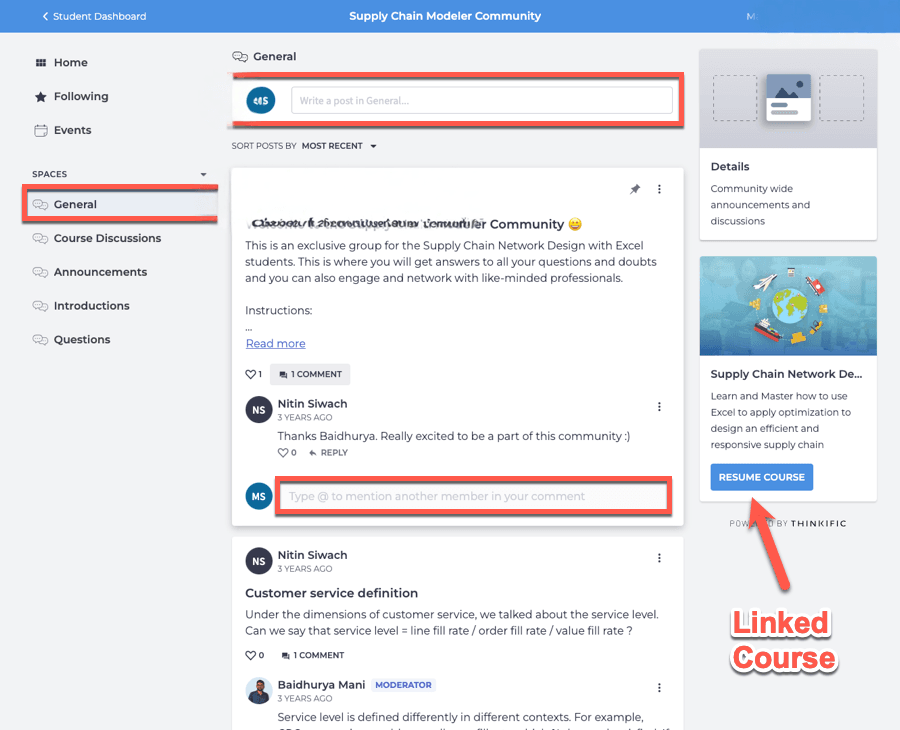
Inside your community space, you can establish conversation areas where both you and your participants can share posts and interact through reactions, replies, and subscriptions. This environment also enables you to organize events designed to captivate community participants.
Thinkific offers remarkable adaptability in how you utilize these community capabilities. For instance, you can leverage it to establish an educational community that enhances your digital course, or you might offer paid membership to a dedicated community platform.
Importantly, the Communities functionality is accessible across every subscription tier, even the no-cost option. However, your specific plan determines how many distinct communities you’re permitted to develop.
With this fundamental grasp of Thinkific Communities established, let’s explore the comprehensive range of capabilities it delivers.
In this segment, we’ll examine the capabilities, highlighting the advantages and limitations, of Thinkific Communities.
Within Thinkific, your community is arranged into Spaces. These Spaces function as conversation hubs where both you and your participants can generate posts and engage in discussions.
Spaces offer versatile application possibilities. For instance, if you maintain a single support community serving all your courses, you might establish a dedicated space for each individual course. Alternatively, when developing a Thinkific membership site, you could create distinct spaces addressing various conversation themes.
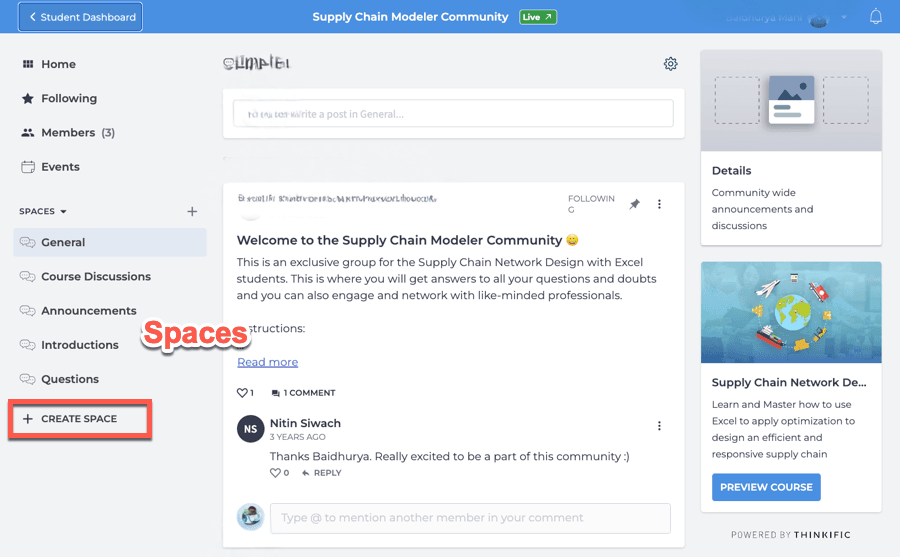
You have the ability to connect a space directly to a particular course, facilitating seamless movement for your members between instructional content and community interaction.
While the Spaces feature delivers valuable functionality, it does present several constraints:
These limitations restrict your options for organizing your community effectively. For instance, you cannot establish a community where some Spaces remain openly accessible while others are exclusively available to subscribed members.
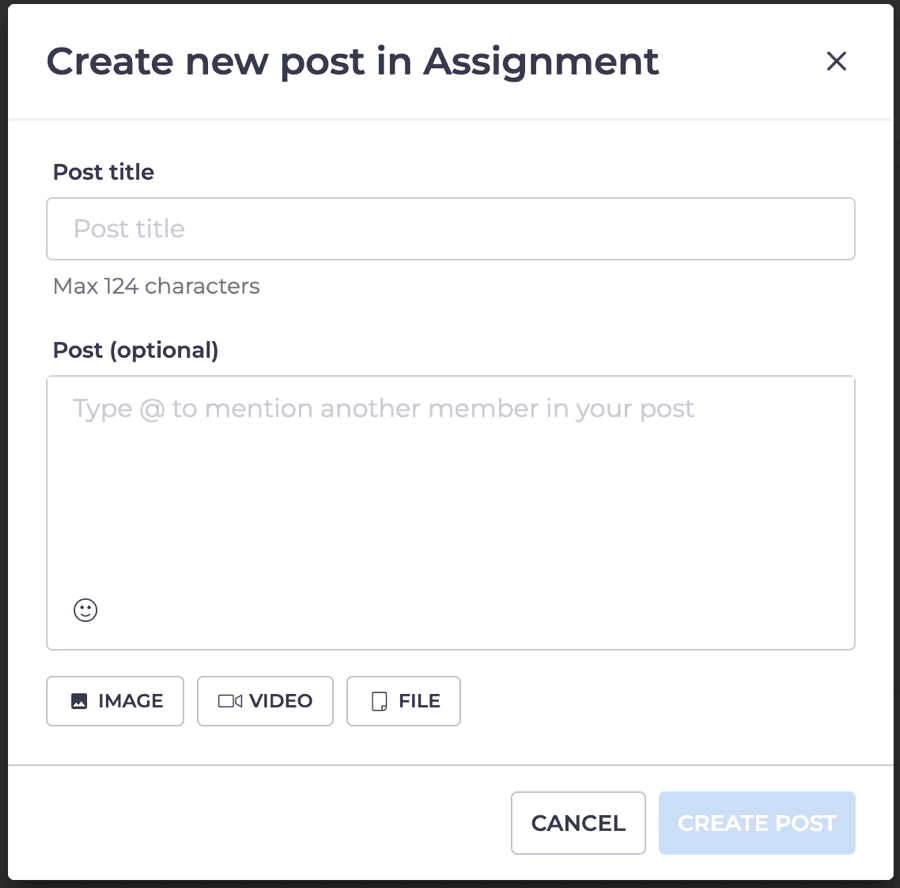
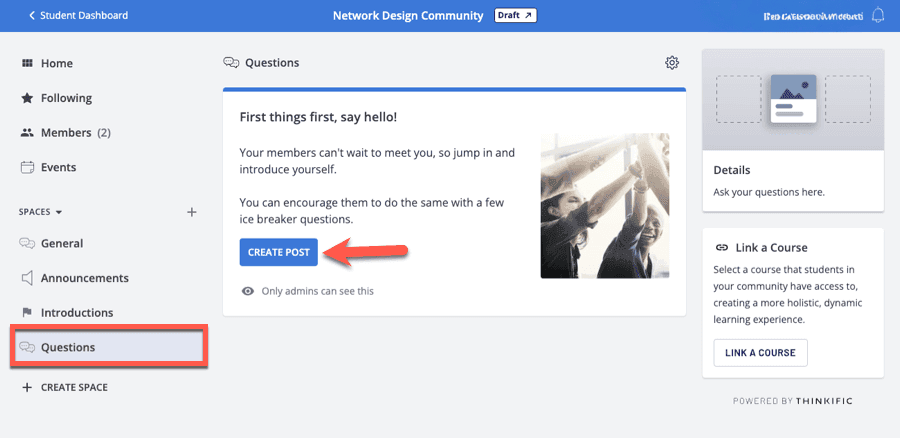
The fundamental component of any community platform is the suite of tools it provides for content creation and participant engagement. Within Thinkific Communities, your content creation is limited to posts. The posting interface allows you to include a headline and message text. You can enhance your posts by incorporating an image, embedding a YouTube/Vimeo video, or providing a downloadable resource.
Nevertheless, Thinkific lacks several essential features:
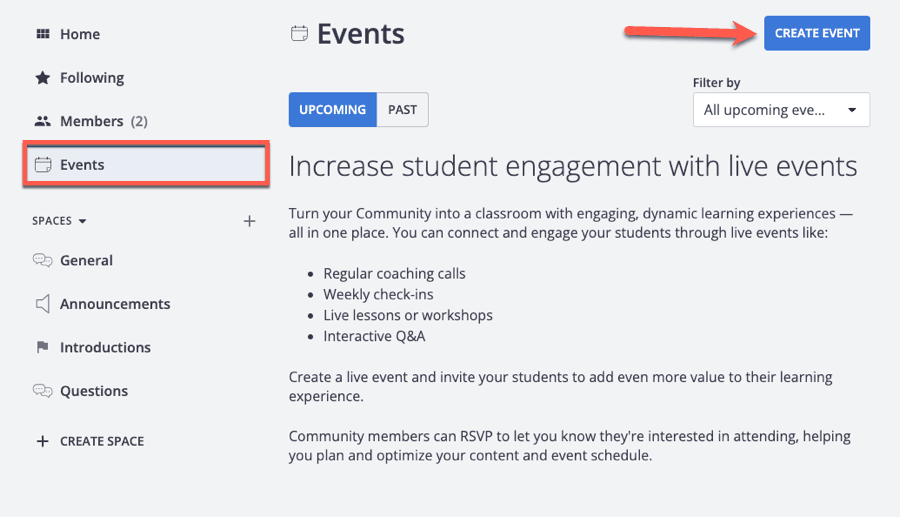
Beyond standard posts, Thinkific Communities enables you to schedule gatherings within your community environment. This events functionality accommodates both physical and virtual gatherings, with the latter easily integrated with video conferencing tools such as Google Meet or Zoom.
Unfortunately, the platform still doesn’t accommodate regularly scheduled events or built-in livestreaming capabilities.
Regarding interpersonal communication, Thinkific Communities demonstrates significant limitations.
Members cannot exchange confidential messages with one another, leaving public posts as the sole communication method. Additionally, the platform doesn’t support group conversation channels, a functionality many online communities consider essential.
Concerning alerts, community participants can receive updates via email or through the mobile application.
Unfortunately, participants have virtually no flexibility regarding their notification preferences. They face an all-or-nothing choice—either receive notifications from every community or disable them entirely. The system lacks options for customizing alerts or selecting specific communities or spaces from which to receive updates.
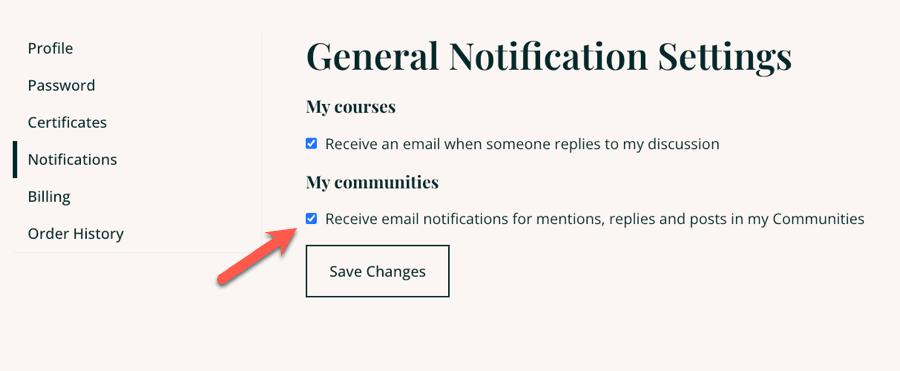
While participants can opt to follow specific posts and receive corresponding updates, the overall alert system requires substantial enhancement.
Effective community administration begins with participant enrollment, and Thinkific provides valuable capabilities for regulating community access. You can configure community availability through several approaches:
Furthermore, you retain the ability to manually incorporate participants into a community through your administrative interface.
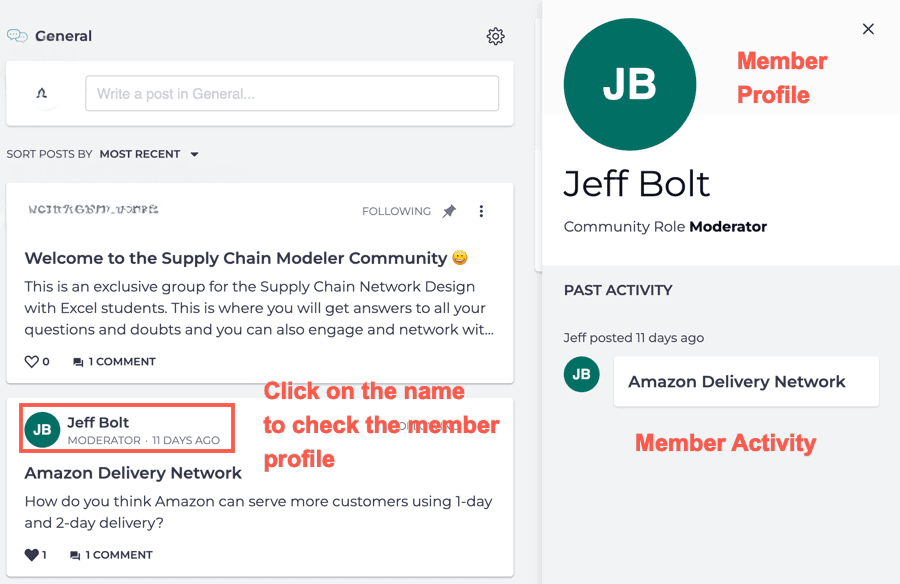
Within a community environment, participants maintain profiles where they can include their fundamental information, though no centralized participant directory exists for browsing profiles. The sole method for viewing anyone’s profile involves clicking their name when it appears alongside their post or comment contributions.
Effective community oversight requires designated supervisors and administrative features. Be aware that community supervision is exclusively available to Thinkific administrators, who possess the ability to modify, remove, or highlight discussions. The platform doesn’t offer a dedicated supervisor position, nor does it provide members with options to flag concerning content.
While adding and organizing participants in a Thinkific community is straightforward, the functionality beyond this remains somewhat restricted.
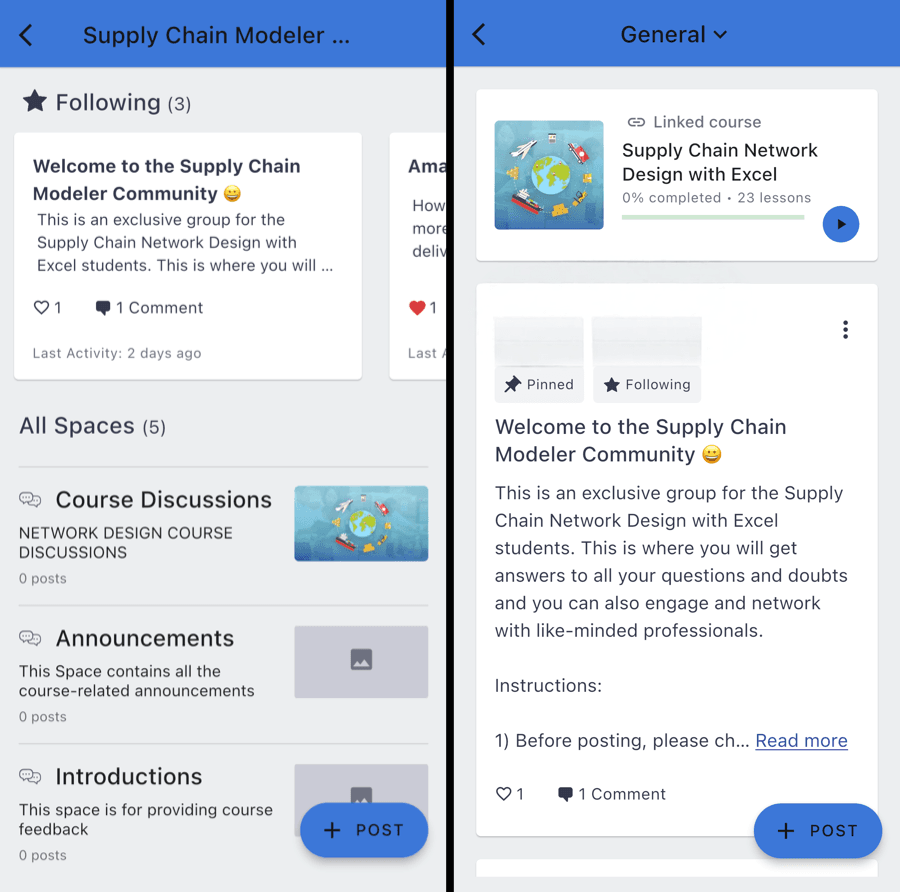
Thinkific creates seamless access for members exploring their communities. Every community a learner participates in is displayed within the communities area of their learner portal. Members can navigate to their desired community with just a single selection.
Furthermore, when you connect a course with a particular community environment, the course interface will incorporate a direct pathway to that environment.

The navigation interface within a Thinkific community environment features an intuitive design worth highlighting. A convenient navigation panel displays all available community areas, allowing your learners to access specific sections with a simple click.
Once inside a particular area, participants will discover options to generate new discussion threads or engage with existing content through reactions and responses.
Although the community interface delivers a satisfactory user experience, several crucial functionalities remain absent, including capabilities to search through, filter, and organize discussions.
In summary, Thinkific’s community development tools function adequately for establishing fundamental community spaces. Currently, they cannot rival the comprehensive functionality provided by dedicated community platforms (like Circle) and are primarily suitable for creating support communities complementary to course offerings.
Thinkific Communities lacks native member directory functionality. Fortunately, an extension called Community Box is available through the Thinkific marketplace that enables member directory creation.
This tool seamlessly connects with Thinkific’s site construction system, allowing you to incorporate a participant listing section on any webpage. Additional capabilities include:
Remember that this solution provides directory functionality exclusively and doesn’t support private communications or group messaging features.
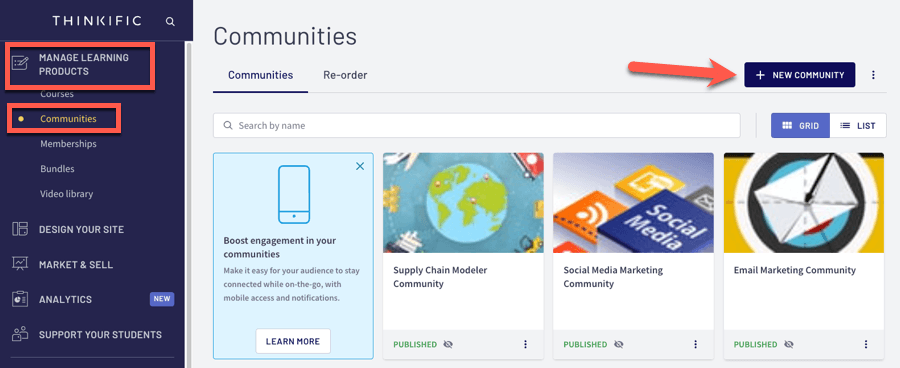
Establishing a Thinkific community requires minimal effort. Simply access your administrative portal and navigate to Manage Learning Products → Communities from the navigation panel.
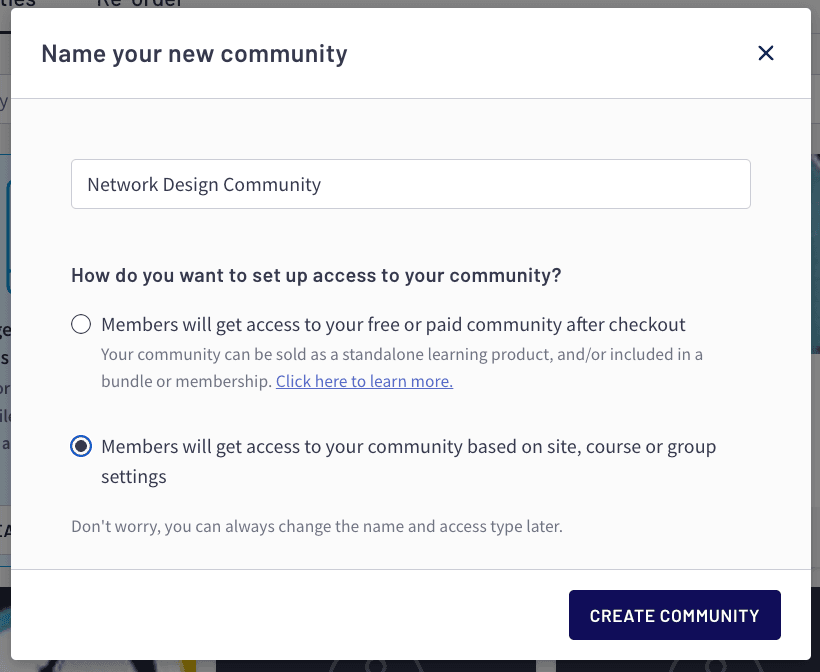
This screen displays an overview of all current communities within your educational platform alongside an option for creating additional ones. Select the + New Community button located in the upper-right section. This action launches a dialogue where you can designate a title for your community and establish participation guidelines.
You’ll immediately be directed to your freshly generated community environment. Within this interface, you can organize discussion areas, initiate conversations, schedule gatherings, and explore additional features.
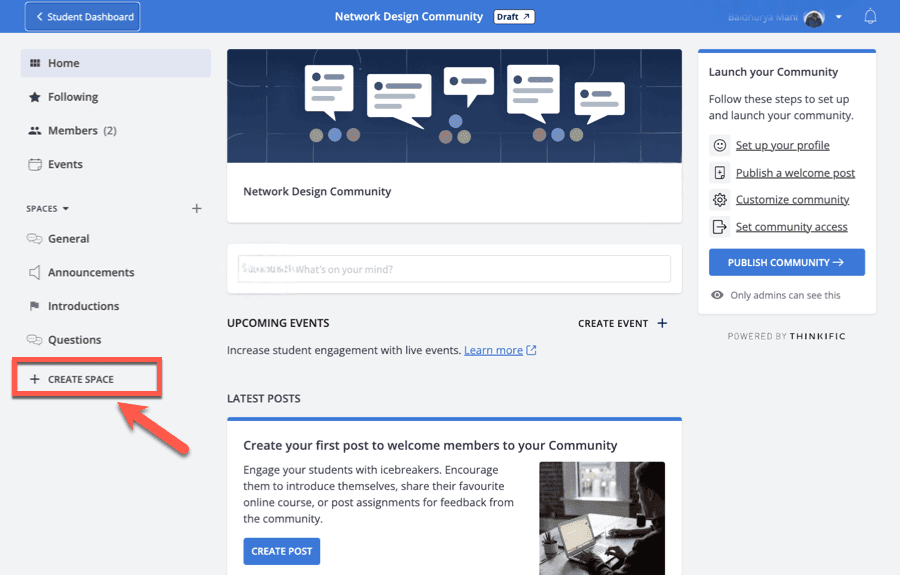
Thinkific automatically generates several predefined areas within your community environment. To establish an additional area, select Create Space from the navigation panel.
You’ll immediately be directed to your freshly generated community environment. Within this interface, you can organize discussion areas, initiate conversations, schedule gatherings, and explore additional features.
Thinkific automatically generates several predefined areas within your community environment. To establish an additional area, select Create Space from the navigation panel.
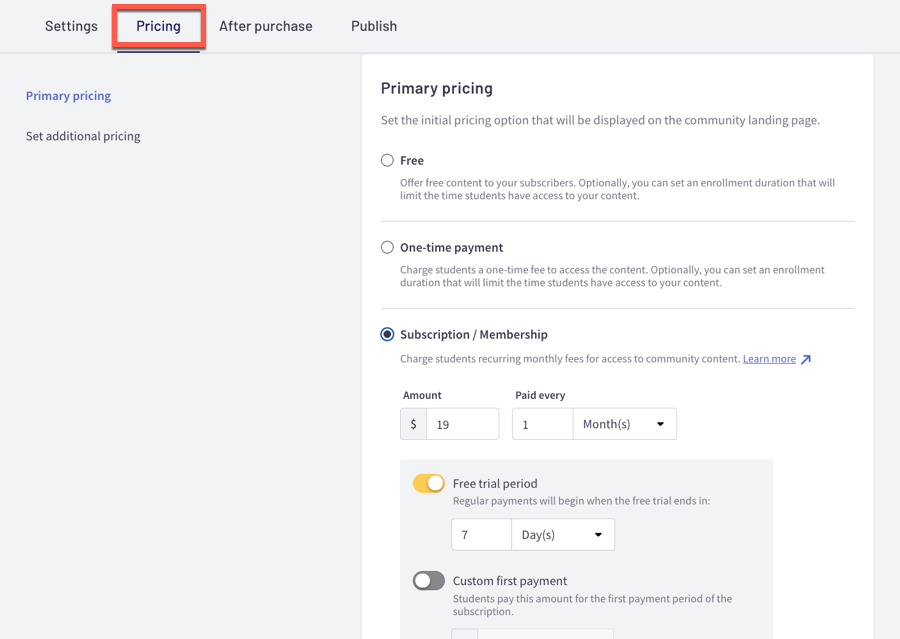
This configuration screen presents several customization possibilities:
Implement these configurations according to your strategic vision and select Save to apply your changes.
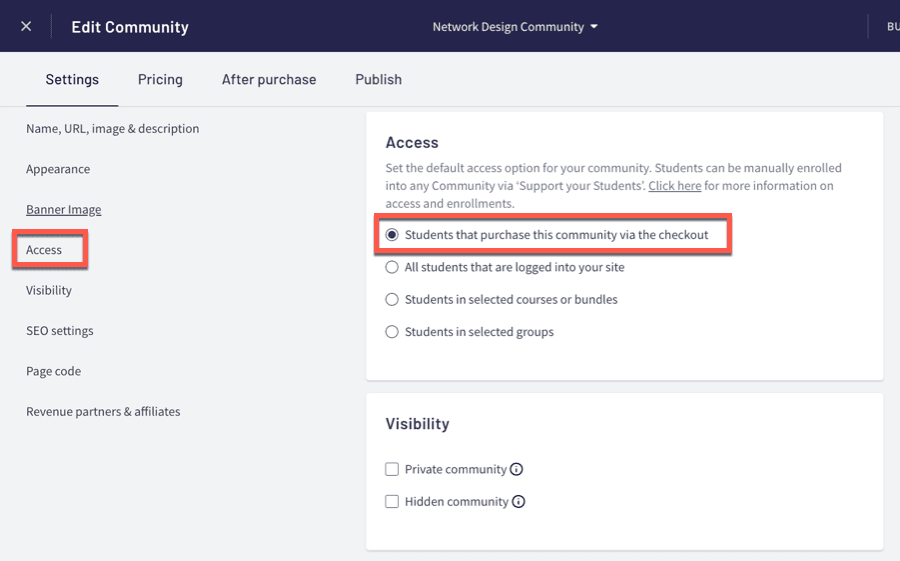
If your business model includes offering this community as an independent product, you’ll first need to adjust the accessibility configuration. Navigate to the Access section and choose the initial option: Students that purchase this community via the checkout.
Additionally, your community includes a dedicated promotional webpage. To personalize this presentation, select the Build Landing Page option, which directs you to the visual editor interface where you can refine the design elements.
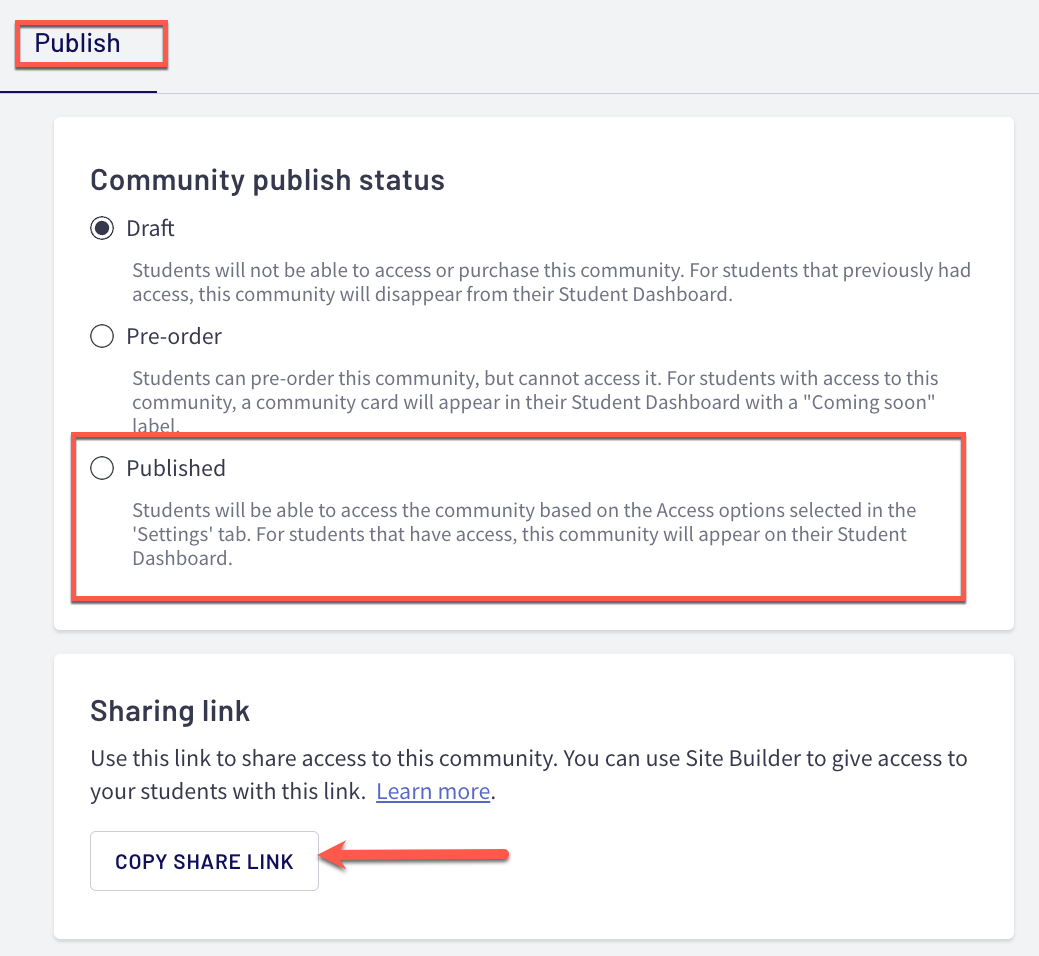
After completing your customizations, navigate to the Publish tab and update the visibility status to Published. You can then duplicate your unique URL and begin welcoming participants to your community environment.
Evidently, Thinkific’s community development features offer fundamental functionality when contrasted with specialized community management systems. However, for educators seeking a straightforward environment to support learners and enhance their educational offerings, this solution proves perfectly adequate.
To establish your Thinkific community environment, simply follow the outlined procedure above, and you’ll have your space operational with minimal delay.
If you haven’t yet adopted the Thinkific platform, consider initiating their complimentary evaluation period to begin crafting your community space.
We hope you found this article helpful. If you have any questions, leave them in the comments below.
Yes, Thinkific has a feature called Communities that allows users to build and manage their own online communities. You can use it to create course/membership communities or build a standalone community as well.
Creating a community in Thinkific is simple. From your admin dashboard, go to Manage Learning Products → Communities and click the New Community button at the top. Enter a name for your community and click the Create button.
Spaces are organized areas within your community where users can post, comment, and engage with content. You can create multiple spaces in a community, and each space can have its own settings.
You can live stream on Thinkific using Zoom or YouTube Live, but there are no built-in streaming features.
Communities are available in all plans, including the free plan. However, the number of communities you can create depends on your plan.

Daniel NicFounder, SellingOnliceCoursesGuide.comis an entrepreneur and digital education specialist who founded sellingonlinecoursesguide.com, a platform dedicated to helping creators and educators successfully navigate the online course marketplace. Through his website, he shares insights and strategies for developing, marketing, and monetizing online educational content. His work focuses on empowering course creators to build sustainable online businesses while effectively sharing their knowledge with students worldwide.
Daniel Nic is an entrepreneur and digital education specialist who founded sellingonlinecoursesguide.com, a platform dedicated to helping creators and educators successfully navigate the online course marketplace. Through his website, he shares insights and strategies for developing, marketing, and monetizing online educational content. His work focuses on empowering course creators to build sustainable online businesses while effectively sharing their knowledge with students worldwide.

We respect your privacy and will never spam you.


