We earn a commission from partner links on this site. This doesn’t affect our opinions or evaluations.
Updated on
You’ve selected Thinkific as your membership site platform and now you’re seeking direction to move forward.
Rest assured, this comprehensive walkthrough will guide you through creating your Thinkific membership site with detailed instructions.
We’ll explore all the essential membership features the platform offers and demonstrate how to implement them effectively—creating an exceptional experience for your members while managing your site with maximum efficiency.
Before diving into the practical tutorial section, let’s examine why Thinkific stands out as an excellent choice for hosting your membership community.
Thinkific delivers remarkable value for online course creation and stands out as a premier solution for membership sites as well.
The platform provides every tool necessary to develop an impressive membership community with speed and simplicity. Here are several standout Thinkific membership features we particularly appreciate:
Thinkific ranks among the top online course creation platforms available today.
To begin with, you can develop diverse lesson formats, including video, audio, text, PDF, and file-based content options. Thinkific also fully supports live learning sessions through its seamless Zoom integration.
Furthermore, the platform delivers essential learning enhancement and engagement features, such as interactive quizzes, comprehensive assignments, professional certificates, scheduled content dripping, prerequisite lesson structuring, and more.
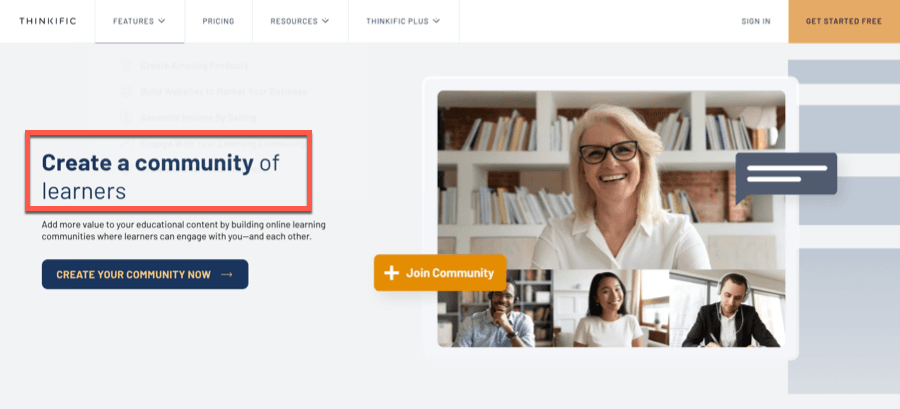
A significant advantage of choosing Thinkific for your membership site is its integrated community feature.
This functionality enables you to establish a dedicated membership community where participants can actively engage in conversations with fellow members. You can structure your community into organized spaces, create compelling discussion posts, and host dynamic live events.
An additional advantage of selecting Thinkific for your membership site is the mobile accessibility it provides through Thinkific’s mobile applications.
The application features an intuitive interface allowing your members to view course content, engage in community discussions, and receive instant updates about new activities through push notification alerts.
Furthermore, you have the option to implement custom-branded membership applications for a more personalized experience.
Thinkific offers a valuable membership feature that enables creation of exclusive member-only pages. This functionality allows you to develop custom website sections accessible exclusively to paying members.
This capability proves especially valuable when you wish to deliver standalone premium content without developing comprehensive course structures.
Thinkific particularly excels with its versatile pricing structure options.
Specifically, when marketing access to your products through a subscription model, you can provide highly customizable payment plans to your customers.
Another standout Thinkific feature is its dedicated application marketplace, making it the only hosted membership solution offering this comprehensive functionality.
While Thinkific’s core features are impressive on their own, you can significantly expand the platform’s capabilities through specialized applications.
The Thinkific App Marketplace contains over 100 applications, with dozens specifically designed to enhance your membership website experience.
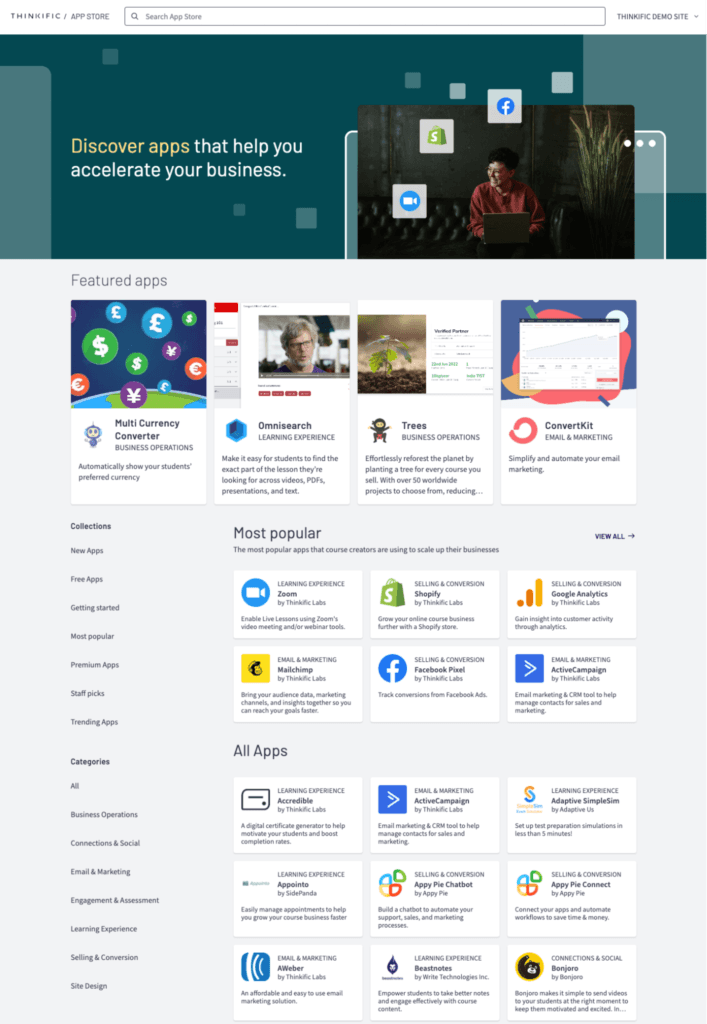
For instance, an application called Community Box enables you to establish a comprehensive directory of your enrolled members. Similarly, another innovative application named Flix can completely transform the standard student dashboard into an engaging, Netflix-inspired viewing experience.
We’ve provided a concise overview explaining why Thinkific stands as an exceptional choice for membership sites. However, if you’re interested in examining the platform more thoroughly, explore our comprehensive Thinkific Review for detailed insights.
Now, let’s proceed with the step-by-step process for establishing your Thinkific membership platform.
A fundamental capability for developing any membership site is the ability to package and market multiple products as a unified offering. Thinkific addresses this need through its dedicated Memberships feature.
If you already have an active Thinkific subscription, simply access your account to begin the process. For new users, you’ll need to register for a complimentary trial first.
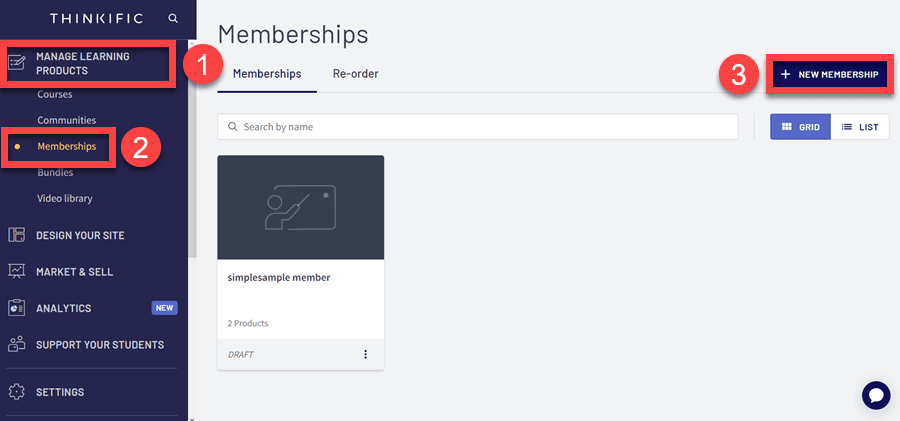
Once logged in, navigate to the Memberships section located under Manage Your Learning Products within your administrative dashboard, then select the New Membership button to proceed.
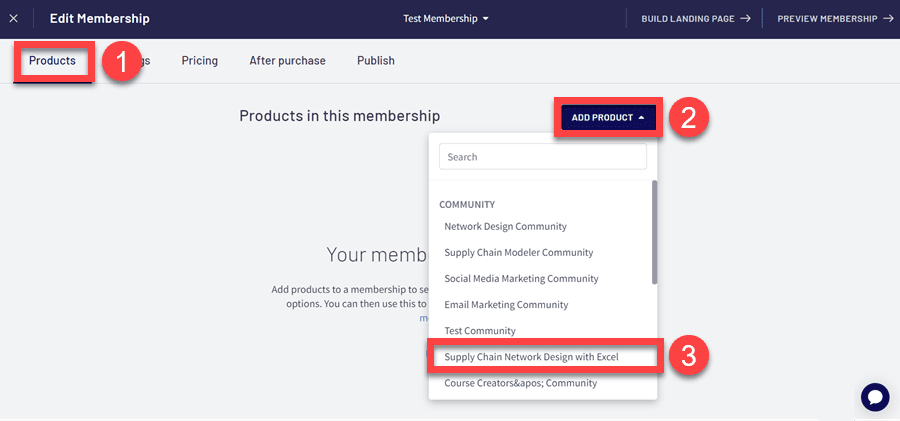
After assigning a name to your membership and clicking the Create Membership button, Thinkific will automatically direct you to the products section, where you can select the specific courses to incorporate into your membership offering.
Select Add Product and then choose the relevant courses and community elements you wish to include within your membership package.
We haven’t detailed the process of course creation within Thinkific in this guide, as we’ve developed a specialized resource for that purpose. If you’re interested in learning more about this process, please review our comprehensive Thinkific instructional guide.
Beyond courses, you can develop exclusive member-only pages. As previously mentioned, this functionality allows you to deliver independent educational content rather than constructing complete online courses.
To establish such a page, navigate to Design Your Site -> Site Pages and select + New Custom Page. Then, provide a descriptive page title and click the Create Page button to proceed.

Thinkific will then direct you to the intuitive page builder interface, where you can craft your page design and incorporate various content elements.
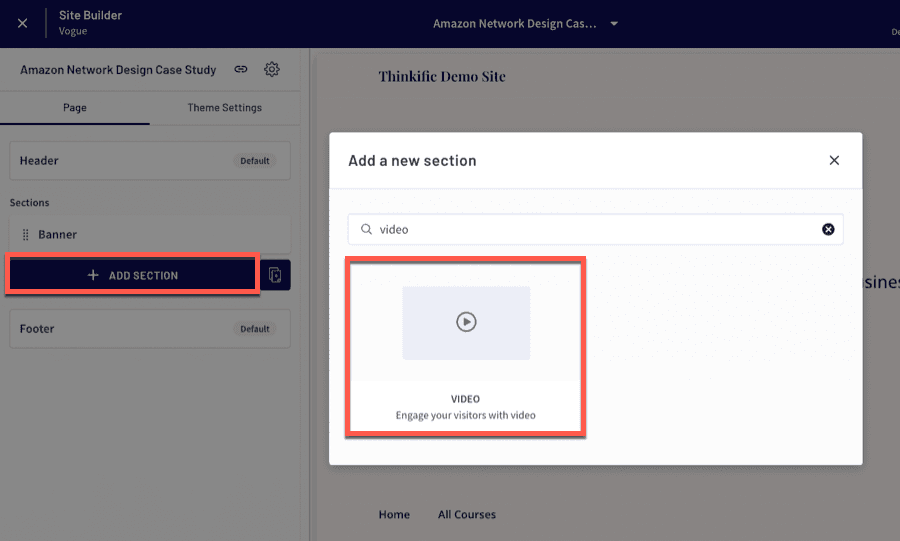
To integrate video content, select + Add Section and choose the Video section option. This will enable you to upload and embed video content directly within your custom page section.
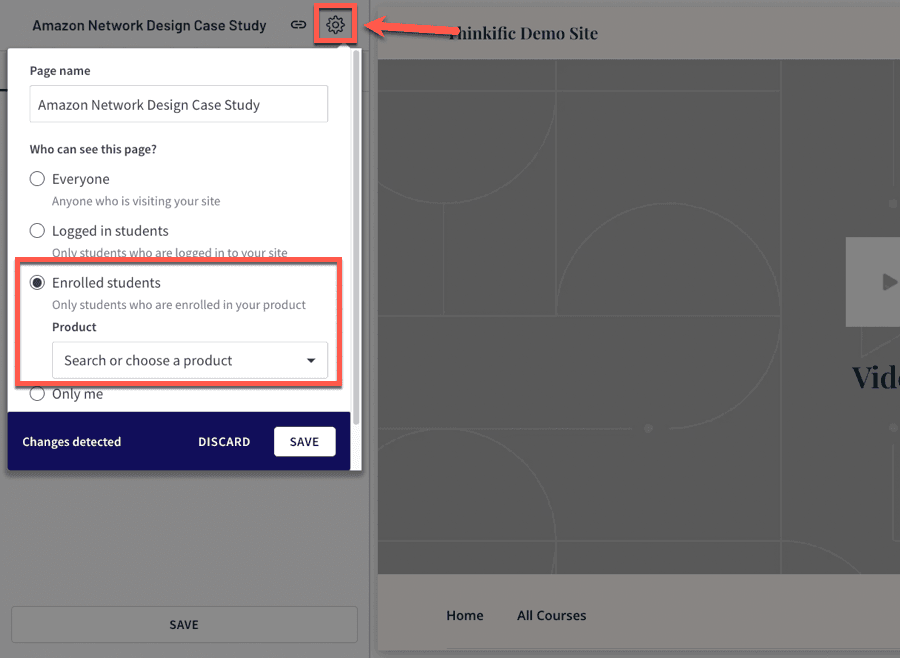
After populating your page with content, you’ll need to adjust the accessibility settings.
To accomplish this, simply click the **gear icon** located in the upper left corner of your screen and select the *Enrolled Students* option. Then, choose the membership plan you established earlier in this chapter.
That completes the process. From this point forward, only members of your program will have the ability to view this page.
Although you can continuously incorporate fresh material into your membership courses, this approach provides an excellent method for delivering standalone content within your membership platform.
Now, let’s proceed to the next phase where we’ll guide you through the process of developing your membership community.
A vibrant online community represents one of the most crucial elements of a membership site. This segment will guide you through the process of establishing a community within Thinkific.
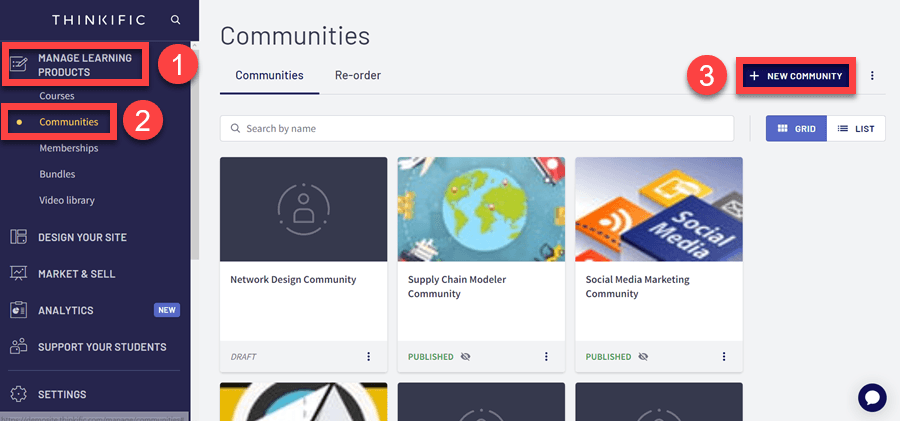
To initiate your community development, navigate to *Manage Learning Products* in your administrative dashboard, choose *Communities,* and then select *+ New Community.*
Thinkific will prompt you to designate a name for your community and craft a concise description.
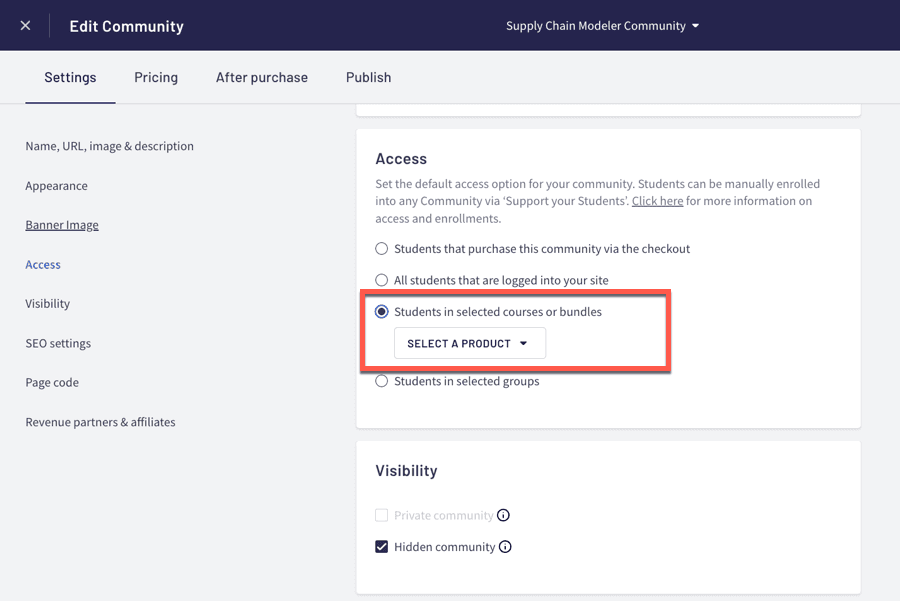
Subsequently, you’ll encounter configuration options for customizing community access privileges, including the ability to make it available to:
For membership community purposes, however, you should specifically select the **third option** from this list.
At this stage, you have the opportunity to configure additional preferences.
For instance, you can enhance the visual aspects of your community by selecting your preferred primary color and typography. Additionally, you have the option to upload a distinctive banner image for your community homepage.

Following the completion of your initial community configuration, you can examine your finished product and implement further modifications.
To preview your community environment, select the *Go To Community* button positioned in the upper right corner of your screen.
The community features a streamlined layout with member contributions and conversations displayed on the right side and navigational elements situated on the left.
Thinkific provides functionality to **create spaces** for maintaining an organized community structure. By default, your community comes equipped with four distinct spaces:
You maintain complete flexibility to add, remove, or modify these spaces according to your preferences.
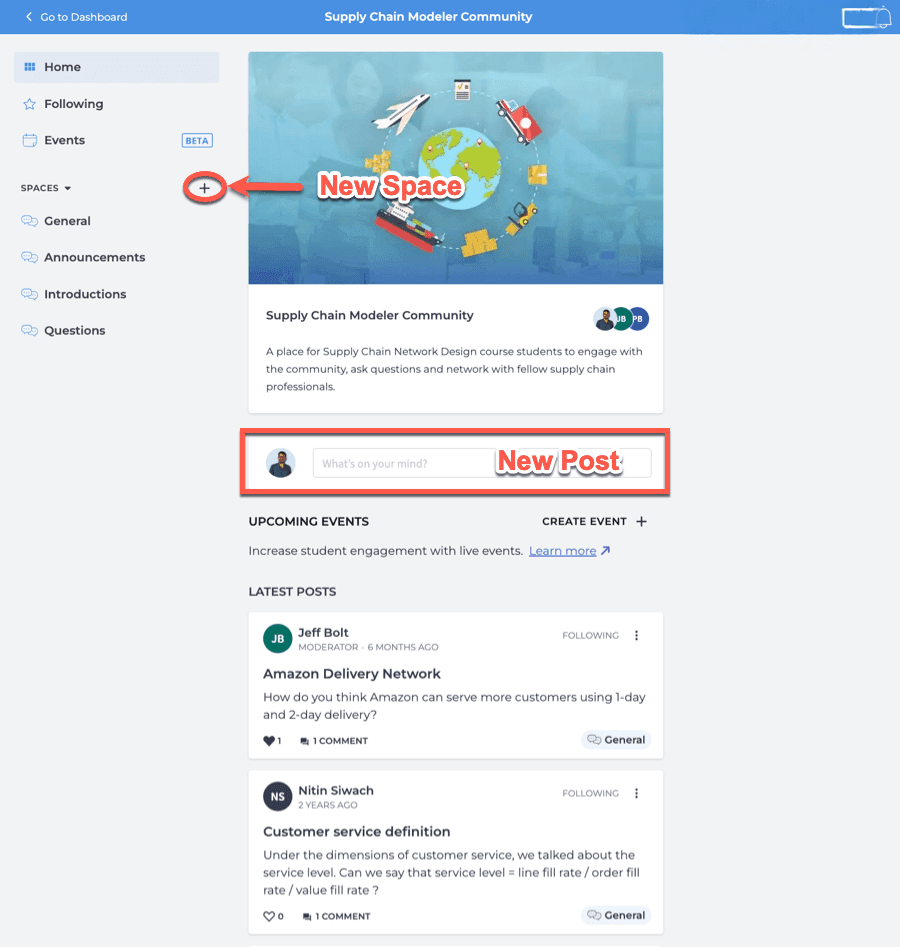
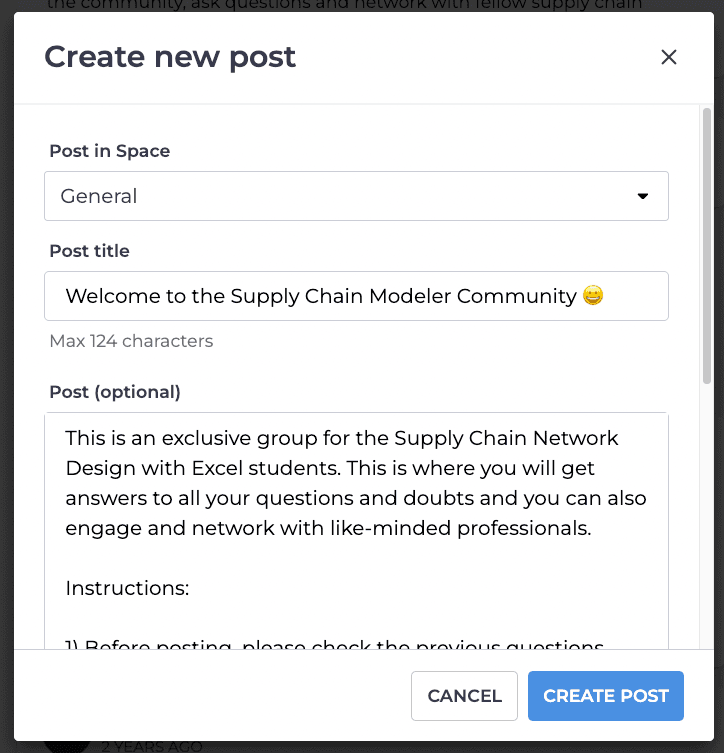
To initiate a new discussion, click on the *What’s On Your Mind* field. This action allows you to designate an appropriate space, provide a descriptive title, and compose your message content. Your contributions can be enhanced with visual elements such as images, video content, or supplementary file attachments.
Following the development of your core product and community features, it’s appropriate to establish your membership tiers.
Thinkific provides numerous options for structuring the pricing of your membership offering, though our primary focus will be on recurring subscription models.
To generate a pricing structure, navigate to the *Memberships* section and select the product you previously established.
Next, choose the *Subscription/Membership* option within the Pricing menu and specify your desired rate.
**The Thinkific platform enables you to implement monthly, quarterly, or annual subscription periods. You have the flexibility to incorporate a complimentary trial period and also assess a customized initial payment.**

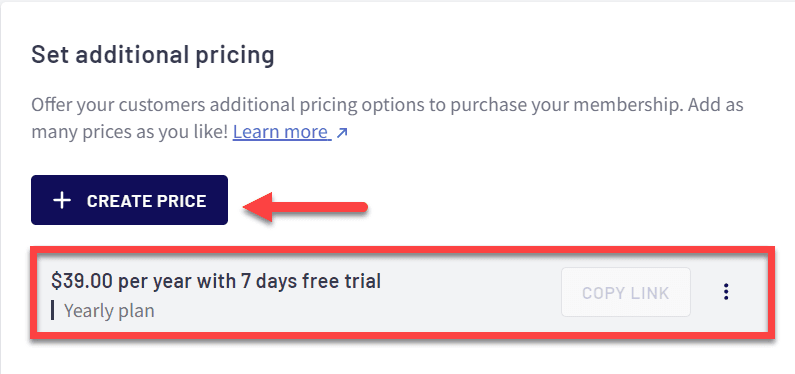
You have the flexibility to establish multiple pricing tiers for your membership program. As you navigate down this page, you’ll discover the feature for configuring Additional Pricing for your membership offering.
Once again, choose Subscription/Membership and input your desired pricing structure.
The Additional Pricing feature proves valuable when you wish to provide subscriptions with varying durations. For instance, you can create both monthly and annual subscription options for the identical membership product.
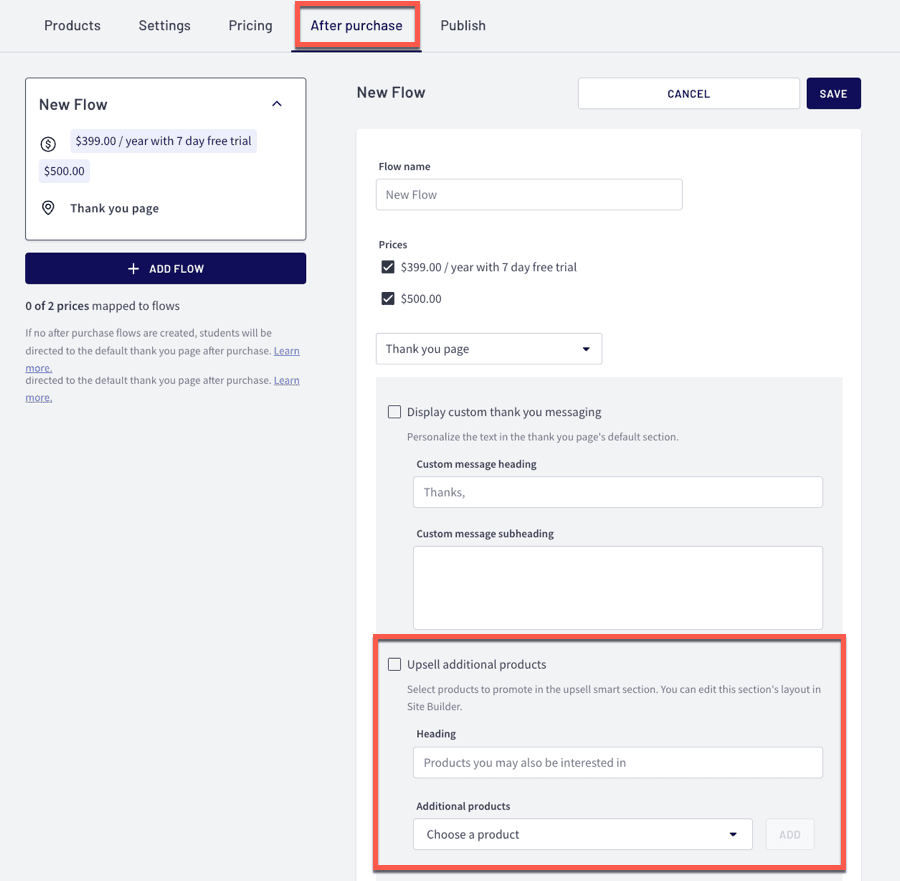
Thinkific provides an additional valuable pricing capability where you can implement 1-click upsells on confirmation pages.
To establish an upsell opportunity, navigate to the After Purchase section and select Add Flow. From there, you can identify the specific product you wish to promote to your members following their initial purchase.
Be aware that establishing multiple membership levels with distinct benefits in Thinkific requires additional effort.
For each membership tier, you’ll need to generate a new membership offering, determine which products to incorporate, and configure the appropriate pricing structure.
Once you’ve established your pricing structure, it’s time to develop your membership conversion page.
By default, Thinkific automatically generates a landing page for each product. You can then utilize Thinkific’s intuitive page builder to customize the appearance of your sales page to match your vision.
To begin customizing, simply click on Build Landing Page from within your membership dashboard.

Within the page builder environment, you’ll notice the editing options displayed on the left portion of your screen, while a dynamic preview of your page appears on the right side.
The standard membership page template includes two primary components: Banner and Bundles. You have complete freedom to modify these elements according to your preferences.
In the Banner component, you can personalize the headline and background elements, incorporate an image or video presentation, and fine-tune the overall page alignment.
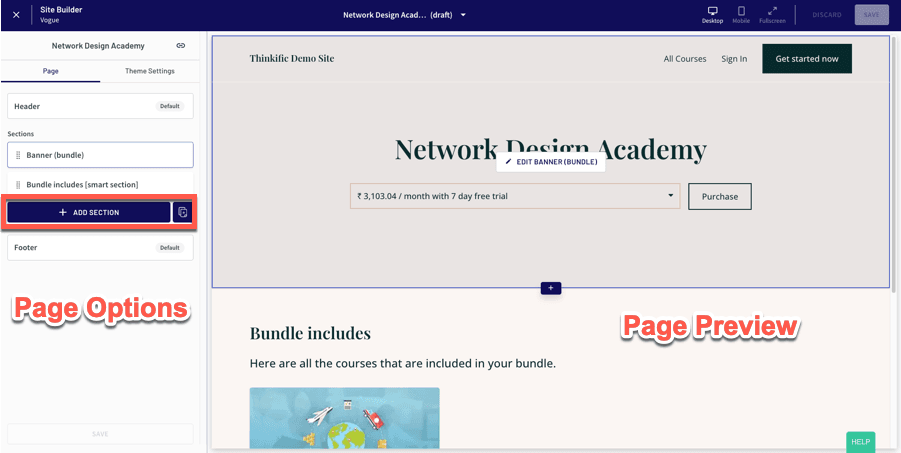
To incorporate additional content sections, select the Add Section button. Thinkific provides more than 20 distinct section templates for your selection.
You can leverage these templates to showcase membership advantages, present client reviews and testimonials, exhibit pricing structures, address common questions, display a countdown element, and much more.
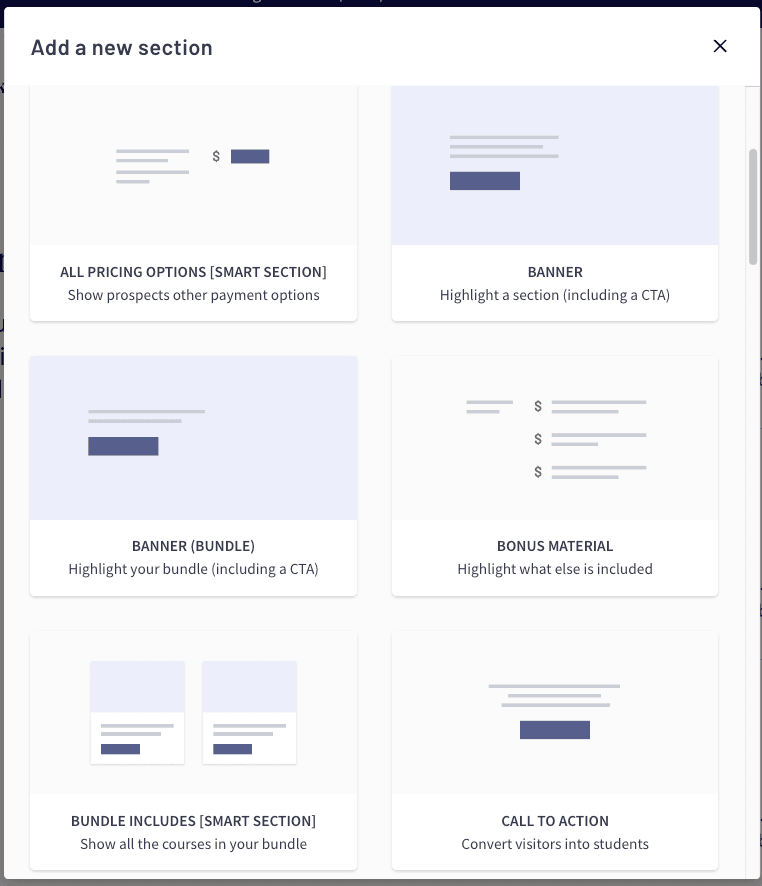
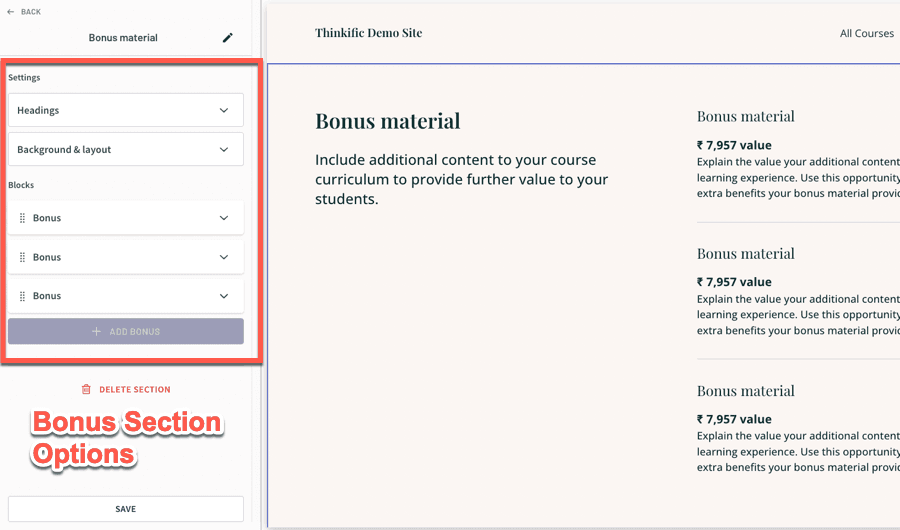
Choose the section style you wish to integrate into your page, and it will be automatically inserted. You can then customize the section by selecting it within the left navigation panel.
This action will reveal various customization possibilities specific to that particular section type.
Once you’ve completed your desired modifications, click the Save button located in the upper right corner of your screen, and your membership page will be finalized.
With your membership site now fully developed, you’re ready to begin promoting it to your audience.
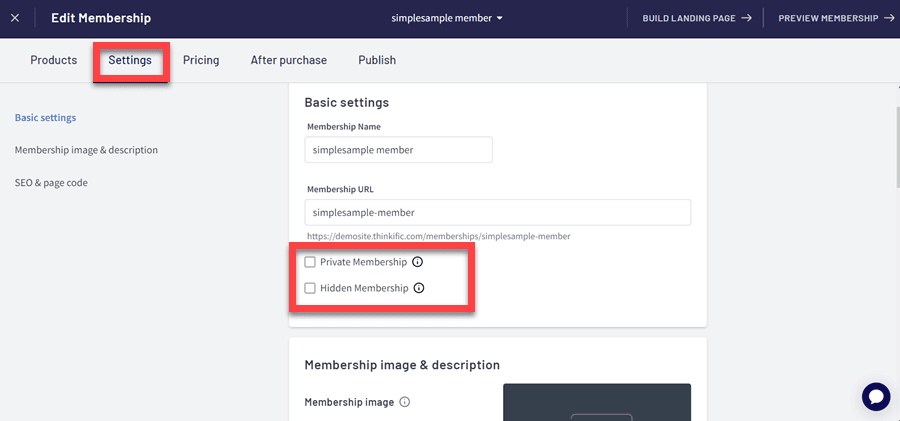
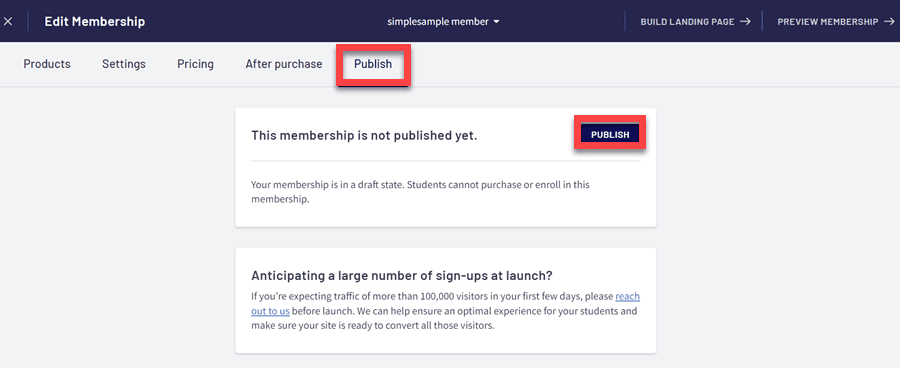
However, before launching, you need to configure several final settings and officially publish your membership offering.
To accomplish this, navigate to your membership dashboard and select Settings. Verify that your membership URL is properly configured, and you also have the option to designate your bundle as either Private or Hidden:
Following your membership publication, it’s essential to thoroughly evaluate the entire user journey to guarantee that your audience will enjoy a seamless experience when registering.
You can effectively simulate the customer experience by generating a 100% discount coupon for yourself and then acquiring the membership using an alternative email address in an incognito browser window.
This approach allows you to verify that your conversion page, payment process, and membership content library are functioning properly and fully prepared for your customers.
Thinkific stands as an exceptional solution for establishing a membership portal. The platform enables you to deliver courses and foster community engagement as components of your membership while providing effective marketing tools.
Throughout this comprehensive guide, we’ve explored all critical elements of constructing a Thinkific membership site, from initializing your membership product to configuring pricing strategies and designing an effective conversion page.
We trust this resource has empowered you with the knowledge necessary to successfully launch your membership through Thinkific.
If you haven’t yet adopted the platform, register for a complimentary trial to begin your journey today.

Daniel NicFounder, SellingOnliceCoursesGuide.comis an entrepreneur and digital education specialist who founded sellingonlinecoursesguide.com, a platform dedicated to helping creators and educators successfully navigate the online course marketplace. Through his website, he shares insights and strategies for developing, marketing, and monetizing online educational content. His work focuses on empowering course creators to build sustainable online businesses while effectively sharing their knowledge with students worldwide.
Daniel Nic is an entrepreneur and digital education specialist who founded sellingonlinecoursesguide.com, a platform dedicated to helping creators and educators successfully navigate the online course marketplace. Through his website, he shares insights and strategies for developing, marketing, and monetizing online educational content. His work focuses on empowering course creators to build sustainable online businesses while effectively sharing their knowledge with students worldwide.

We respect your privacy and will never spam you.


